Docs
Subjects
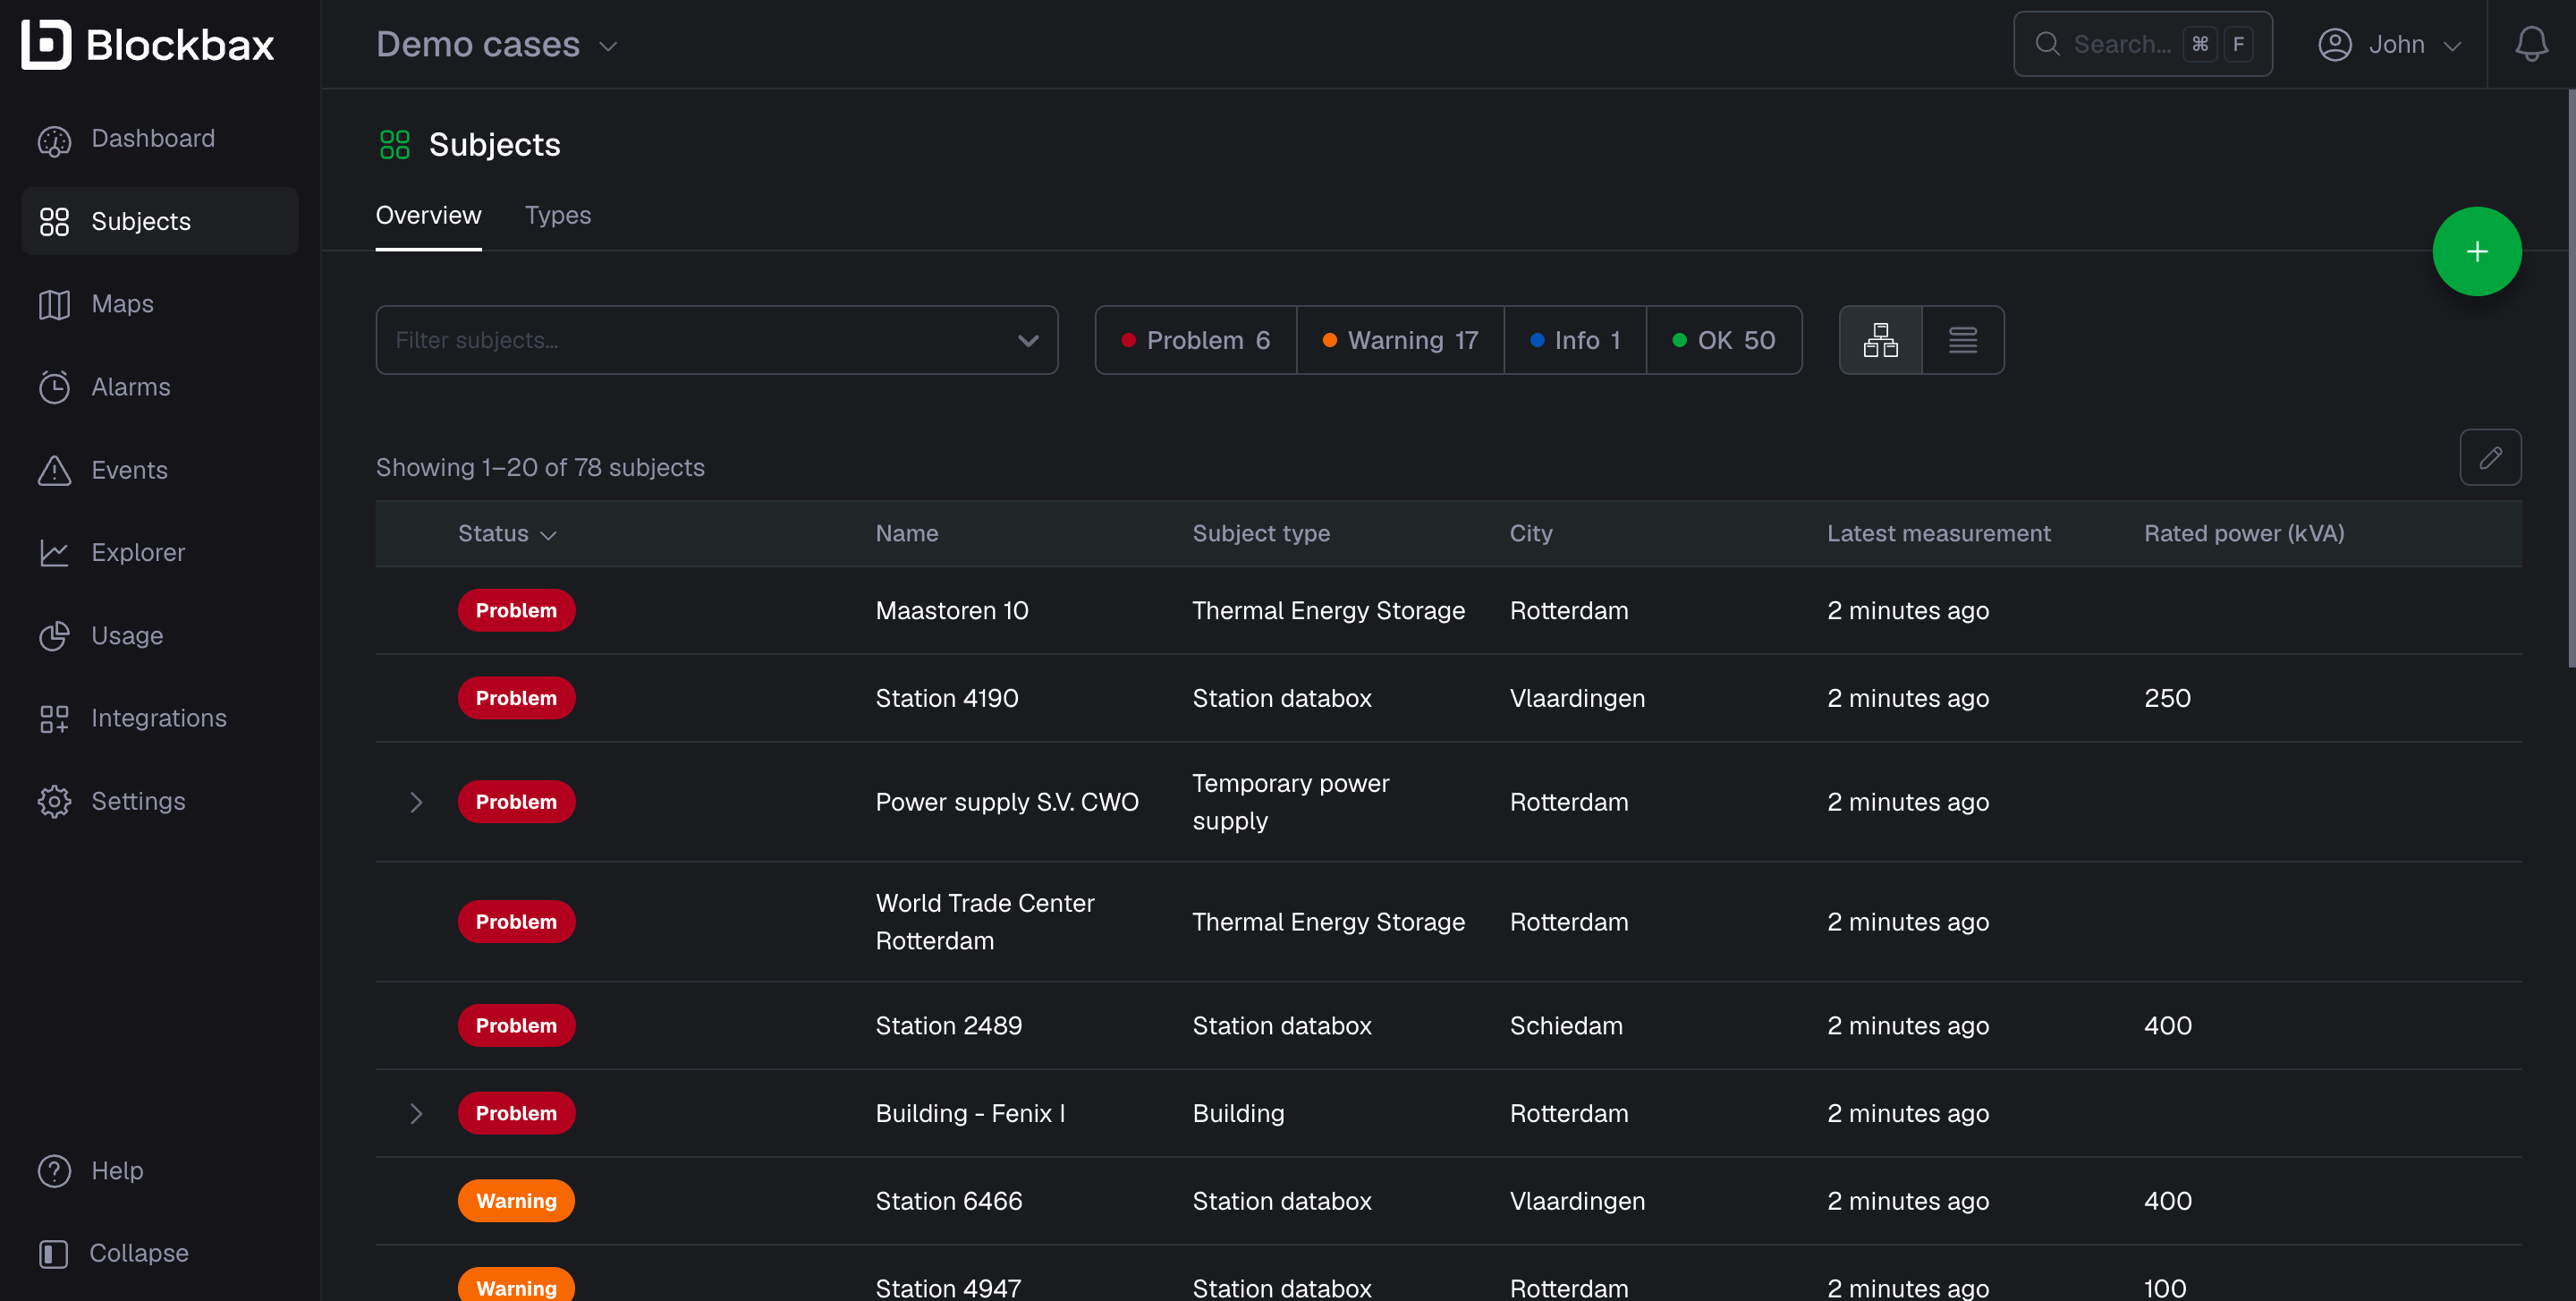
Subjects are the main assets you want to monitor. This can be a machine, office or production line. For example, a room in a building, construction site or electrical substation. Subjects can either be shown in a list or on a map. You can filter on subject, properties and status to create any cross-section of subjects you would like to see. For example, you want to see machines of a certain type within a specific region in problem status. The color of the map marker indicates the status of the subject to give you an instant view on the health of the subjects.
Using subjects
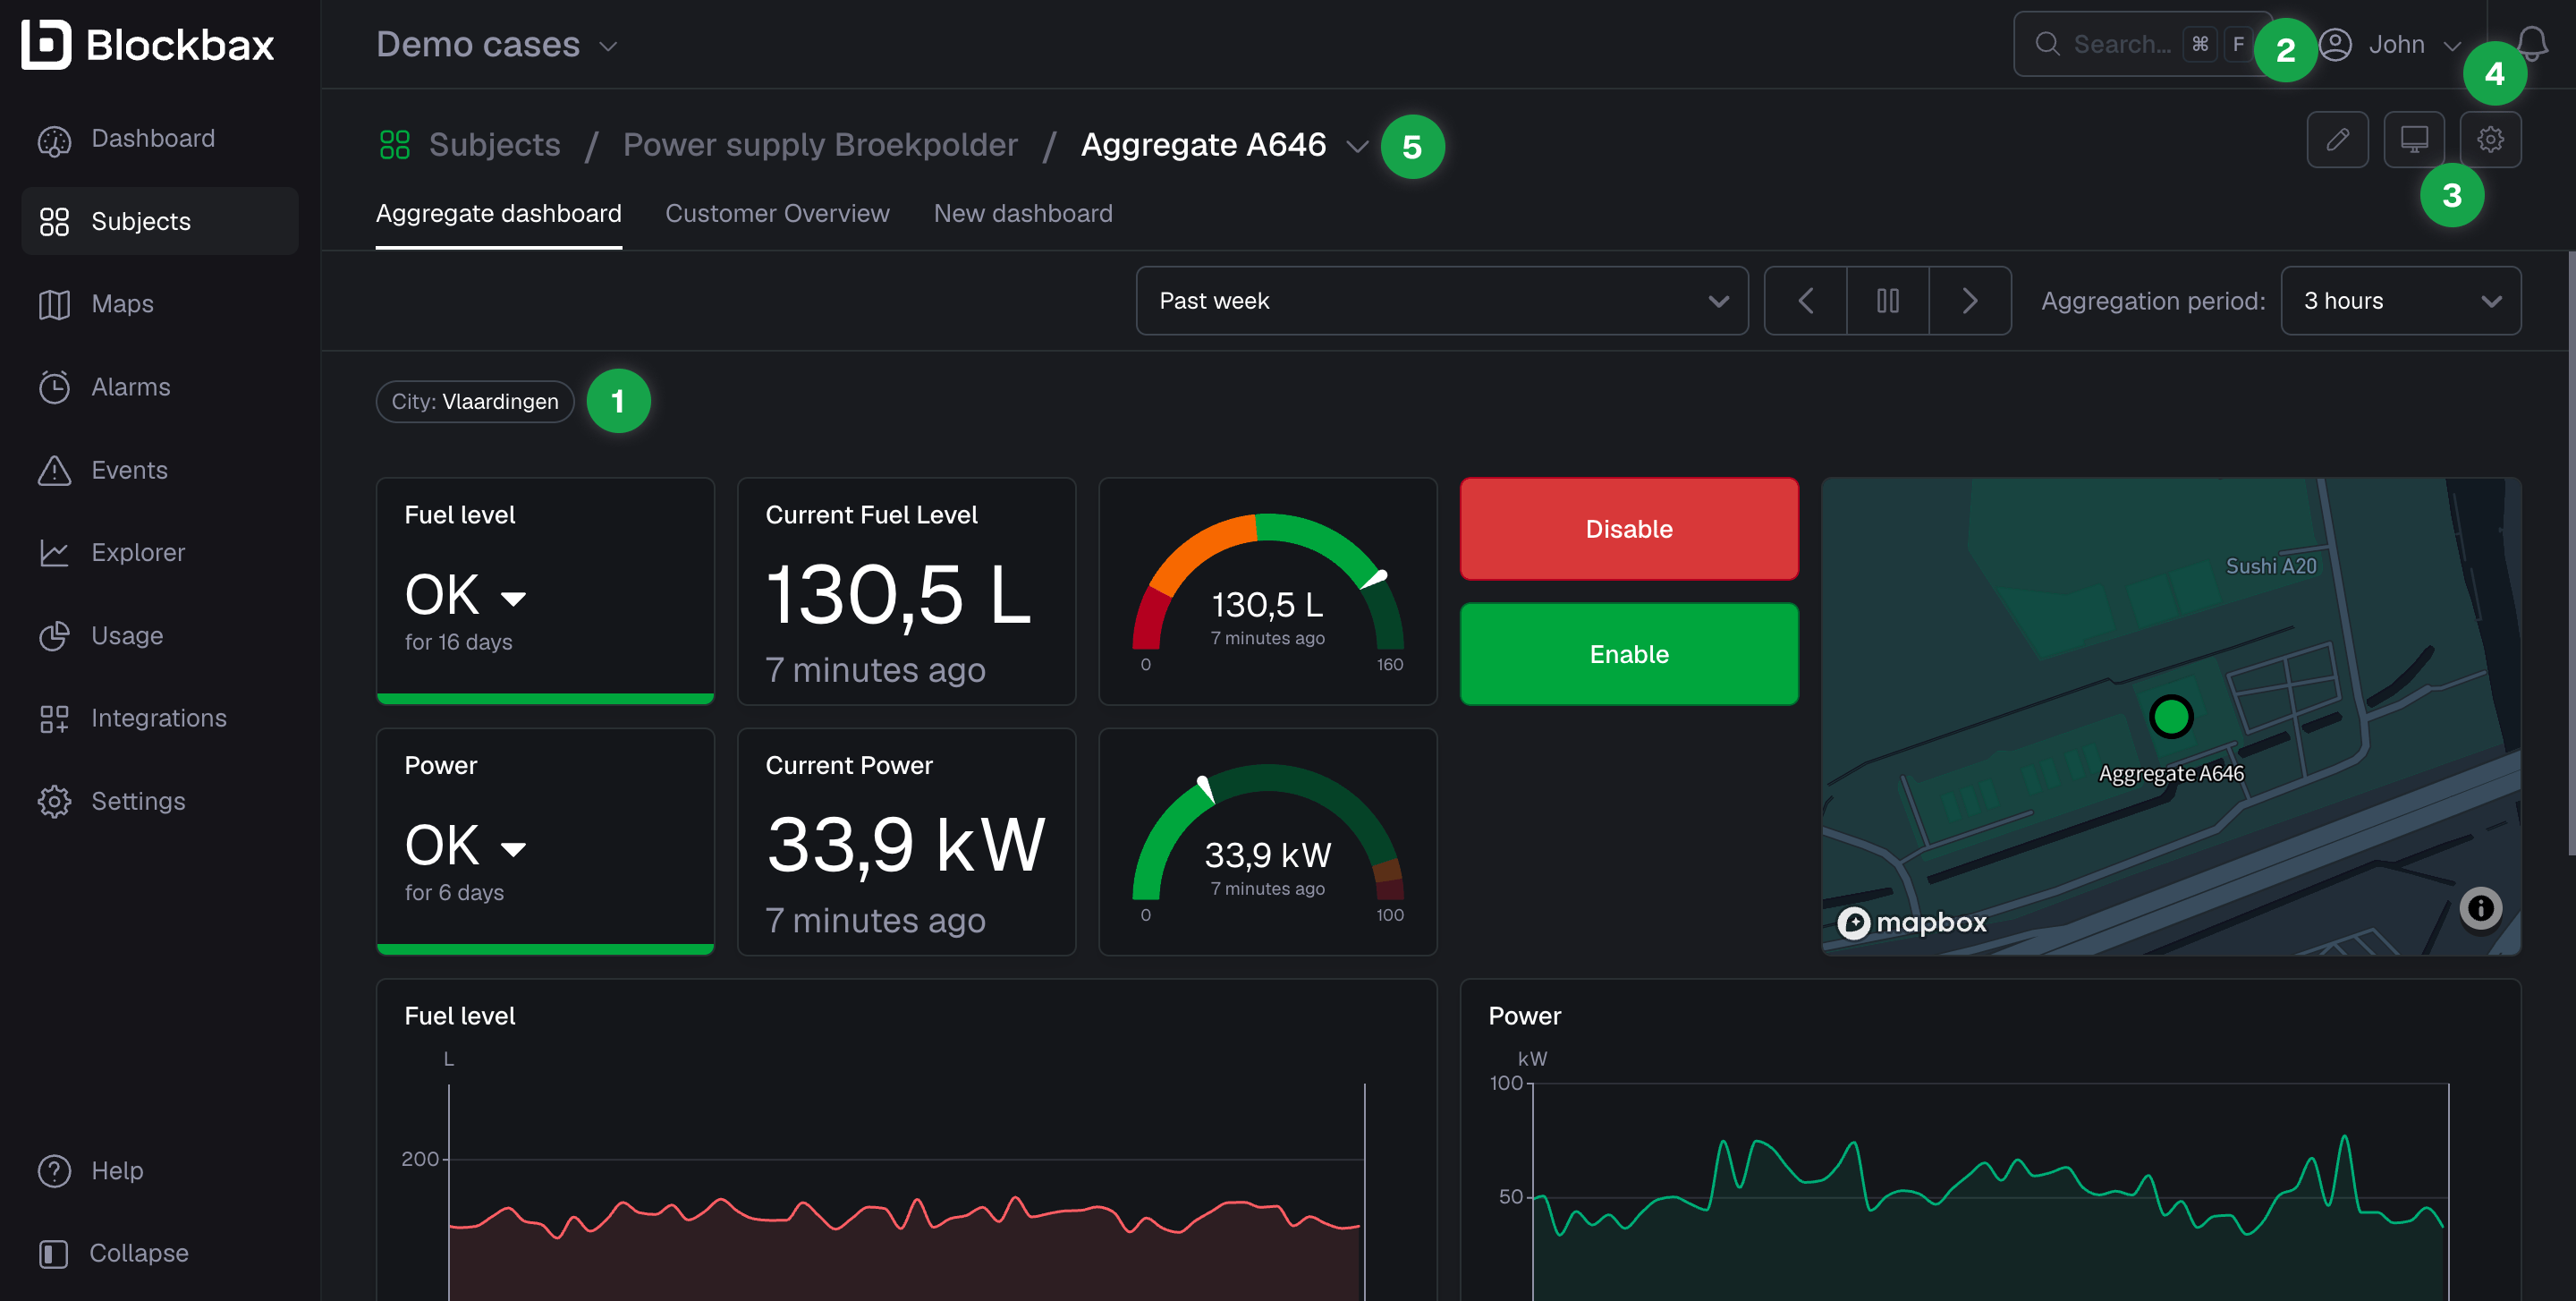
The status of your subject is of great importance to know if you should take action. The subject dashboard gives you all the ins and outs at a glance. The properties (1) show the details of the subject. The subject dashboard layout is configurable, and it works the same as your general dashboard. Click the pencil (2) to start editing your dashboard, and you are able to:
- Resize and order panels to adjust the panel sizes and drag them where you want.
- Layout configuration per screen size to keep your dashboard to the point no matter the screen size.
- Adding panels to divide your dashboard into more manageable chunks of visual information.
- Widgets to display different types of data. All widgets automatically use the context of the subject you are looking at.
- Using multiple dashboards allows you to provide users with different dashboards of the same subject. Simply enter edit mode, and add a new dashboard similarly to default dashboards
Adjusting the subject settings can easily be done via the settings (3) in the top-right corner of the page.
If desired, you can enter Kiosk mode (4) to remove any distractions and enter a full screen mode.
If your subject has a parent and/or children based on its subject composition, you can use the breadcrumb (5) to navigate up towards its parent, or down towards its children. When clicking on the arrow, you will see a list of all the children of this specific subject.
Managing subject types
Subject types can be seen as a template or blueprint for a subject. This makes it easy to add and adjust subjects of the same type.
Creating subject types
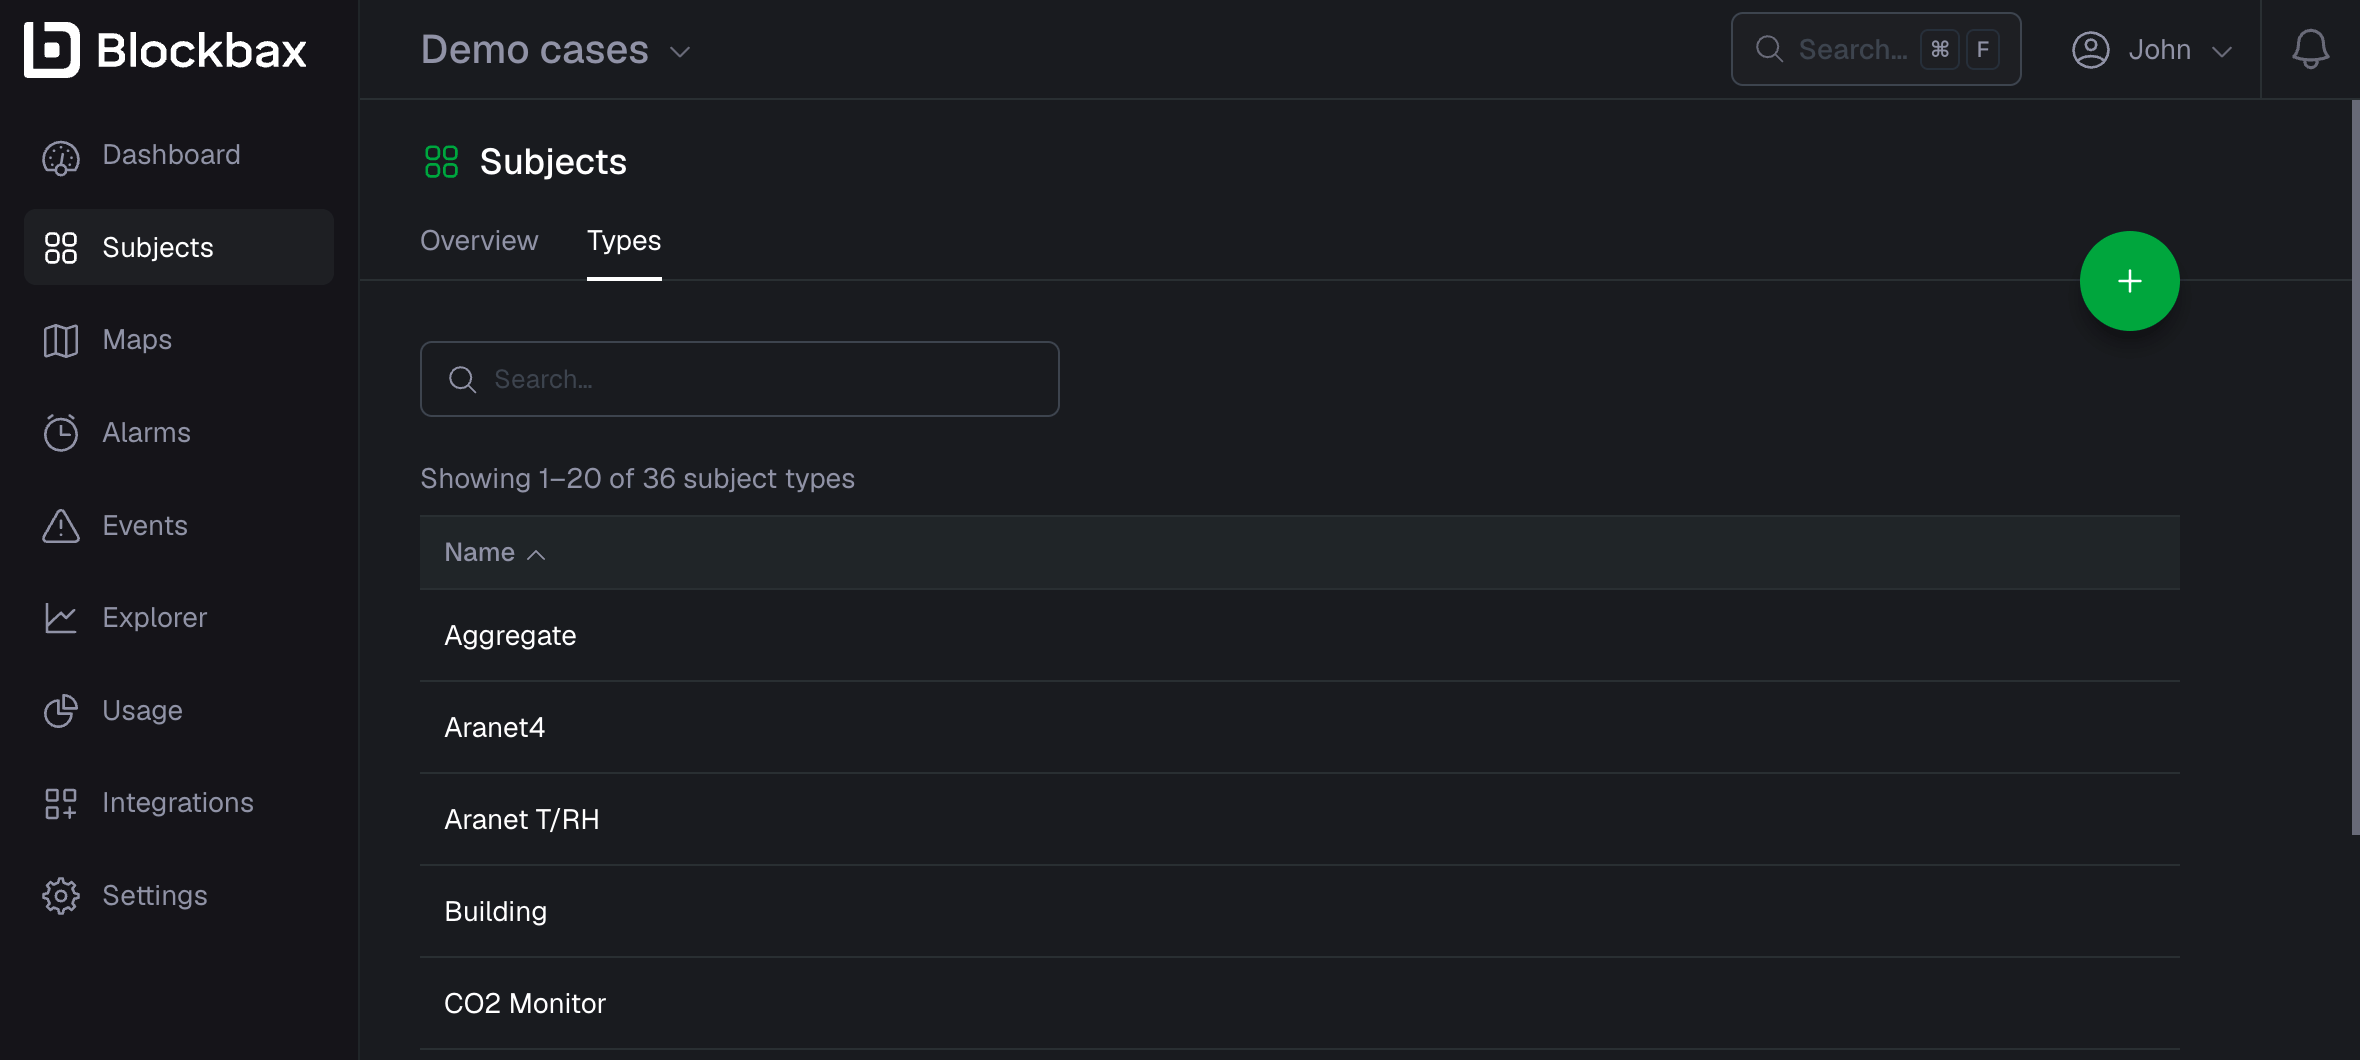
Creating a subject type is done by providing a name for the type and adding a default set of properties and metrics. Go to the subject type overview page when you want to add a new type:
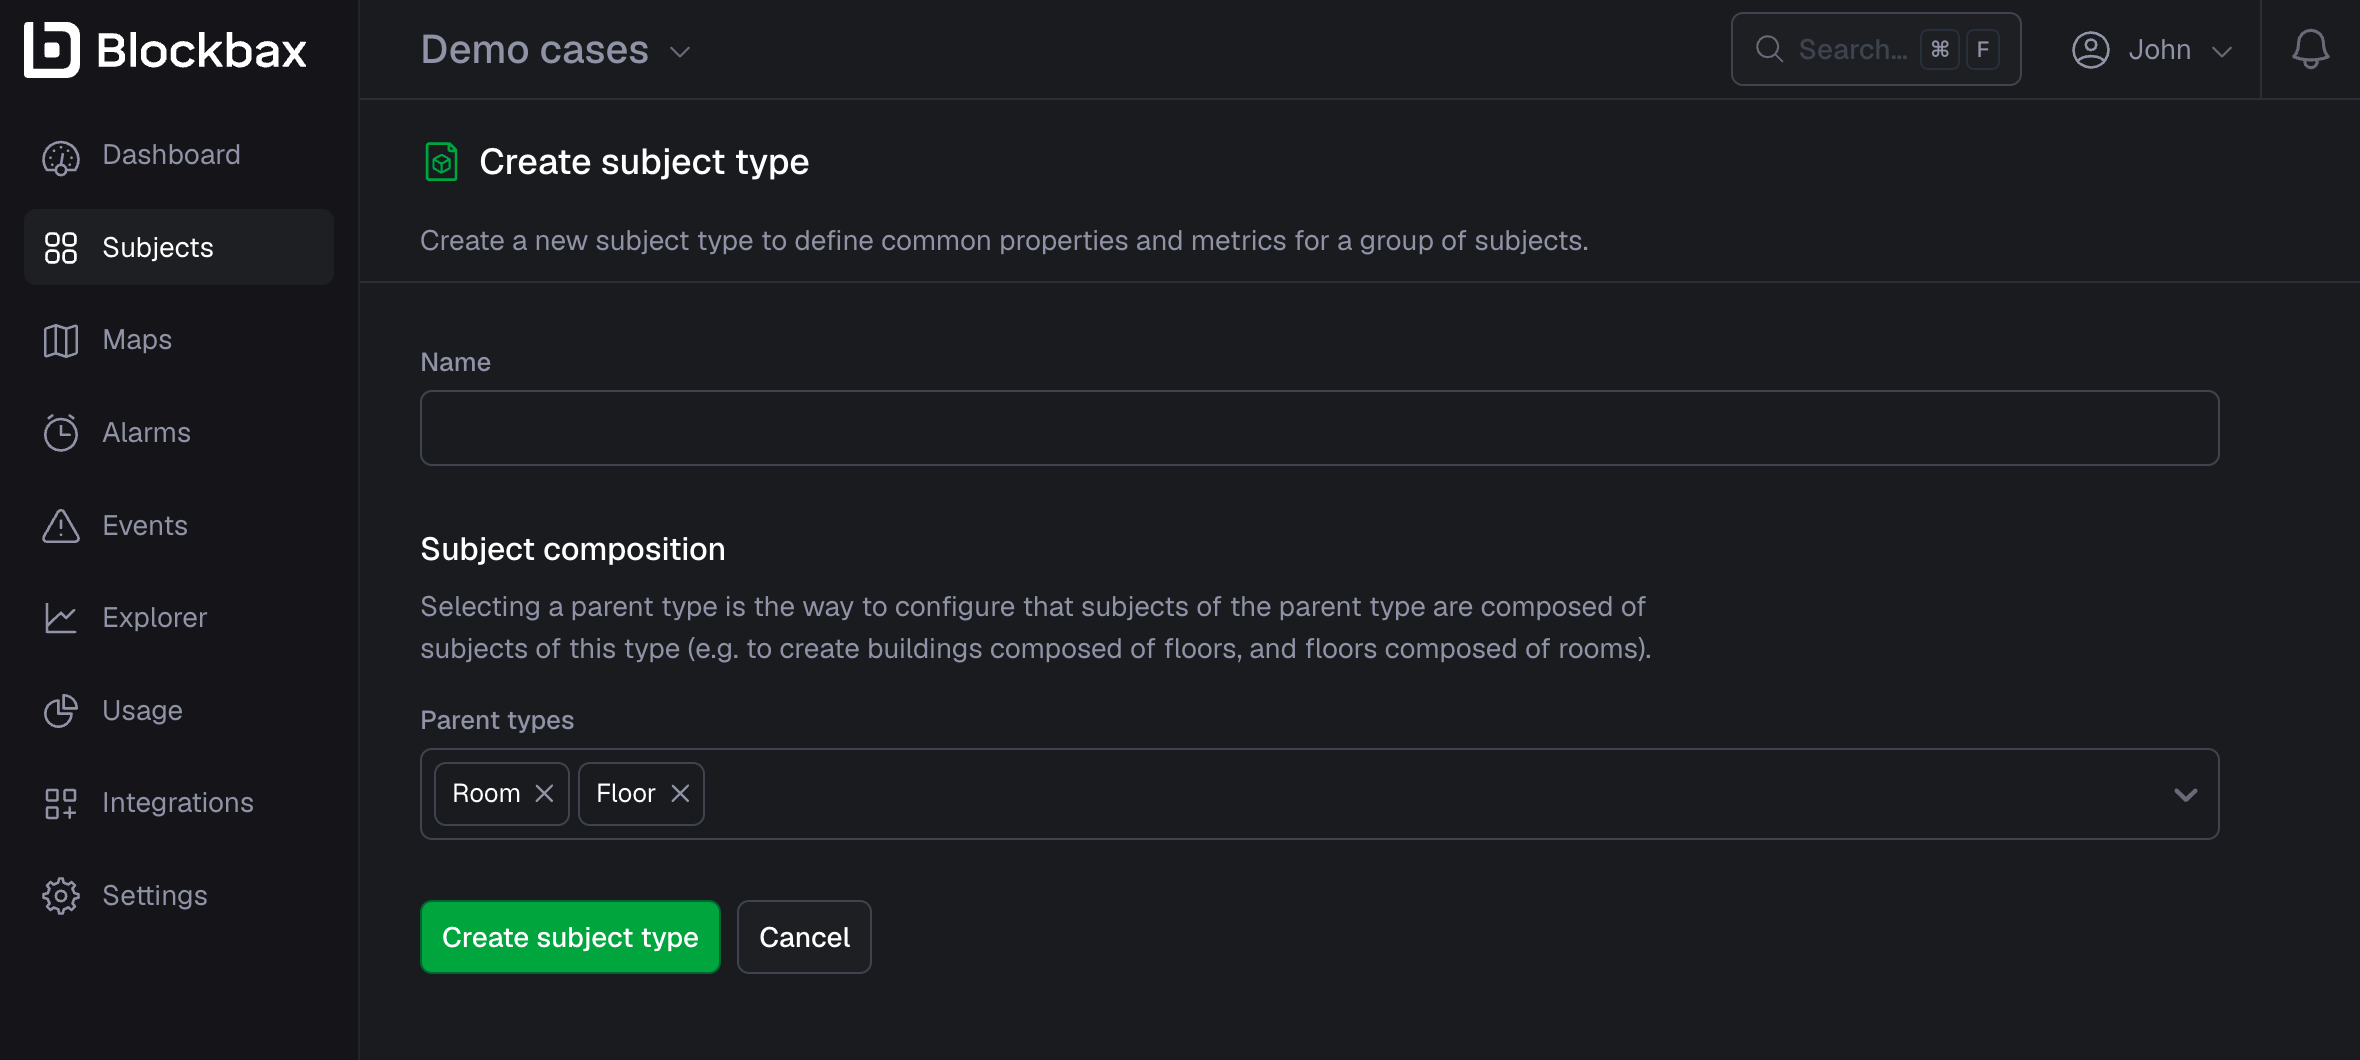
After clicking on the green plus button to create a new subject type, you can provide a name for the subject type, as well as identify one or more parent types based on existing subject types. Simply start typing in the parent type field, and select or hit enter to configure one or multiple subject types as parent types. Defining a parent type is optional, thus you can also leave this field empty.
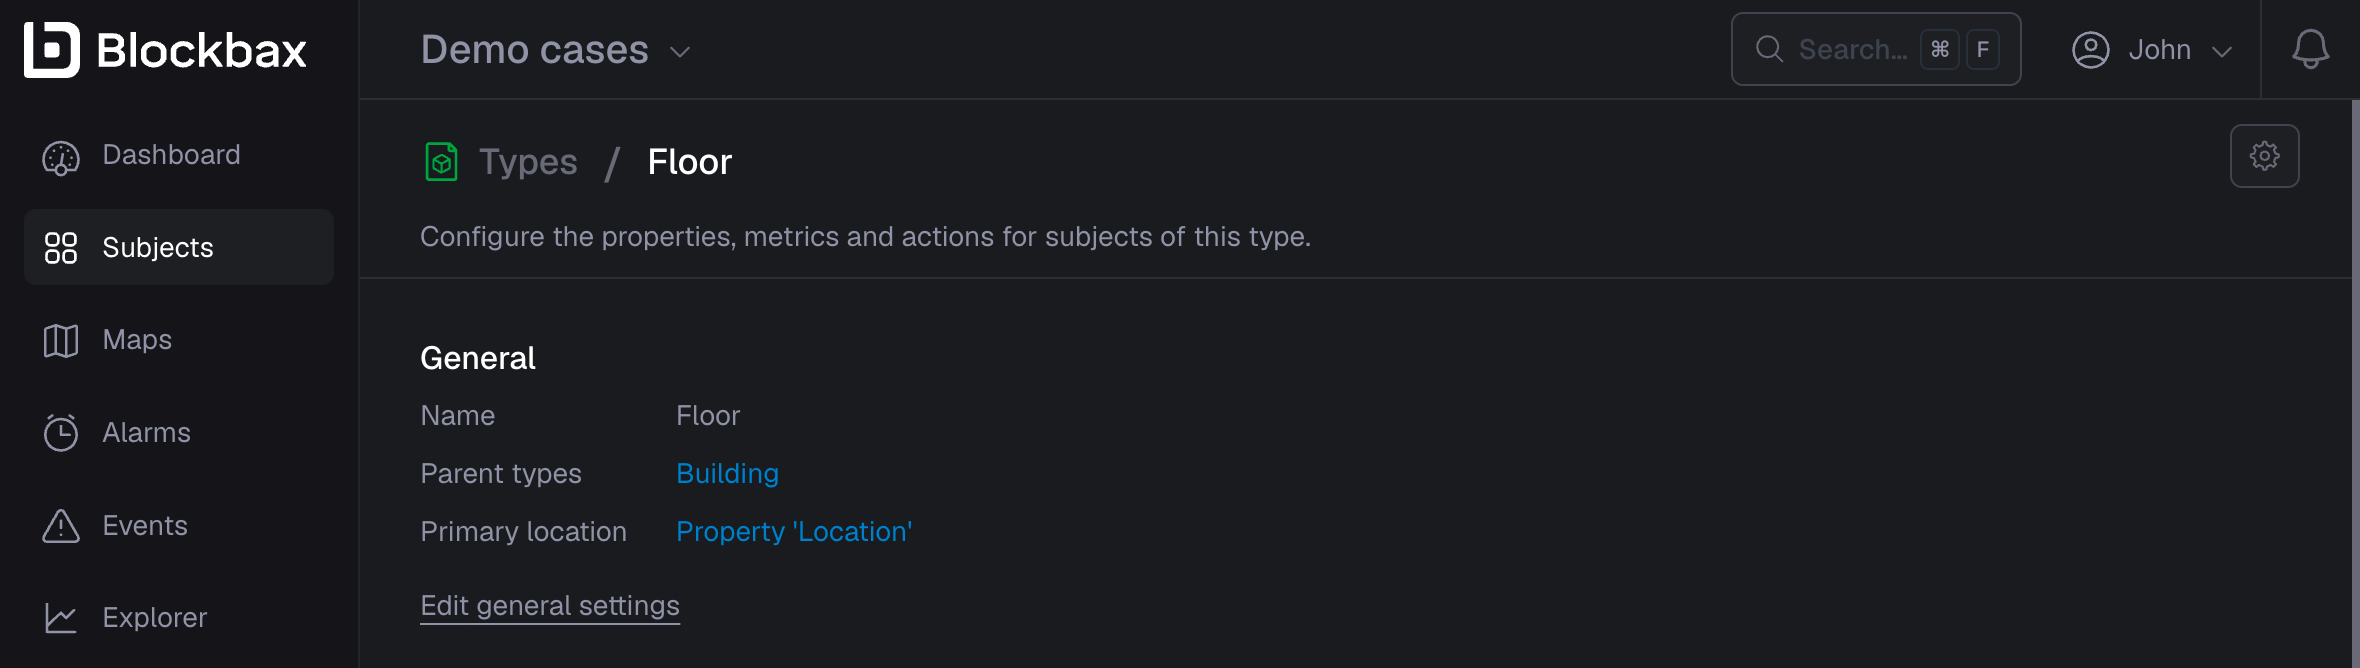
General settings
The general settings of a subject type consists of the name, parent type(s), primary location and is the place to remove the subject type.
Parent types
Selecting one or multiple parent types is the way to configure your subject composition (entity model). Defining parent types determines what possible parent subject can be selected when creating or editing subjects. This then has the following effects throughout the platform:
- On the subject overview, the tree view can be used to expand and collapse parents, and the list view will display all subjects along with additional information about its subject composition.
- Maps will only show the top-level subjects. You need to explicitly filter on other subject types to see specific children on the map.
- On the main dashboards and Explorer you are able to constrain your subjects, events and measurements on ancestor subjects.
- On the event overview you will see all events. You can filter on subject type or subject to see specific events.
- On the subject dashboards, it is possible to show descendant subjects in the widgets.
- On the subject dashboards you can use a breadcrumb to navigate down to children, and up to a subject’s parent.
Subject composition allows you to add additional context to your subjects. This is done by defining your parent types and thus creating a composition.
Below you will find an example of a building on the right side, and on the left side how you would define your subject types in Blockbax.
Building
] --> B[Floor
Parent type: Building] --> D[Room
Parent type: Floor] --> F[CO2 Sensor
Parent type: Room]Primary location
The primary location determines the location that is used to display a subject on the map. To be able to set a primary location, you first need to add a location property or an ingested location metric to the subject type.
| Option | Description |
|---|---|
| No primary location | Subjects of this type are not shown on the map |
| Use location property | The subject location on the map is fixed based on the selected location property |
| Use location metric | The subject location on the map is based on the latest received location measurement of the selected metric |
Below you see a subject type which has a property and a metric of data type location. The property is chosen as the primary location.
Configure properties
The next task is to decide whether you want to assign properties to the subject type. Properties are optional and meant to provide extra information (metadata) about the subject, and they can also be used as filters. For example, when you want to compare certain series with a specific property.
| Attribute | Description |
|---|---|
| Name | Open the dropdown and select the property you want assign. Nothing to choose from? You have to create properties in the project settings. |
| Subject must define a value | Check the checkbox when a value for this property is required for every subject you add. |
| Hide from subject dashboard | Check the checkbox the property should not be shown in the subject dashboard. |
Configure metrics
Now it’s time to determine which metrics you want to add to the subject type. We created the metrics documentation to explain the three different types and their capabilities.
Configure actions
Last but not least, a subject type can have actions. They allow you to interact with devices directly. See below for more information.
Managing subjects
The platform provides several actions on subjects. Down here you can find the most common actions explained.
Subject overview
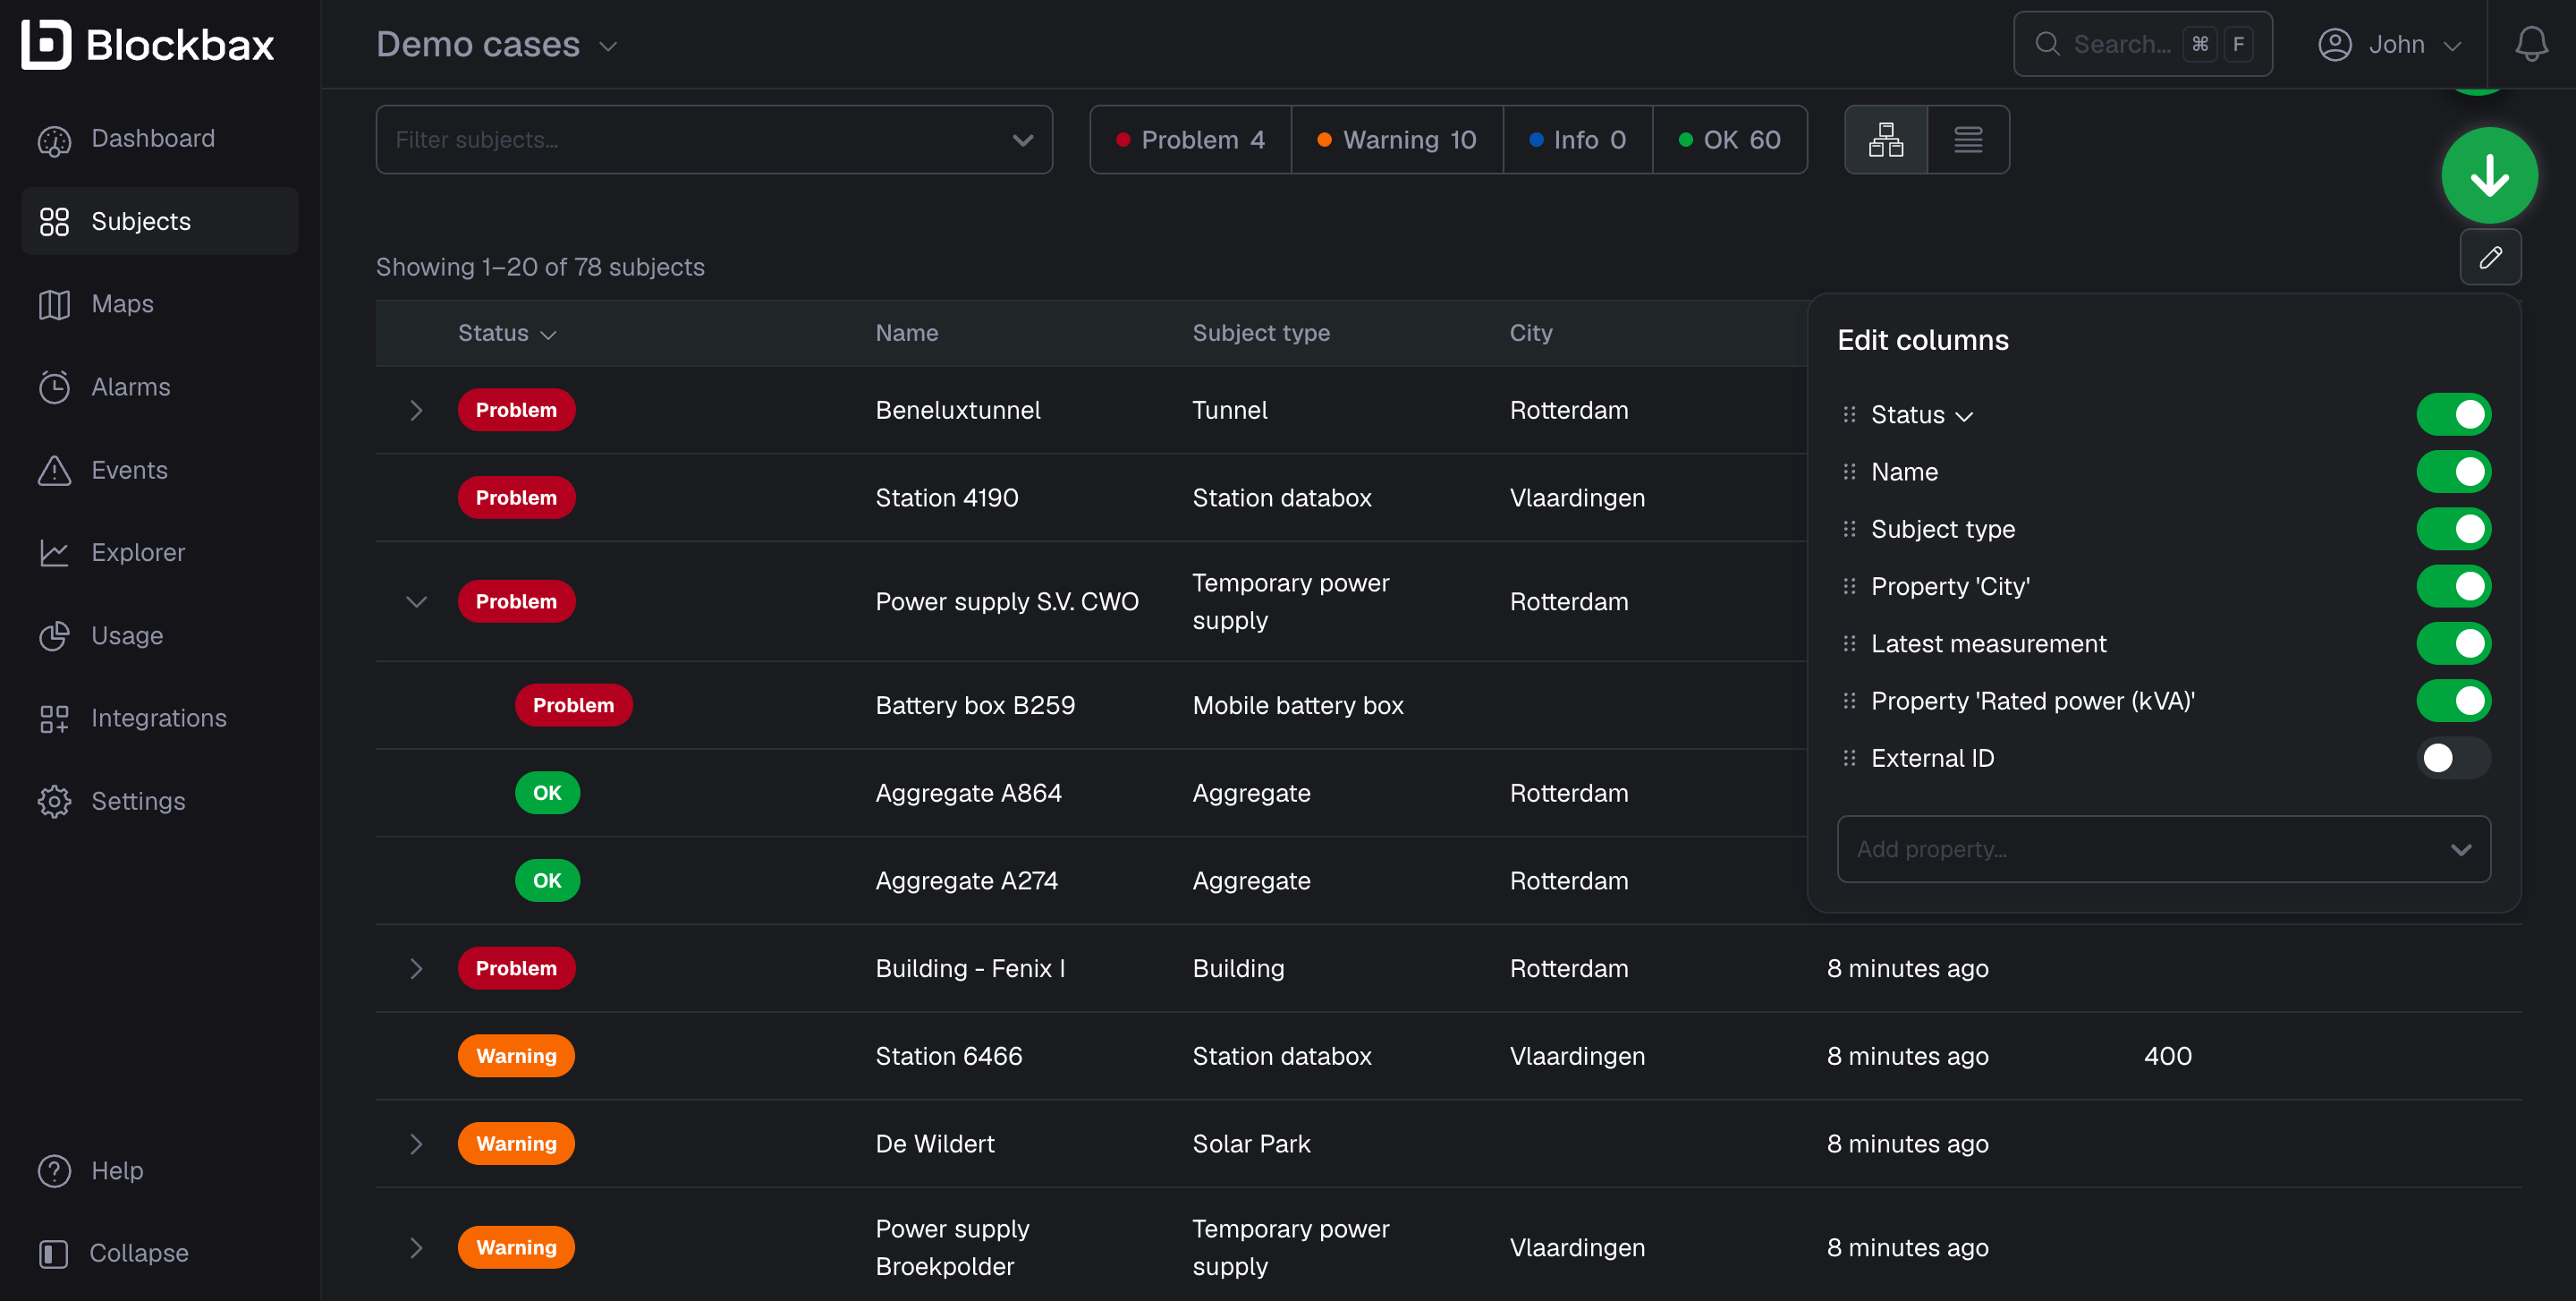
The subject overview displays all subjects in the project, accompanied by some key statistics. You can configure what information is shown by customizing the columns. By default, it will show you a subject’s name, status, latest event and latest measurement date. In addition to the default columns, you can add columns for properties to show the values that are assigned to subjects.
Columns can be enabled or disabled by using the toggle switch, and re-ordered by using the drag handle in front of it. The column that comes first determines the default sort order of the grid.
There are two views that you can use on the subject overview, a tree view and a list view.
Tree view
The tree view allows you to expand and collapse subjects that have any children defined on the basis of subject composition.
List view
The list view displays all subjects, with additional information based on subject composition in the name column. Underneath the name of your subject, you will also see information regarding its composition.
Creating, editing, and deleting subjects
From the subject overview you can add new subjects, edit existing ones, or delete them. Creating and editing both use the same set of attributes, described below.
| Attribute | Description |
|---|---|
| Type | The subject type you want to create a subject for. Nothing to choose from? See how to create a subject type first. |
| Name | Give your subject a descriptive name so you can easily recognize and find it. |
| External ID | Provide the ID the subject has in your own systems. In this way you can easily map subjects to the entities they relate to in your own systems. This external ID is also used to construct the default ingestion IDs you have to provide when sending measurements for ingested metrics. |
| Parent subject | Based on parent type(s) defined in the subject type, you are able to select a parent for the given subject. Selecting a parent is optional. |
| Properties | Define values for the properties that are assigned to this subject’s type. See the properties docs for how to add properties to subject types. |
| Metrics | Use the default ingestion IDs or provide your custom one for your ingested metrics. By default ingestion IDs are derived from the subjects’ external IDs and metrics’ external IDs (e.g. subjectExternalId$metricExternalId). You can also override these with custom ones. You have to provide an ingestion ID when sending measurements via the API. |
Creating a subject:
Deleting a subject: be careful here. Deleting a subject also removes its associated metrics, along with their measurements and events, so a single action can wipe out a substantial amount of data.
Actions
Actions allow you to set properties, control devices and more. An action definition consists of several parts:
- Parameters
- References
- Script
We will take a look at each of these now.
Parameters
Parameters allow you to pass information into the action. For example, when you create an action to update the temperature of a thermostat, the temperature can be passed in as a parameter so that it can be influenced from the outside. When triggering an action from a dashboard, you will be asked what values you want to use as parameters.
Parameters have a type (number or text) and an alias, which is a simple name by which you can refer to the parameter within the script.
References
To refer to elements in the Blockbax model in the script, you can add a reference to the action. Currently, this can be used to refer to property types and subject types. You select a property type or subject type and give it an alias that can then be used in the script. Thanks to this way of referencing, even when the property type or subject type is renamed, the script will keep working.
Script
The script describes what needs to happen in the JavaScript language. Initially, the script is filled with some example code:
| |
The run function has three parameters:
- In
paramsyou can find the values of the parameters by their alias, e.g.params.desiredTemperature. - In
refsyou can find the references of the action by their alias, e.g.refs.temperatureProperty. - The
contextobject contains the list of subjects the action is called for and offers a number of functions to call.
During the execution of the script, the timezone is in UTC, this means that you have to convert it to your local timezone yourself.
Context
The context parameter of an action contains a list of subjects and some functions that you can call. The reason
that it is a list of subjects is because an action can be triggered from a higher level in the composition.
For example, if you have a building subject that has four children of type room, you can place an action button on
the dashboard of building. If you then trigger the action, the list context.subjects will contain all the children of
type room, allowing you to set multiple thermostats in one go. Even if you place the action button on a room dashboard,
it will still be a list, but then with only one element.
Each subject in the list has the following information available:
id: the unique identifier (UUID) of the subjectname: the name of the subjectexternalId: the external identifier of the subjecttypeId: the unique identifier (UUID) of the subject type of the subject- If you want to compare to an actual subject type, you can add a reference to a subject type in the action definition and use the alias.
properties: a map from property type to either a string or a number- You can also add references to property types and use them through an alias, e.g.
subject.properties[refs.temperature]
- You can also add references to property types and use them through an alias, e.g.
parent: if there is no parent, this field isnull. Otherwise, it contains the following information about the parent:id: the unique identifier of the parenttypeId: the unique identifier of the subject type of the parent
Note that this is all static information that does not change during the execution of the script. So, after calling setProperties, the properties map will still contain the old values of the properties.
Apart from the subjects, the context parameter can be used to call the following functions:
logInfologWarnlogErrorsetProperties, see Setting propertieshttpGet,httpPost,httpPutandhttpPatch, see HTTP requestslwm2mRead,lwm2mWriteandlwm2mExecute, see LwM2M
User feedback
You can implement a validation error to give the user feedback on the values that are used in the action, like the screenshot below where the value needs to be between 15 and 25.
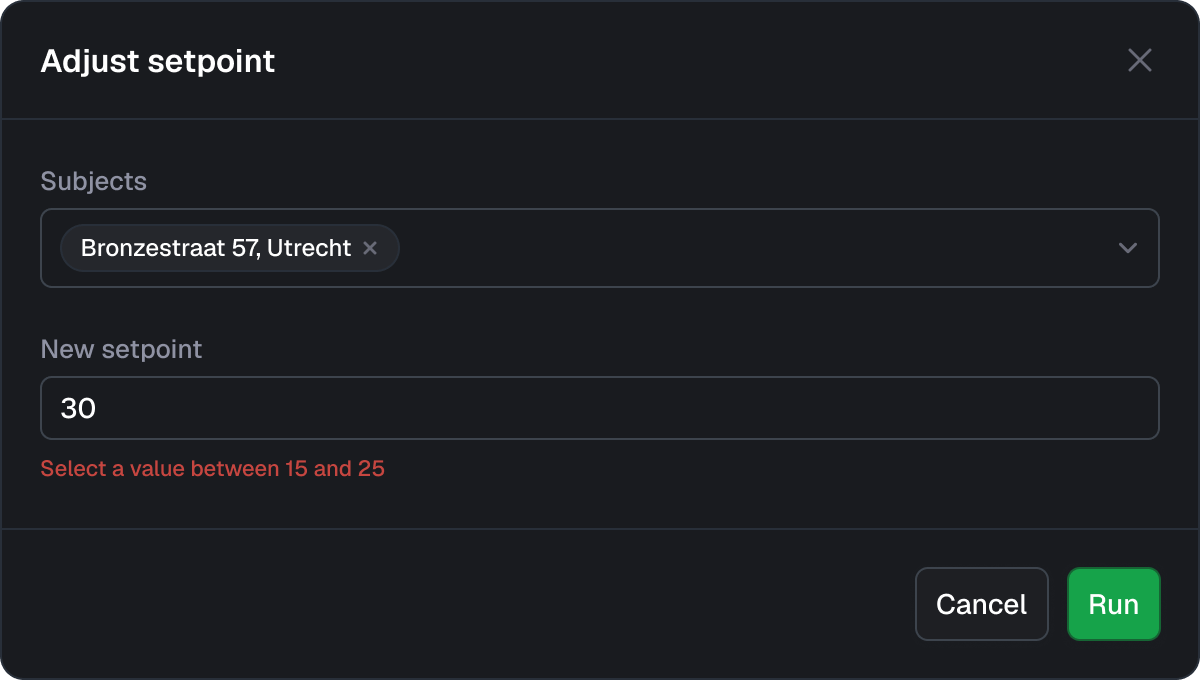
Use the parameters and a ValidationError alert in your script to construct the feedback. See the script below for another example.
Example
Here is an example that shows several aspects of writing an action. It is about changing the temperature of a room:
| |
The parameter desiredTemperature is validated. If it is too high, a validation error is thrown. This will be shown
to the user that triggered the action. If the temperature is okay, a loop is started that visits all the subjects
in the context and for each of them sets the temperature property to the desired temperature.
As you can see, you can also log messages by using the context object. You can log messages at three different levels: logInfo, logWarn, and logError.
Setting properties
Changing properties of a subject is done through the setProperties function on the context object. Its first parameter is a subject which you can get from the list of subjects in the context. The second parameter is a map from property type to a value. The value can be one of three things:
{ number: <NUMBER> }{ text: <TEXT> }{ inherit: true }: make the subject inherit the value of the property from its parent
Note that you can set multiple properties in one go:
| |
HTTP requests
Using the HTTP request functions, the action can be used to do HTTP requests to your servers/devices. The following functions are available on the context object:
context.httpGet(url, options?)- HTTP GET requestcontext.httpPost(url, options?)- HTTP POST requestcontext.httpPut(url, options?)- HTTP PUT requestcontext.httpPatch(url, options?)- HTTP PATCH request
See below for extra information on the parameters:
| Parameter | Description |
|---|---|
| url | The url of the endpoint that the request is being done to |
| options (optional) | An object containing the body, headers and timeout, all of them optional. The body object can be either a string or an ArrayBuffer (make sure that it is in big-endian) and is supported for httpPost, httpPut and httpPatch. The headers object will be added as the request headers, where the key of the headers object will be the key of the header, together with its corresponding value, which has to be a string. The timeout can be set - in milliseconds - which will interrupt the request after a certain amount of time, and throw an error. |
This will return a Response object, which has the following methods and properties to it:
| Properties and methods | Description |
|---|---|
| status | The status of the request, which will return an integer containing the status code, e.g. 200. |
| statusText | The status of the request, which will return a string, containing the status text, e.g. OK. |
| headers | The response headers, which is a JavaScript object mapping each key to a string. |
| json() | The response body of the request, mapped to a JavaScript object. Will throw an error if the response body cannot be parsed as JSON. |
| text() | The response body of the request, interpreted as a UTF-8 string. |
| arrayBuffer() | The bytes of the response body wrapped into an ArrayBuffer object. |
An example of the httpPost function, together with the response can be found below:
| |
The HTTP request functions will add some default headers to each request:
- Will add the
User-Agentheader with the valueBlockbax-action-engine-for-project-<PROJECT_ID>, if it is set in theheadersobject, it will be appended. - Will add the
Acceptheader to*/*if it is not set by theheadersobject in the action. - For
httpPost,httpPutandhttpPatch: will set theContent-Typeheader to eithertext/plain(if thebodyfield is supplied with a string), or toapplication/octet-stream(if thebodyobject is an ArrayBuffer). If theheadersobject supplies theContent-Typeheader or nobodyis supplied, no header will be added.
LwM2M
If you have devices connected to the Blockbax Platform using the LwM2M protocol, you can interact with them via actions. The following methods are available on the context object for READ, WRITE, and EXECUTE operations:
| Method | Parameters | Example |
|---|---|---|
lwm2mRead | 1. subject 2. object path | context.lwm2mRead(subject, "/7/0") |
lwm2mWrite | 1. subject 2. object path 3. body | context.lwm2mWrite(subject, "/7/0", { 0 : true, 1 : false } |
lwm2mExecute | 1. subject 2. object path 3. arguments(optional) | context.lwm2mExecute(context.subjects[0], "/3311/0/0", "arg=test") |
All of these methods return either:
- A string, which means something went wrong, and the string will explain what (e.g., the device is not known to the LwM2M server).
- An object with two (nullable) fields:
coapResponseandmessage. ThecoapResponsefield will contain the response that the device gave to the server (e.g.,CHANGED); it can also benullwhen the device is in queue mode. Themessagefield will contain the server’s response or a reason why the device didn’t return a response.