Docs
The Things Stack
The Things Stack provides an open-source network where LoRaWAN devices can be connected. The Things Network and the Things Industries are both using The Things Stack, this connection guide is relevant in both cases. The Blockbax Platform provides a native integration with The Things Stack, such that your devices can publish measurements to your Blockbax project.
Goal
The goal is to configure a device via The Things Network to publish measurements to Blockbax.
Prerequisites
- Blockbax project
- The Things Network account or The Things Industries account
Preparing an inbound connector in Blockbax
Before we can setup communication to Blockbax we first have to setup an inbound connector in Blockbax. This will be used as an endpoint where the incoming payload is converted and ingested into Blockbax. A default template is available.
- Open the Blockbax web app and go to ‘Integrations’ -> ‘HTTP’ / ‘MQTT’.
- Press the ‘+’ icon or ‘Create inbound connector’ button.
- Choose ‘Use preset’.
- Select the template under ‘The Things Network’ -> ‘Basic decoded payload’
- Optional If you wish to change the protocol click on
Show advanced settingsand change the Transfer protocol. - Optionally you can check ‘Automatically create subjects’. This will create a subject automatically if a subject does not exist.
- Press ‘Save Changes’.
- Copy the ‘Endpoint’ to your notes, you will need it for configuring The Things Stack later on.
The payload conversion script depends on the way the payload is formatted before it is being sent to Blockbax. By default, when you add a known device in The Things Stack it comes with a payload formatter submitted by the device manufacturer from the device repository. In most cases data is returned as a simple JavaScript object containing numeric and text values as properties.
The default template takes the keys in the decoded payload as the metric external IDs and the values as the measurements. In this case everything will work with the default template. If not, you need to align the payload conversion script to the way your device formatter(s) output the payload. We will explain how to do this later. In any case it is a good starting point to start with the following script in your inbound connector.
Create a webhook in The Things Stack
Now we can create a webhook in The Things Stack to forward device payload to Blockbax.
Go to The Things Network Console or The Things Industries Console and go to your application.
In the left menu select ‘Integrations’ and ‘Webhooks’
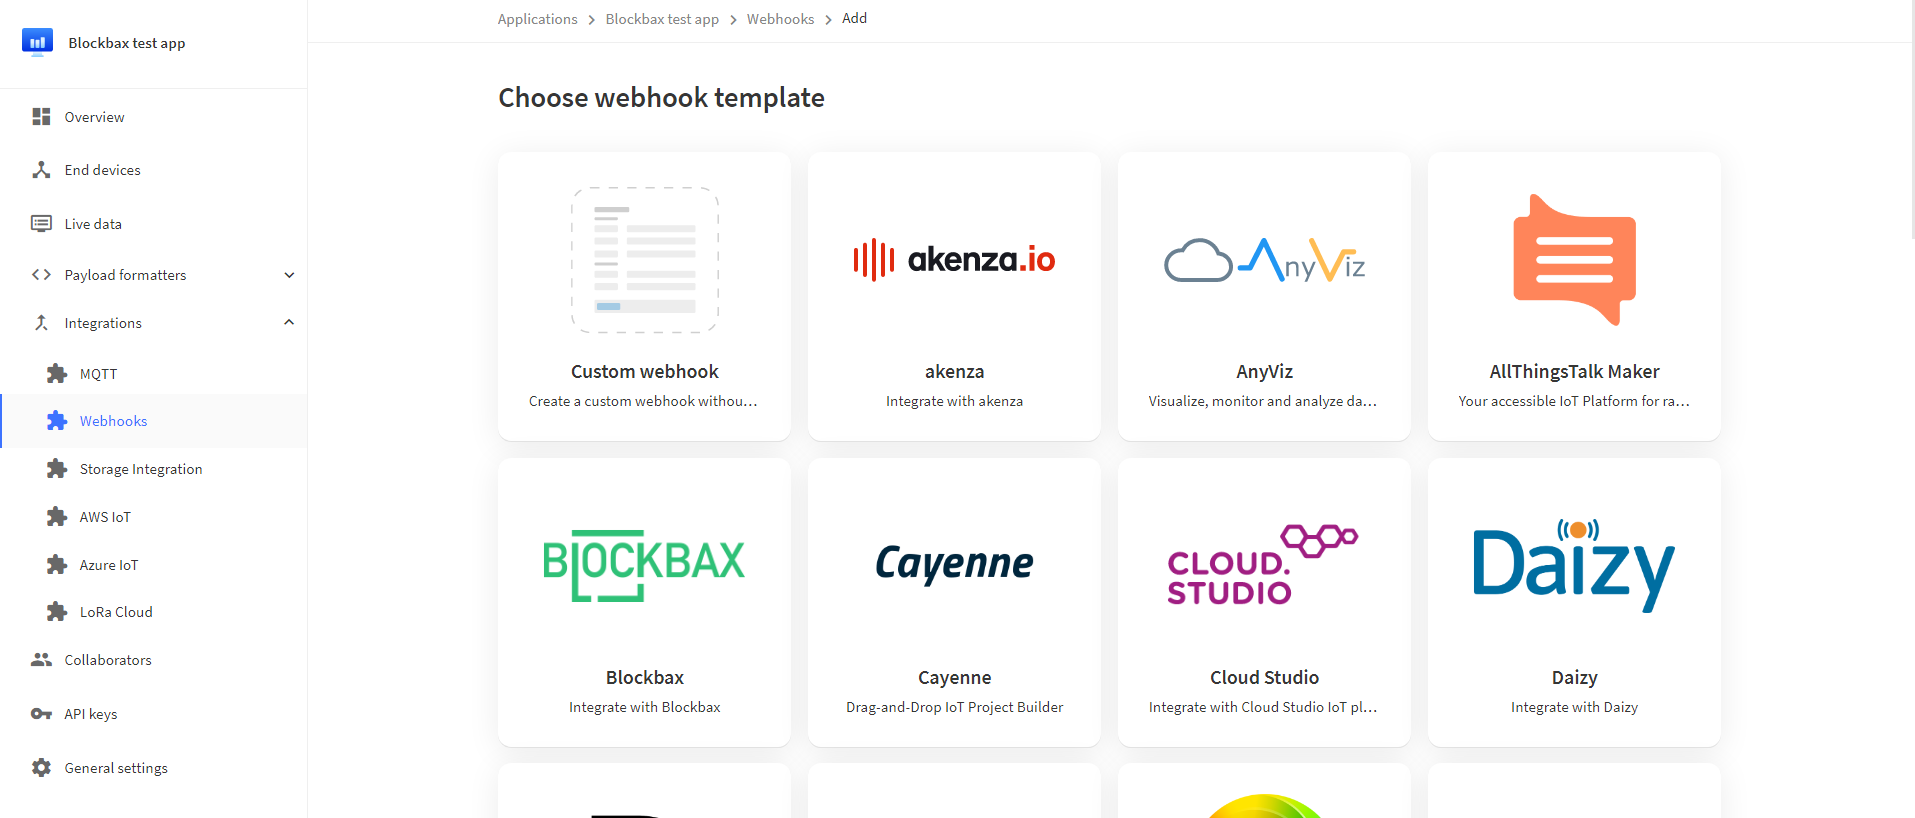
Click on ‘Add webhook’ and select the ‘Blockbax’ tile
Enter the information according to the table below, and press ‘Create Blockbax webhook’
| Field | Value |
|---|---|
| Webhook ID | Your own identifier (enter an arbitrary value) |
| Blockbax access key | Your access key |
| Endpoint | Your inbound connector endpoint that you noted during the preparation |
Setting up a subject type
Once you’ve added the webhook, payload are sent to Blockbax. Now we are going to create a subject type which matches your device type(s) and further align your inbound connector if necessary.
Make sure your The Things Stack device is connected and has sent at least one payload.
Open the inbound connector you created in the previous step.
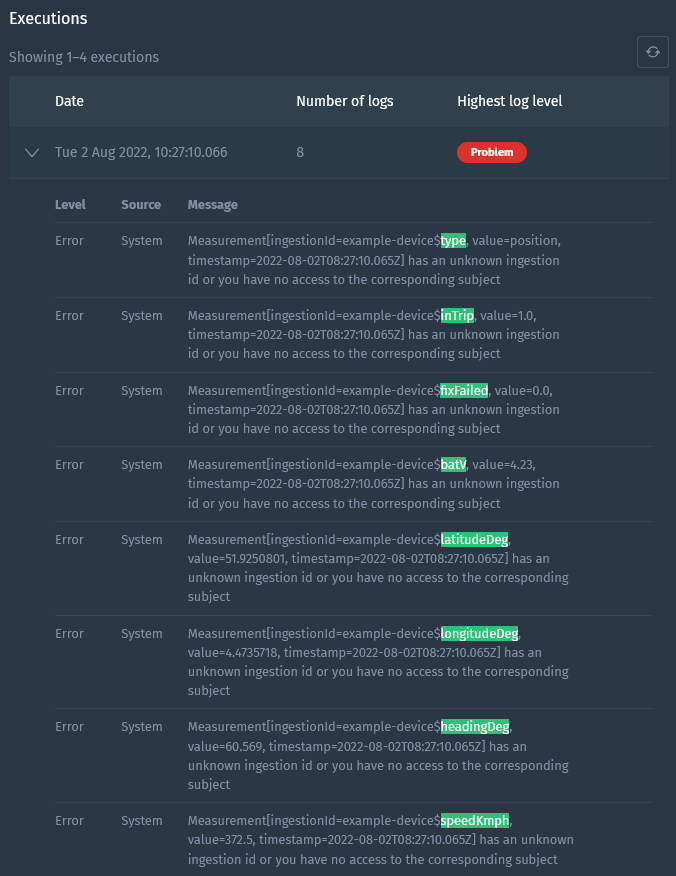
In the ‘Executions’ section expand the latest execution.
As an example we use the Oyster of Digital Matter, but you should see something similar to the execution logs below.
In Blockbax ingestion IDs are used to map The Things Stack data to your subjects and metrics. By default ingestion IDs are derived from the subjects’ external IDs and metrics’ external IDs (e.g.
subjectExternalId$metricExternalId) but you can also override these with custom ones. The inbound connector script configured in the previous step combines your device ID from The Things Stack and the property name returned by the payload formatter(s) into an ingestion ID (e.g.example-device$type). This allows for easy setup if you make sure your subject external IDs and metric external IDs match the ones you configure in Blockbax.Create a subject type with a metric of the correct type for each external ID in your execution logs.
For this example you would need to create ingested metrics with the following types and external IDs (highlighted also in the screenshot of the execution logs above):
Type External ID Text typeNumber inTripNumber batVNumber fixFailedLocation latLonDeg*Number headingDegNumber speedKmphIf you have enabled the setting to automatically create subjects in the inbound connector they will be created automatically when measurements are received and the metric external ID can be linked to one subject type. If you wish to create subjects manually the subject’s external IDs need to match the device IDs configured in The Things Stack. For this example that would be a subject with external ID
example-device.(*) As you might have noted the
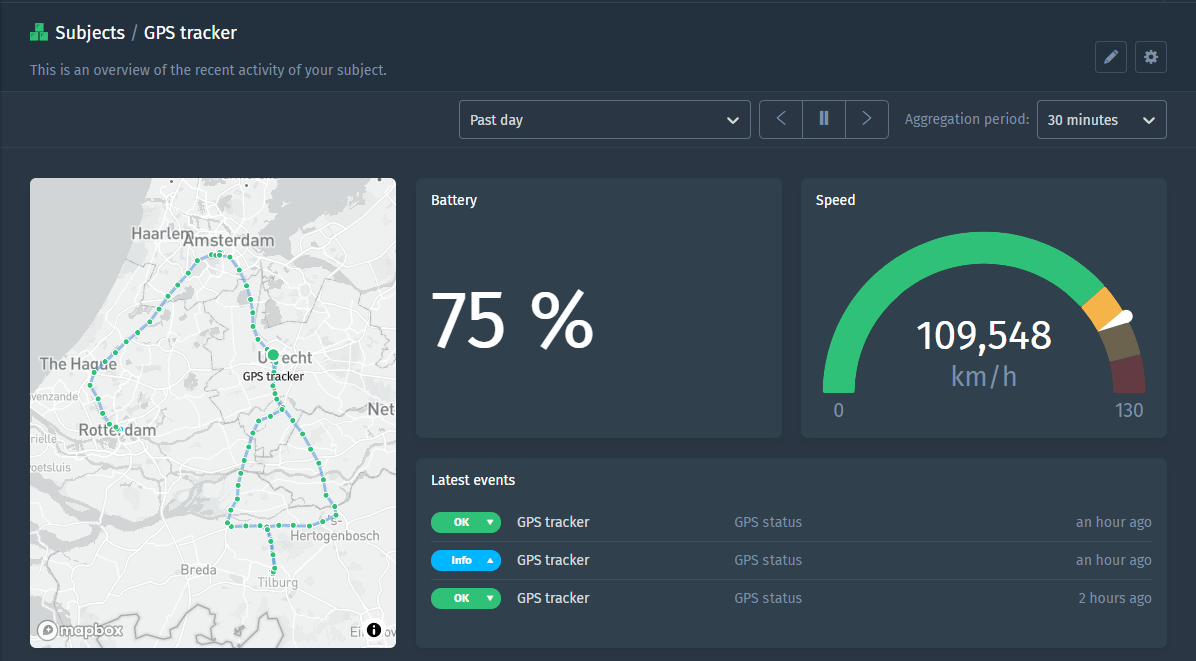
latLonDegexternal ID is not highlighted in the execution logs. This is because we do not to have thelatitudeDegandlongitudeDegas separate number metrics but as a location metric. In this way you are able to use the full location-based functionality in the Blockbax Platform such as viewing routes and setting geofences. Here is an example script to combine latitude and longitude to a proper location. Change it to your needs:
| |
Now you are all set up, check your Blockbax project to see the measurements coming in!
If you are familiar with JavaScript another option to determine the external IDs for the ingested metrics is to look at the source code of the device specific payload formatter. In this case you are also sure you do not miss any metrics which are only sent under certain conditions.
In our example we used the Oyster of Digital Matter. The source code for the related payload formatter can be found [here](https://github.com/TheThingsNetwork/lorawan-devices/blob/master/vendor/digital-matter/oyster.js). The property names of the `decoded` object should be set as metric external IDs.