Docs
Integration templates
To make integrating with Blockbax as easy as possible, we provide integration templates that can integrate third-party platforms and devices with a few clicks.
Using integration templates
Prerequisites
- Blockbax account
- A device for which an integration template is available
Steps to configure
- Open the Blockbax web app and go to ‘Integrations’ -> ‘HTTP’ / ‘MQTT’.
- Press the ‘+’ icon or ‘Create inbound connector’ button.
- Choose ‘Use preset’.
- Select the template you wish to use; available templates can be found here.
- (Optional) If you wish to change the payload converter and/or protocol click on
Show advanced settings. - (Optional) In the advanced settings, you can click on
convert it to a custom conversionto change the payload converter. - (Optional) Select
Automatically create subjectsto create subjects based on the ingestion ID. - Press ‘Save changes’.
- Depending on the protocol you have selected, you can use the url or topic in the inbound connector settings to configure the third-party platform or device to forward payloads to.
Advanced tips
At times, even when using a template, it may not entirely address the final steps required to integrate your data seamlessly into the Blockbax platform. In such cases, a bit of additional configuration remains necessary. These advanced tips can assist you in successfully accomplishing this task.
Uncovering ingestion IDs
Sometimes, it’s challenging to determine the nature of the messages being sent and how you need to set up a subject type with the correct metric external IDs. Depending on the template you’ve chosen to utilize, there are two methods for resolving this problem.
Use the inbound connector execution logs
Take the following steps:
Make sure at least one payload has been sent to the inbound connector.
Open the inbound connector you created in the previous step.
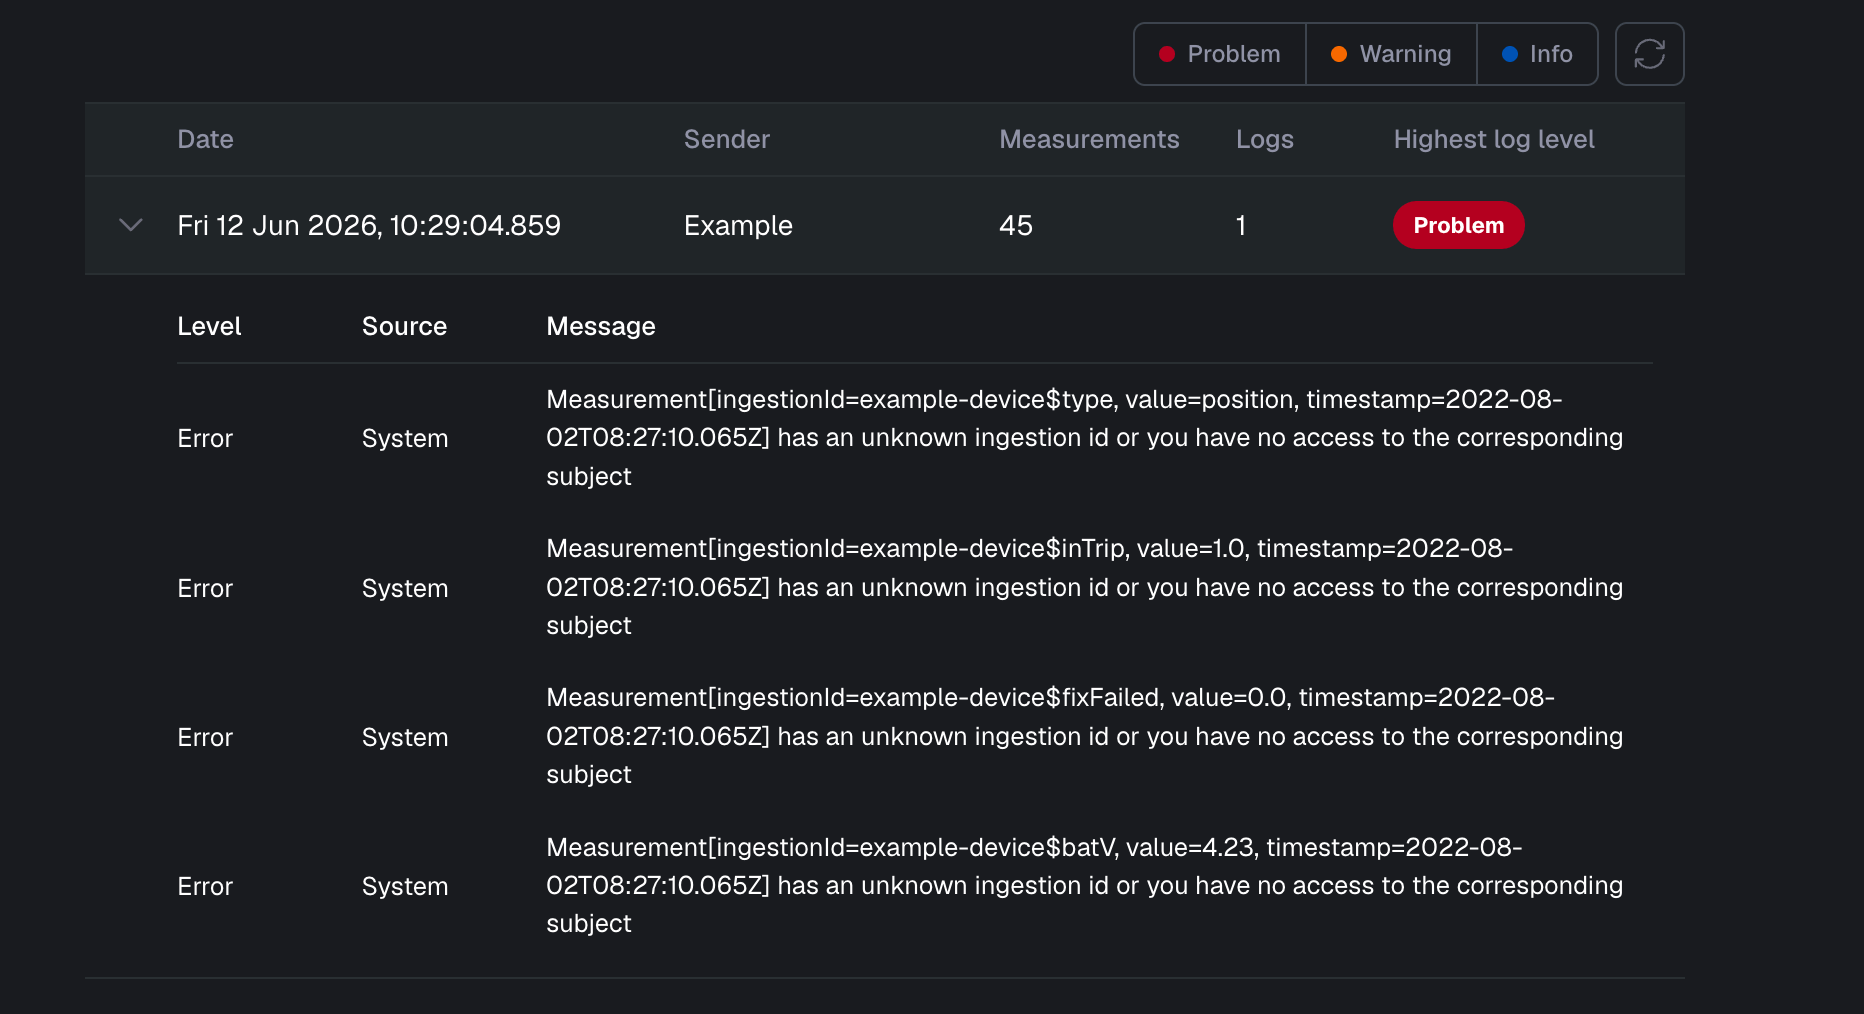
In the ‘Executions’ section expand the latest execution.
As an example we use the The Things Network integration template with the Oyster 2 of Digital Matter, but you should see something similar in the execution logs below.
In Blockbax ingestion IDs are used to map data to your subjects and metrics. By default, ingestion IDs are derived from the subjects’ external IDs and metrics’ external IDs (e.g.
subjectExternalId$metricExternalId) but you can also override these with custom ones. The inbound connector script configured combines the device ID from The Things Stack and the property name returned by the payload formatter(s) into an ingestion ID (e.g.example-device$type). This allows for easy setup if you make sure your subject external IDs and metric external IDs match the ones you configure in Blockbax.
Log the payload
Some templates cannot fully parse the incoming payload because the format is not standardized or is susceptible to customizable fields. To fix these issues you will need to know how the payload is presented when it is received and how to parse it. The quickest way to check what the payload looks like is by logging it inside the inbound connector just by adding one line. If you have selected a template you can click on Show advanced settings and then click on convert it to a custom conversion and then add the following line:
| |
Now every time a message is received the payload is logged, and you will be able to see what is in the data.
Creating or updating integration templates
If you are want to provide a quick and easy way for your devices or your backend to integrate with Blockbax, you can create a template using this guide.
Prerequisites
- GitHub account
- node
- npm
Steps
- Go to our integration templates repository.
- Fork and clone the integration templates repository.
- Add or update your integration template.
- Configure the test suite to test the integration template’s payload conversion script.
- In your forked repository open a merge request selecting the
mainbranch of the integration templates repository as its target branch, we will check out your request and notify you when further changes are needed.
Before your templates are available within Blockbax our CI pipeline will validate that the config.yml, index.yml and test.yml files are correct and test the payload conversion script with tests defined in the tests.yml file. If all checks succeed, it will then attempt to publish the version of your template to Blockbax.
Add a new template
- If you do not yet have a group in the
groups/<group-id>/directory add a new directory with your group id, a group id can only contain letters, numbers and the ‘-’ character and cannot be longer than 20 characters. - Configure the group index.
- To add a template add a
groups/<group-id>/<template-id>/directory with your template id, a template id can only contain letters, numbers and the ‘-’ character and cannot be longer than 20 characters. - Configure the template.
- Add a test suite.
Update a template
To update a template you will need to do the following:
- Make the desired changes to the payload conversion script located at
groups/<group-id>/template-id>/script.jsand/or change theprotocoland/orpayloadFormatfields in theconfig.ymlfile. - Add a test case or update the current test cases to illustrate what this change does. The test suite is located at
groups/<group-id>/template-id>/tests.yml - Bump the version number of the template inside the
config.yml. This config file is located atgroups/<group-id>/template-id>/config.yml.
Only if changes in the payload conversion script are detected or if the protocol and/or payloadFormat fields in the config.yml file are changed a new version will be accepted and a new version number is required. This new version number must be exactly one higher than the latest version.
Configure the group
A group index is located at groups/<group-id>/index.yml and should look like the following:
| |
Configure the template
A template config is located at: groups/<group-id>/template-id>/config.yml and should look like the following:
| |
This example defines a payload conversion script called script.js which is located at groups/<group-id>/template-id>/script.js. When updating this template’s configuration or payload conversion script you will also need to bump this version number.
Add the payload conversion script
Inside the script.js file you will need to define the payload conversion to ingest the data. For example, this is the basis for a JSON payload conversion script:
| |
More information about writing the conversion script can be found in the payload conversion documentation.
Configure the test suite
A test suite is located at: groups/<group-id>/template-id>/tests.yml and should look like the following:
| |
This example mentions an example payload which should be located at groups/<group-id>/template-id>/payloads/your-payload-example. In the test suite you are able to define multiple tests, but are required to specify one default test. For each test you can define expected measurements, expected logs and expected errors when the payload conversion script is run using the defined payload.
The payload file is read as a utf-8 string and depending on the configured payloadFormat of the template it is parsed/decoded to the expected payload format. CBOR & JSON are parsed to JavaScript objects using their respective parsers. For the STRING type the raw string contents are used and for the BYTES type the contents of the payload are expected to be in hexadecimal characters.
Example payloads for each payload format can be found in the examples/ directory.
Expected measurements can be defined like this:
| |
Expected logs can be defined like this:
| |
Log levels can be INFO, WARN or ERROR.
Expected Errors can be defined like this:
| |