Docs
Digital Matter
Digital Matter offers a large portfolio of LPWAN, integration-ready and battery-powered asset tracking devices across a range of connectivity technologies. We integrate seamlessly with a variety of their sensors.
We tested this integration with the Oyster2-4G and G62-4G devices, however the integration should also work for other Digital Matter devices. If you want to connect a Digital Matter device using LoRaWAN and The Things Network, please check out our The Things Stack connection guide.
Goal
The goal is to set up an integration between a Digital Matter tracking device and Blockbax.
Prerequisites
- Blockbax project
- Access to the OEM server
Steps to connect a device
Before you can connect your device you will first need to set up an inbound connector in Blockbax.
- Open the Blockbax web app and go to ‘Integrations’ -> ‘HTTP’ / ‘MQTT’.
- Press the ‘+’ icon or ‘Create inbound connector’ button.
- Choose ‘Use preset’.
- Select the Digital matter Oyster 2 template under ‘Digital matter’ -> ‘Oyster 2’ and press ‘Save changes’.
- The ‘Endpoint’ will be needed later for the configuration on the Digital Matter side.
To set up the integration from the side of Digital Matter perform the following steps:
Login to the OEM server.
Go to ‘Connectors’ and click on ‘New’.
Choose a ‘Name’ and an optional ‘Description’ and configure the rest according to the table below.
field value Connector Type Http Connector Url Your inbound connector endpoint that you noted during the preparation Headers Set the ’name’ as Authorizationand the ‘value’ to an access key starting withApiKey.Press ‘Ok’.
The inbound connector will automatically map the data coming from the Digital Matter OEM server to ingestion IDs. Below is a list of available metrics by their external ID:
| Type | External ID | Description |
|---|---|---|
| Text | reason | Logging reason |
| Location | 0-position | GPS location of the sensor |
| Number | 0-speed | 2D ground speed [cm/s] |
| Number | 0-speed-accuracy | Speed accuracy estimate [cm/s/10] |
| Number | 0-2d-heading | 2D heading [deg/2] |
| Number | 0-pdop | Position dilution of precision (PDOP) |
| Number | 0-position-accuracy | Position accuracy estimate [m] |
| Number | 2-digital-input | Digital inputs 0-31 (d0=IGN) |
| Number | 2-digital-output | Digital outputs 0-15 |
| Number | 2-device-status | Device status flags |
| Number | 6-internal-battery-voltage | Internal battery voltage [mV] |
| Number | 6-external-voltage | External voltage [V ⋅ 100] |
| Number | 6-internal-temperature | Temperature [°C ⋅ 100] |
| Number | 6-gsm-signal-strength | Last known GSM CQ |
| Number | 24-peak | Peak G force. 1024 = 1G (only with high-G event detection) |
| Number | 24-average | Average absolute value of G force. 1024 = 1G (only with high-G event detection) |
You can test if everything works by opening the Blockbax web app, creating a subject type with the previously mentioned metric external ID’s and a subject with the device serial number as the subject external ID (or enable the inbound connector to create subjects automatically).
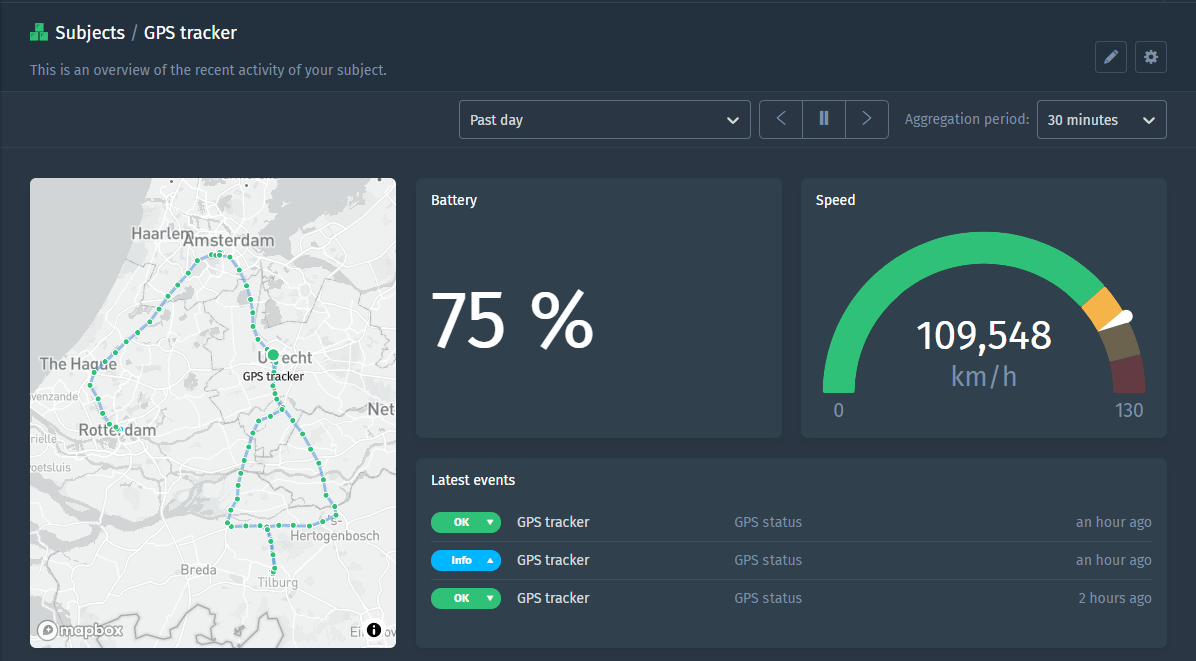
Below you’ll find an example of a dashboard we created for a specific device after the setup was completed.
Steps to set up high-G event detection
High-G is not enabled by default on the Digital Matter device. To enable High-G event detection you will need to do the following:
- Login to the OEM server.
- Go to ‘Devices’ -> Select your device.
- Go to ‘Parameters’ -> ‘Edit System Parameters’.
- Click on ‘+ Add Advanced Parameter’.
- Choose Accelerometer Settings and configure according to your requirements.
Now High-G peak and average events will be sent to Blockbax.