Docs
Option CloudGate
Option CloudGate gateways are set up in a modular way to support a wide range of networks (such as 3G, LoRaWAN, NB-IoT and LTE-M), sockets (such as ethernet, RS232/RS485, analog or digital IOs, I2C, CAN or USB) and protocols (such as BACnet, CAN bus, Modbus and M-Bus). It has active GPS and comes with Luvit-RED for edge computing, which works similarly to Node-RED. Luvit-RED can be used to configure local processing for instance to handle some event rule logic locally or pre-aggregate data before sending it to the Blockbax Platform.
Goal
This guide will show you how to set up an Option CloudGate gateway with Luvit-RED to acquire data and communicate with Blockbax.
Prerequisites
- Blockbax project.
- CloudGate Universe account
This integration was tested on the Option CloudGate Nano but other gateways from Option should behave similarly.
Steps to set up the CloudGate
To set up the CloudGate you will have a couple of options depending on how you would like to connect to it for configurations and how you would like to connect the CloudGate to the internet. The CloudGate can connect to the internet through using an ethernet cable or via LTE-M, NB-IoT or 2G/3G using a SIM card.
Make sure that you are logged into the CloudGate universe then do the following:
- Install the CloudGate.
- If you have one, Install the SIM Card.
- If applicable, install the expansion cards.
- Activate the CloudGate.
- Connect the CloudGate with your own computer via an ethernet cable and Log into the CloudGate.
- Change the default password in the System Tab.
If you have installed a SIM card you will have to do the following:
- Select a wireless provider.
- Set up the LTE interface or the 3G interface.
If you want to connect the CloudGate to the internet using an existing network do the following:
- Configure the Firewall and make sure you set “WAN -> Local” to “Accept”.
- Configure the LAN interface and keep the Mode to WAN.
- Optionally, Enable the “Remote access through HTTPS” in the System Tab if you plan to access the CloudGate remotely using this network.
Remote configuration
When you want to update a CloudGate, but you are not near it, you are able to upload new configurations to it via CloudGate universe. To do this you need a configuration that you can upload for the remote CloudGate to download.
If you don’t have a configuration you can get one by doing the following:
- Login to a local CloudGate.
- Edit the configuration of this CloudGate.
- Goto “System” -> “Config export”.
- Click on “Download config” and store it somewhere on your computer.
When you have a configuration you can do the following to upload it to CloudGate universe.
- Goto your Library.
- Click on “View configurations” and then click on “Add new configuration”.
- Name your new configuration, give it a version number and upload the configuration.
- On the next page select the version number and the group in which your CloudGate was activated.
Now all that has to be done is tell your CloudGate that it should use this new configuration.
- Go to Devices and go to the group in which your CloudGate is activated.
- Click on the device you want the configuration changed.
- Under Configuration click on “Choose a different configuration”.
- Search for the configuration you just added and click on “Select version”.
- Select the version and click on “Apply changes”.
- The CloudGate will download the new configuration on its next check-in.
Steps to set up the Luvit-RED
To set up Luvit-RED consult the installation guide including the tutorial video.
Using Luvit-RED
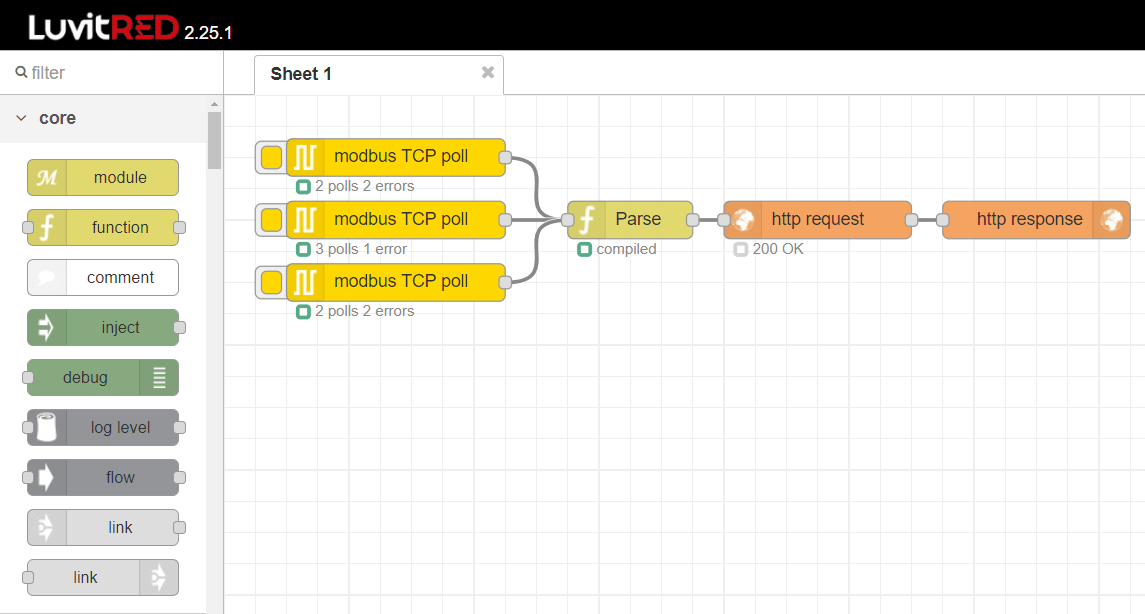
Luvit-RED is Option’s version of Node-RED for their CloudGate gateways. It’s mostly the same except that you can only use the built-in nodes.
Nonetheless, Luvit-RED has a fairly large library of built-in nodes which you can use to acquire data and communicate with Blockbax. Some supported protocols include Modbus, M-Bus, CAN Bus, BACNet, Zigbee, knx, HTTP, MQTT, TCP & SNMP.
Communicate with Blockbax
To send data to Blockbax in Luvit-RED you can use the build-in HTTP or MQTT nodes and configuring them to communicate with our HTTP API or MQTT API
Hint:
Luvit-RED is written in Lua which means that some custom code inside Luvit-RED needs to be written in Lua aswell. For parsing data to our JSON format as seen in the example image you will need to convert JSON to a Lua table. For this you can use a JSON to Lua table converter.