Docs
BACE IoT Platform
BACE IoT Platform by Evalan is an edge-to-cloud platform developed to help customers create state-of-the-art IoT implementations quickly in all kind of industries.
Goal
The goal is to set up an integration between the BACE cloud and Blockbax.
Prerequisites
- Blockbax project
- Access to the BACE cloud
- At least one sensor connected to the BACE cloud.
Steps to connect BACE with Blockbax
Several steps in both platforms need be taken to get the data from BACE to Blockbax.
Create an inbound connector in Blockbax
You will create an endpoint in the Blockbax platform to send your BACE data to.
- Open the Blockbax web app and go to ‘Integrations’ -> ‘HTTP’ / ‘MQTT’.
- Press the ‘+’ icon or ‘Create inbound connector’ button.
- Choose ‘Use preset’.
- Select the BACE measurement integration template.
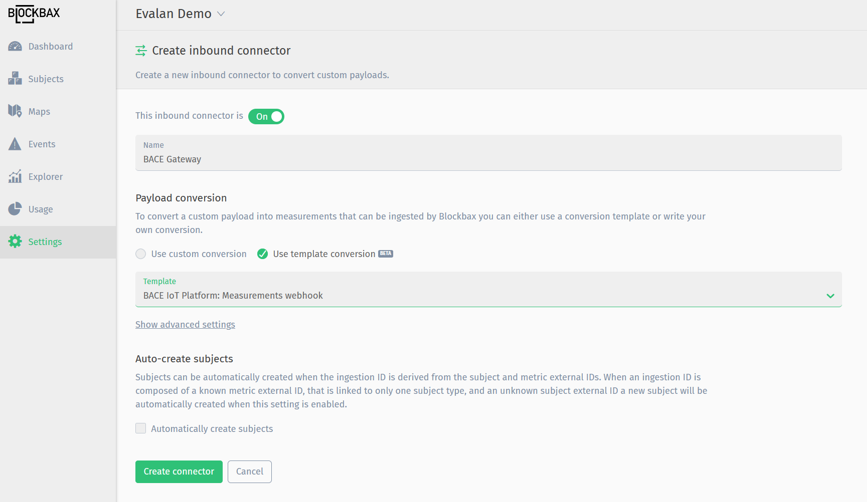
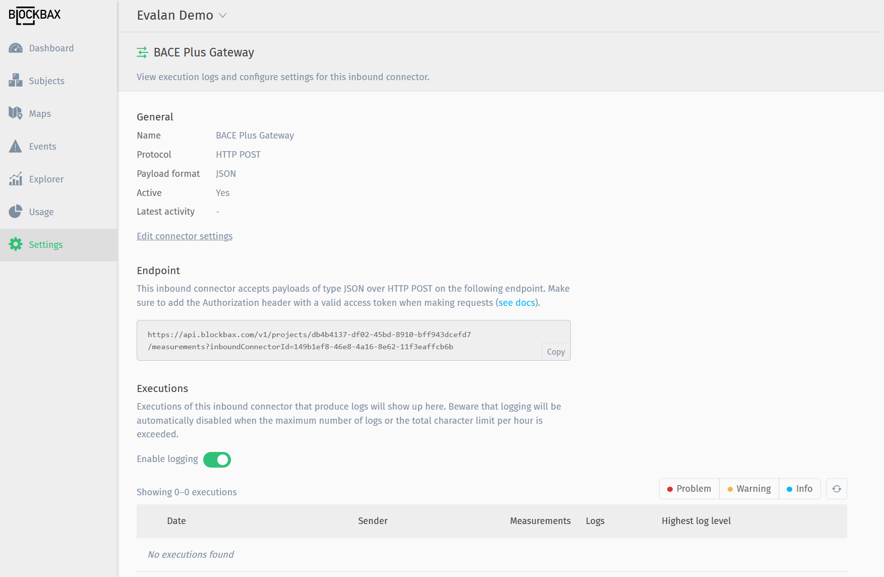
The inbound connector is a unique endpoint that allows sending data into the Blockbax platform. The URL in endpoint field will be used during webhook creating in BACE, so copy this endpoint since you need in one of the next steps.
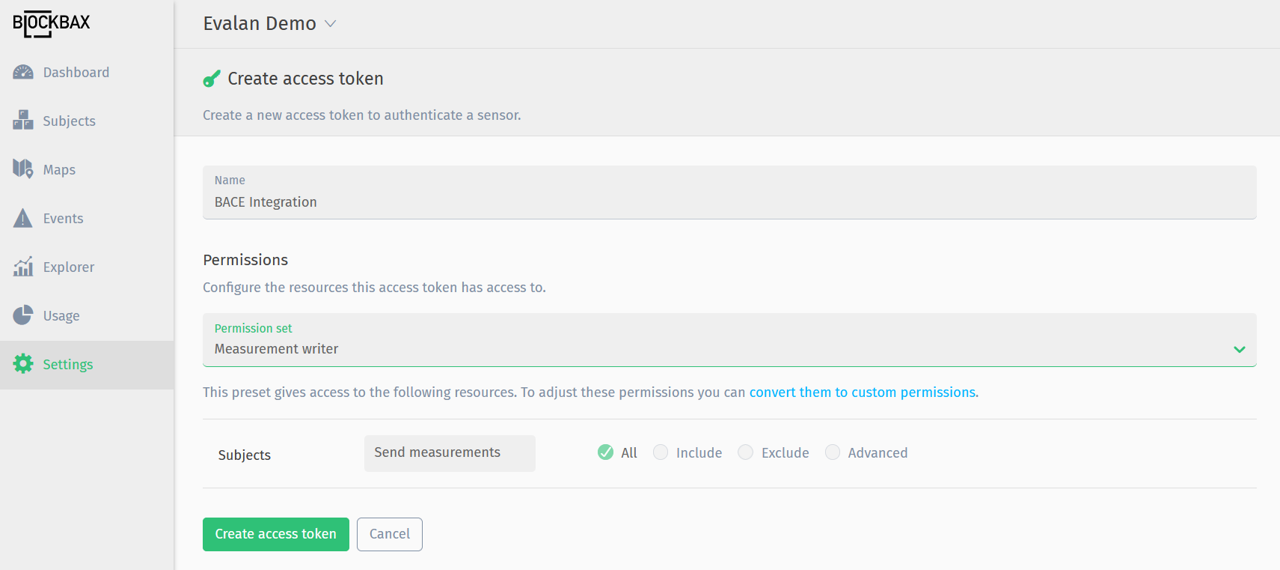
Create an access key in Blockbax
For integration into Blockbax, you’ll also need an access key to safely send messages to the Blockbax endpoint.
- Login to your Blockbax account. Go to Integrations -> Access keys -> (+) Create access key.
- Give a name to access key (i.e. BACE Integration), and set permission to Only send measurements.
- Click Create access key.
- You will need the authorization key for HTTP, so copy the ApiKey [KEY] because you need it in one of the next steps. You will only see this screen once, so create a new access key when something goes wrong.
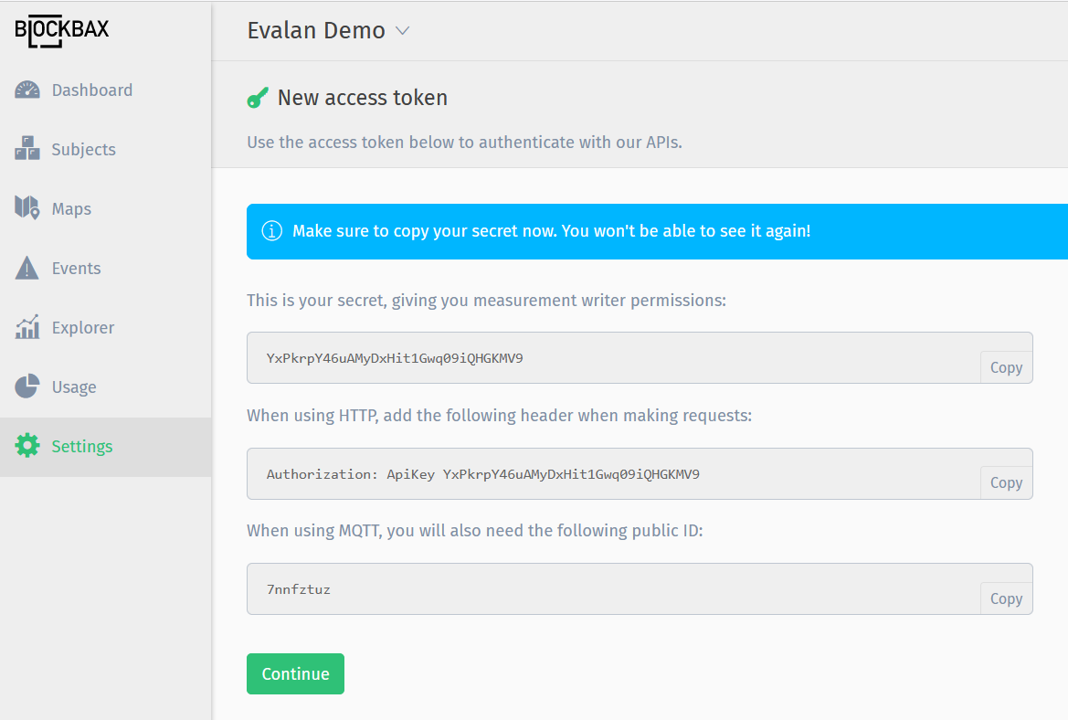
Now you have the endpoint and ApiKey that you need when creating a webhook in the BACE platform.
Create a webhook in BACE
In this section, we’ll explain how to create a webhook in BACE IoT Platform that will push information to Blockbax inbound connector created in previous step.
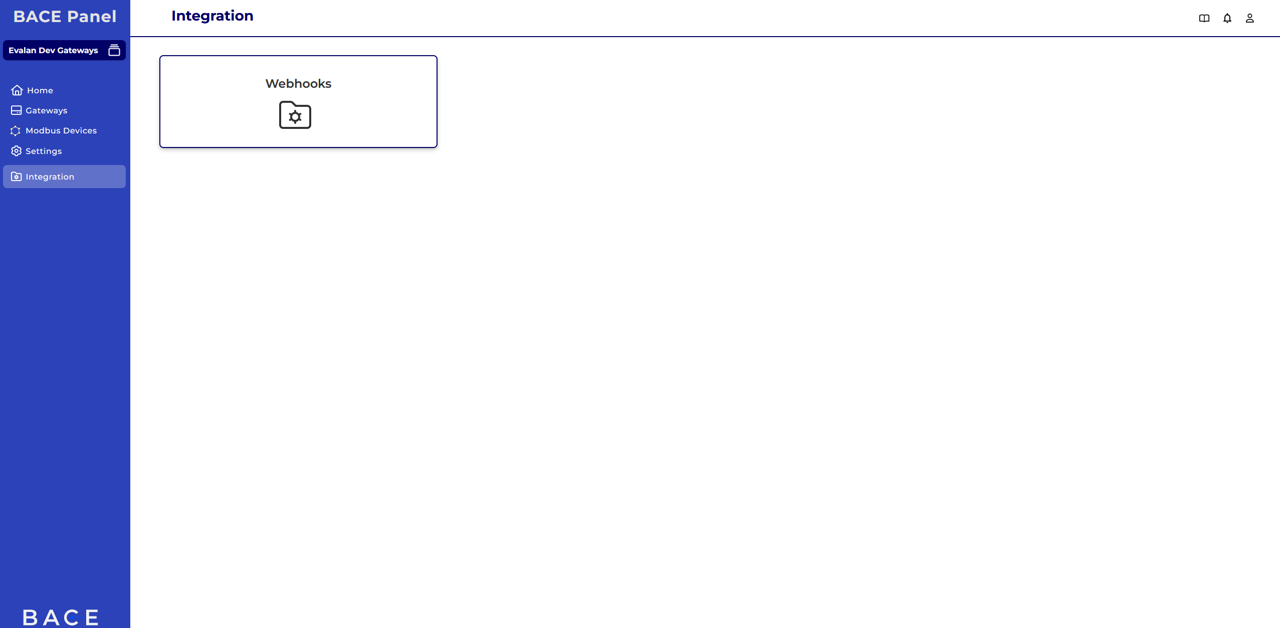
- Login to BACE Panel and click into one of the projects that you want to integrate into Blockbax.
- On left navigation click Integrations -> Webhooks.
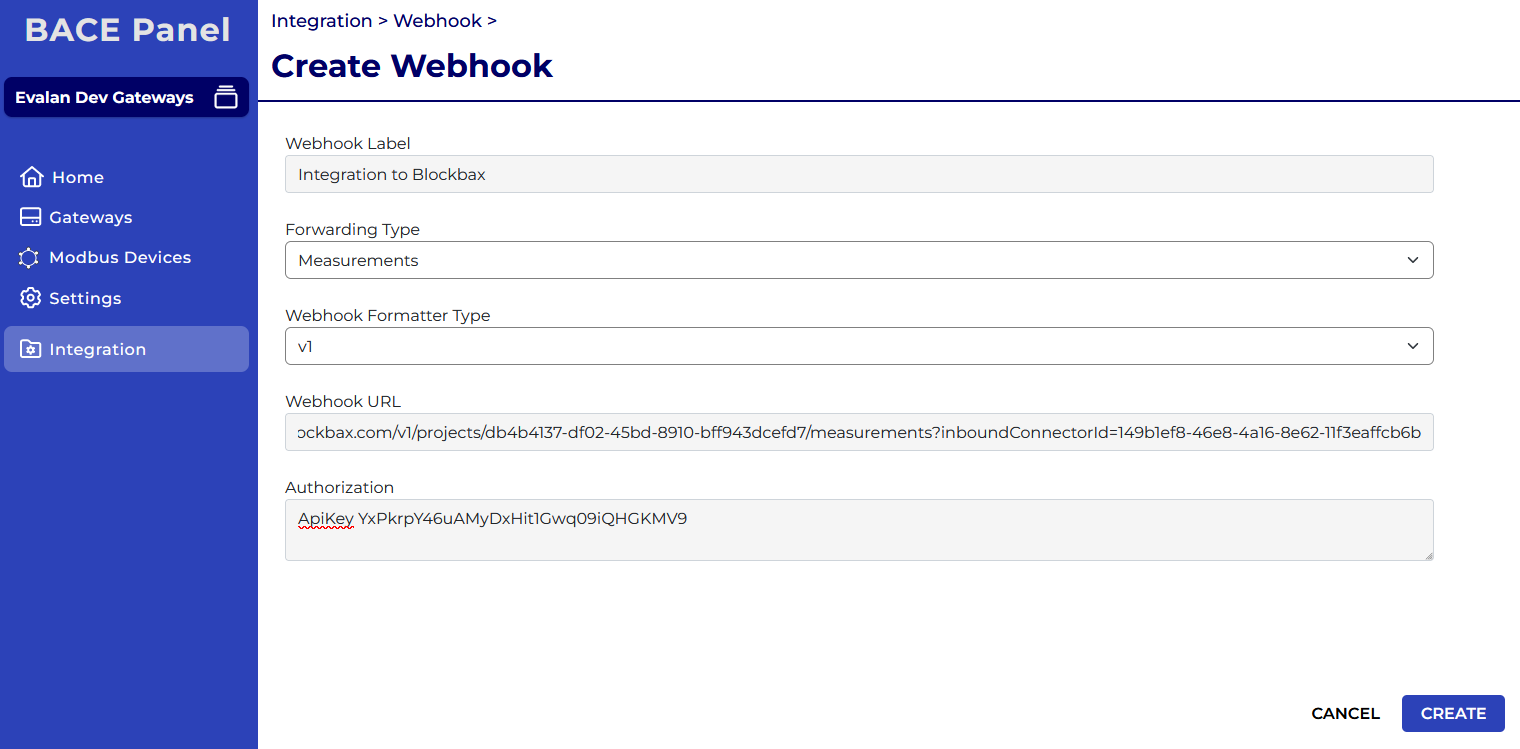
Click Create a Webhook and provide a name to the webhook (i.e. Integration to Blockbax). Make sure to paste URL copied from Blockbax inbound connector into Webhook URL field.
Paste the Access key created in previous step inside Authorization field. Paste ApiKey [KEY] in this field. DO NOT include ‘Authorization: ’ text. '
When successful you should start seeing Webhook responses inside Blockbax inbound connector.
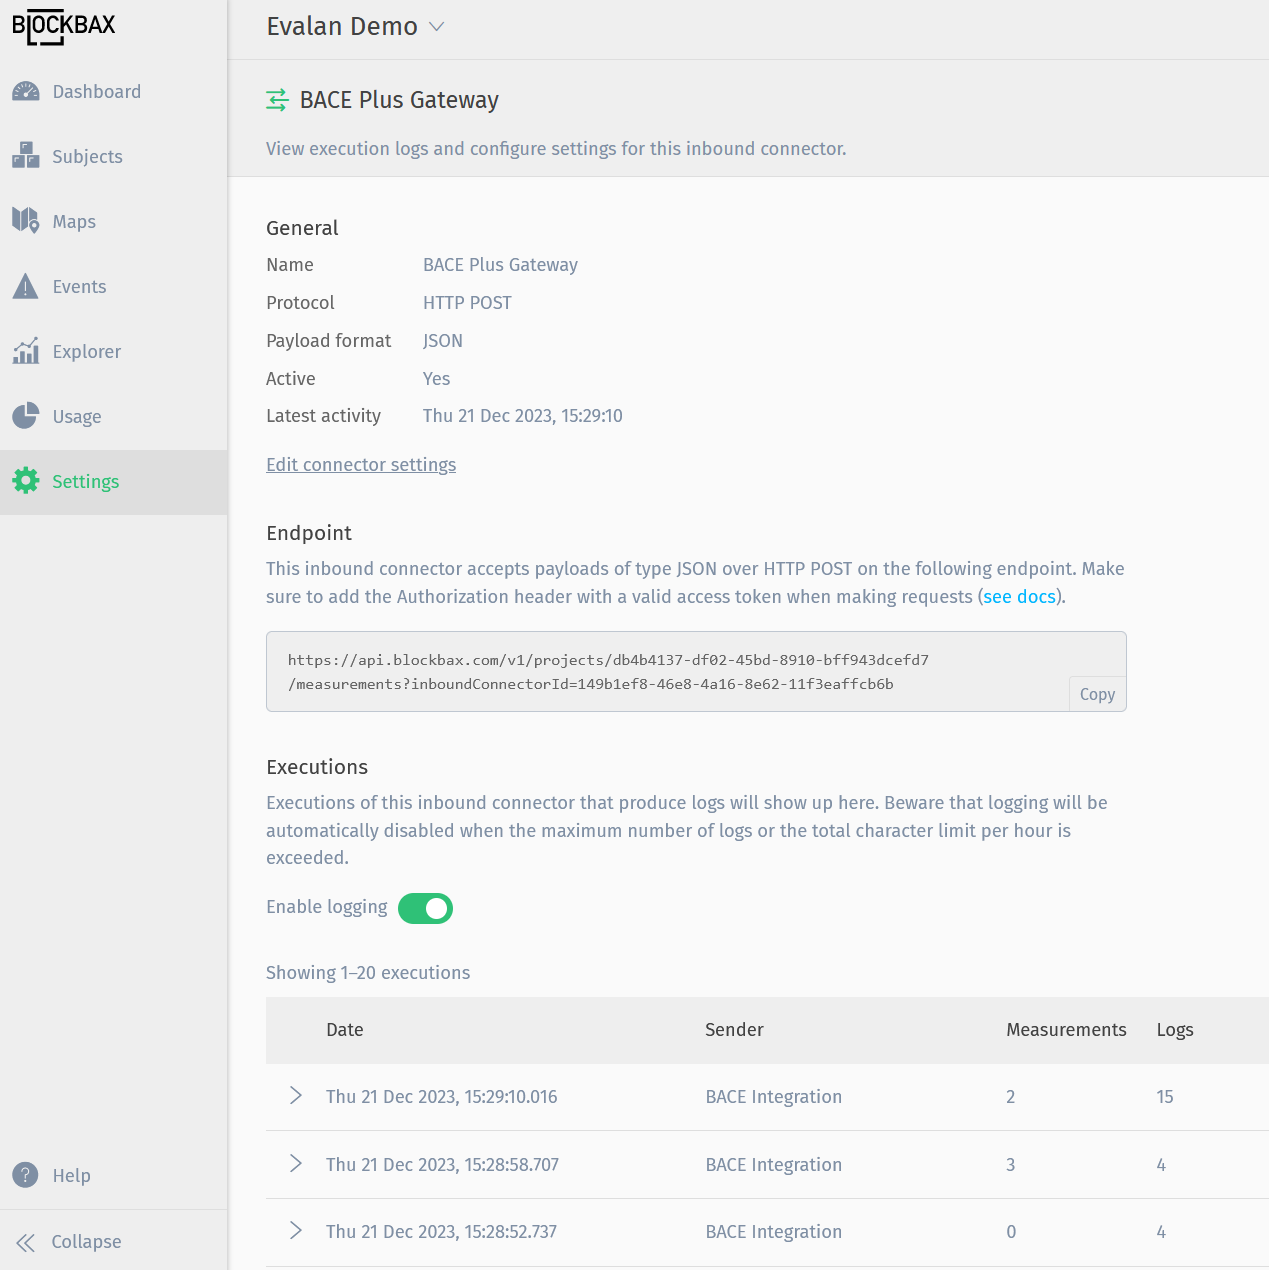
- If you are seeing some messages underneath Executions, the messages are pushed into Blockbax as expected and next step is creating a subject type for these messages.
There is more BACE webhook documentation to help you out when you get stuck.
Creating a subject type in Blockbax
For processing data in Blockbax, you need to map incoming data from BACE IoT platform to a Blockbax subject type first. Subject types are like device templates that helps you connect similar equipment in bulk easily.
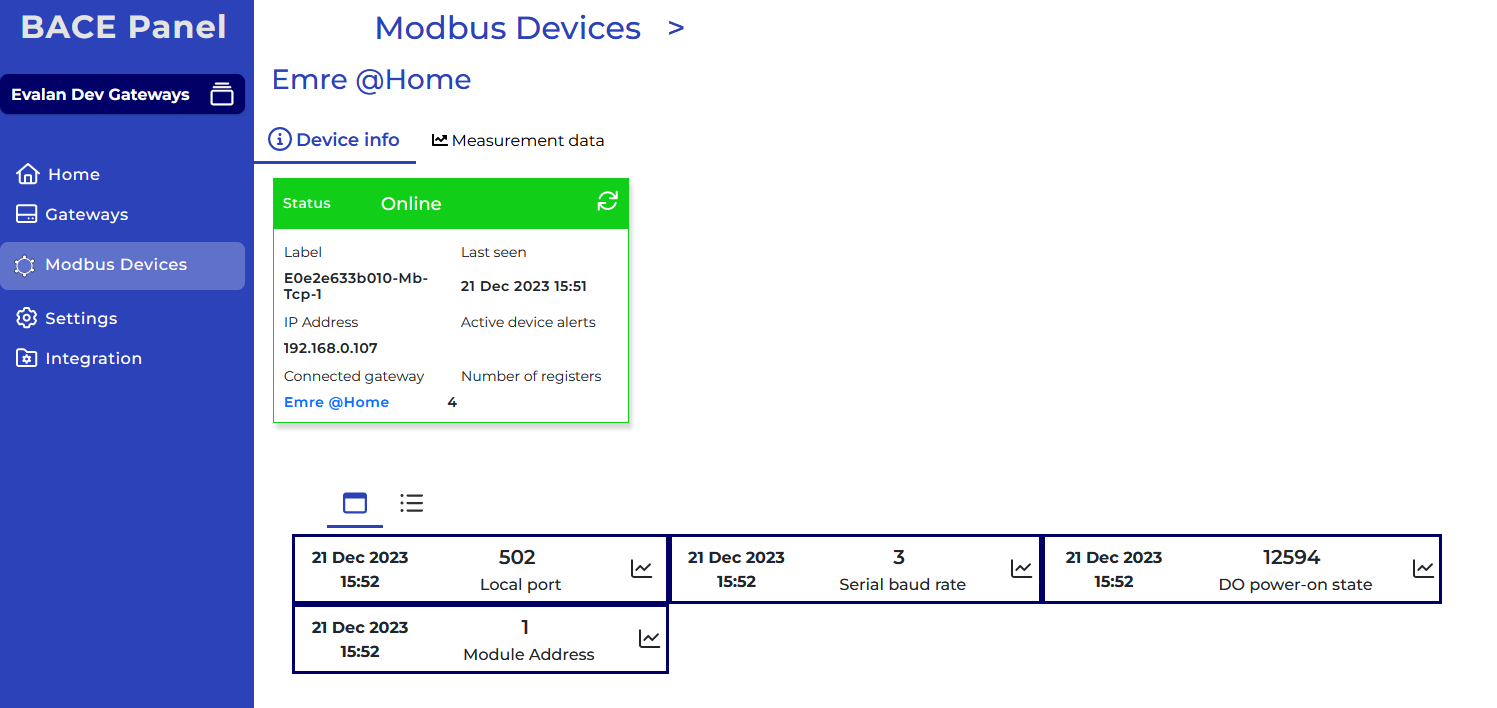
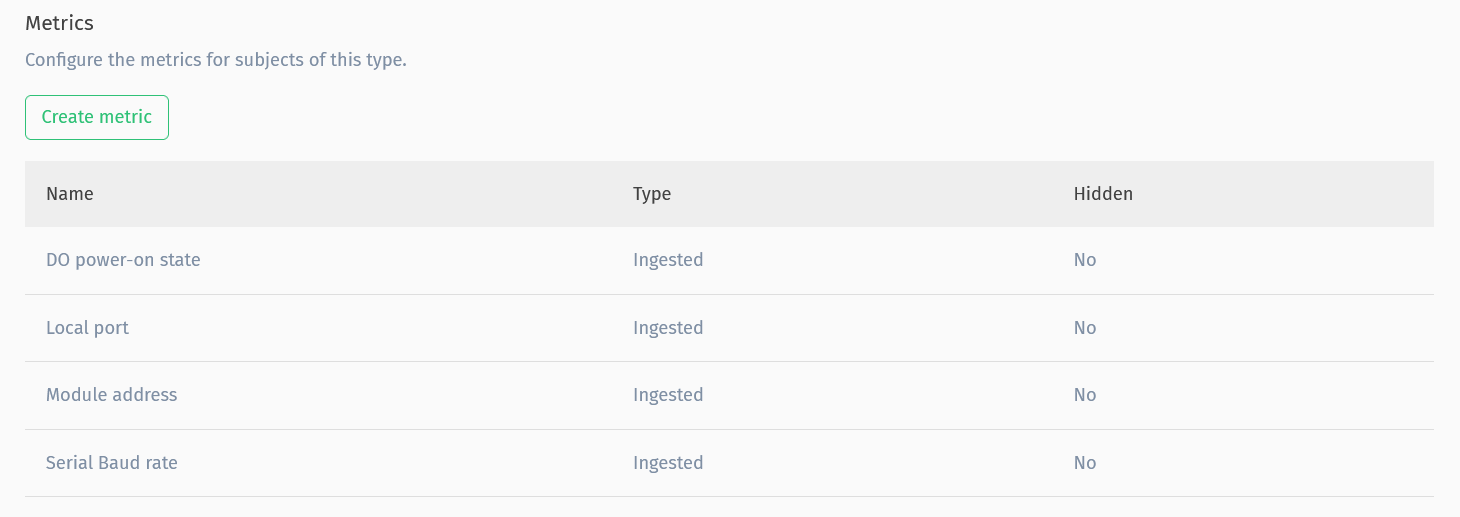
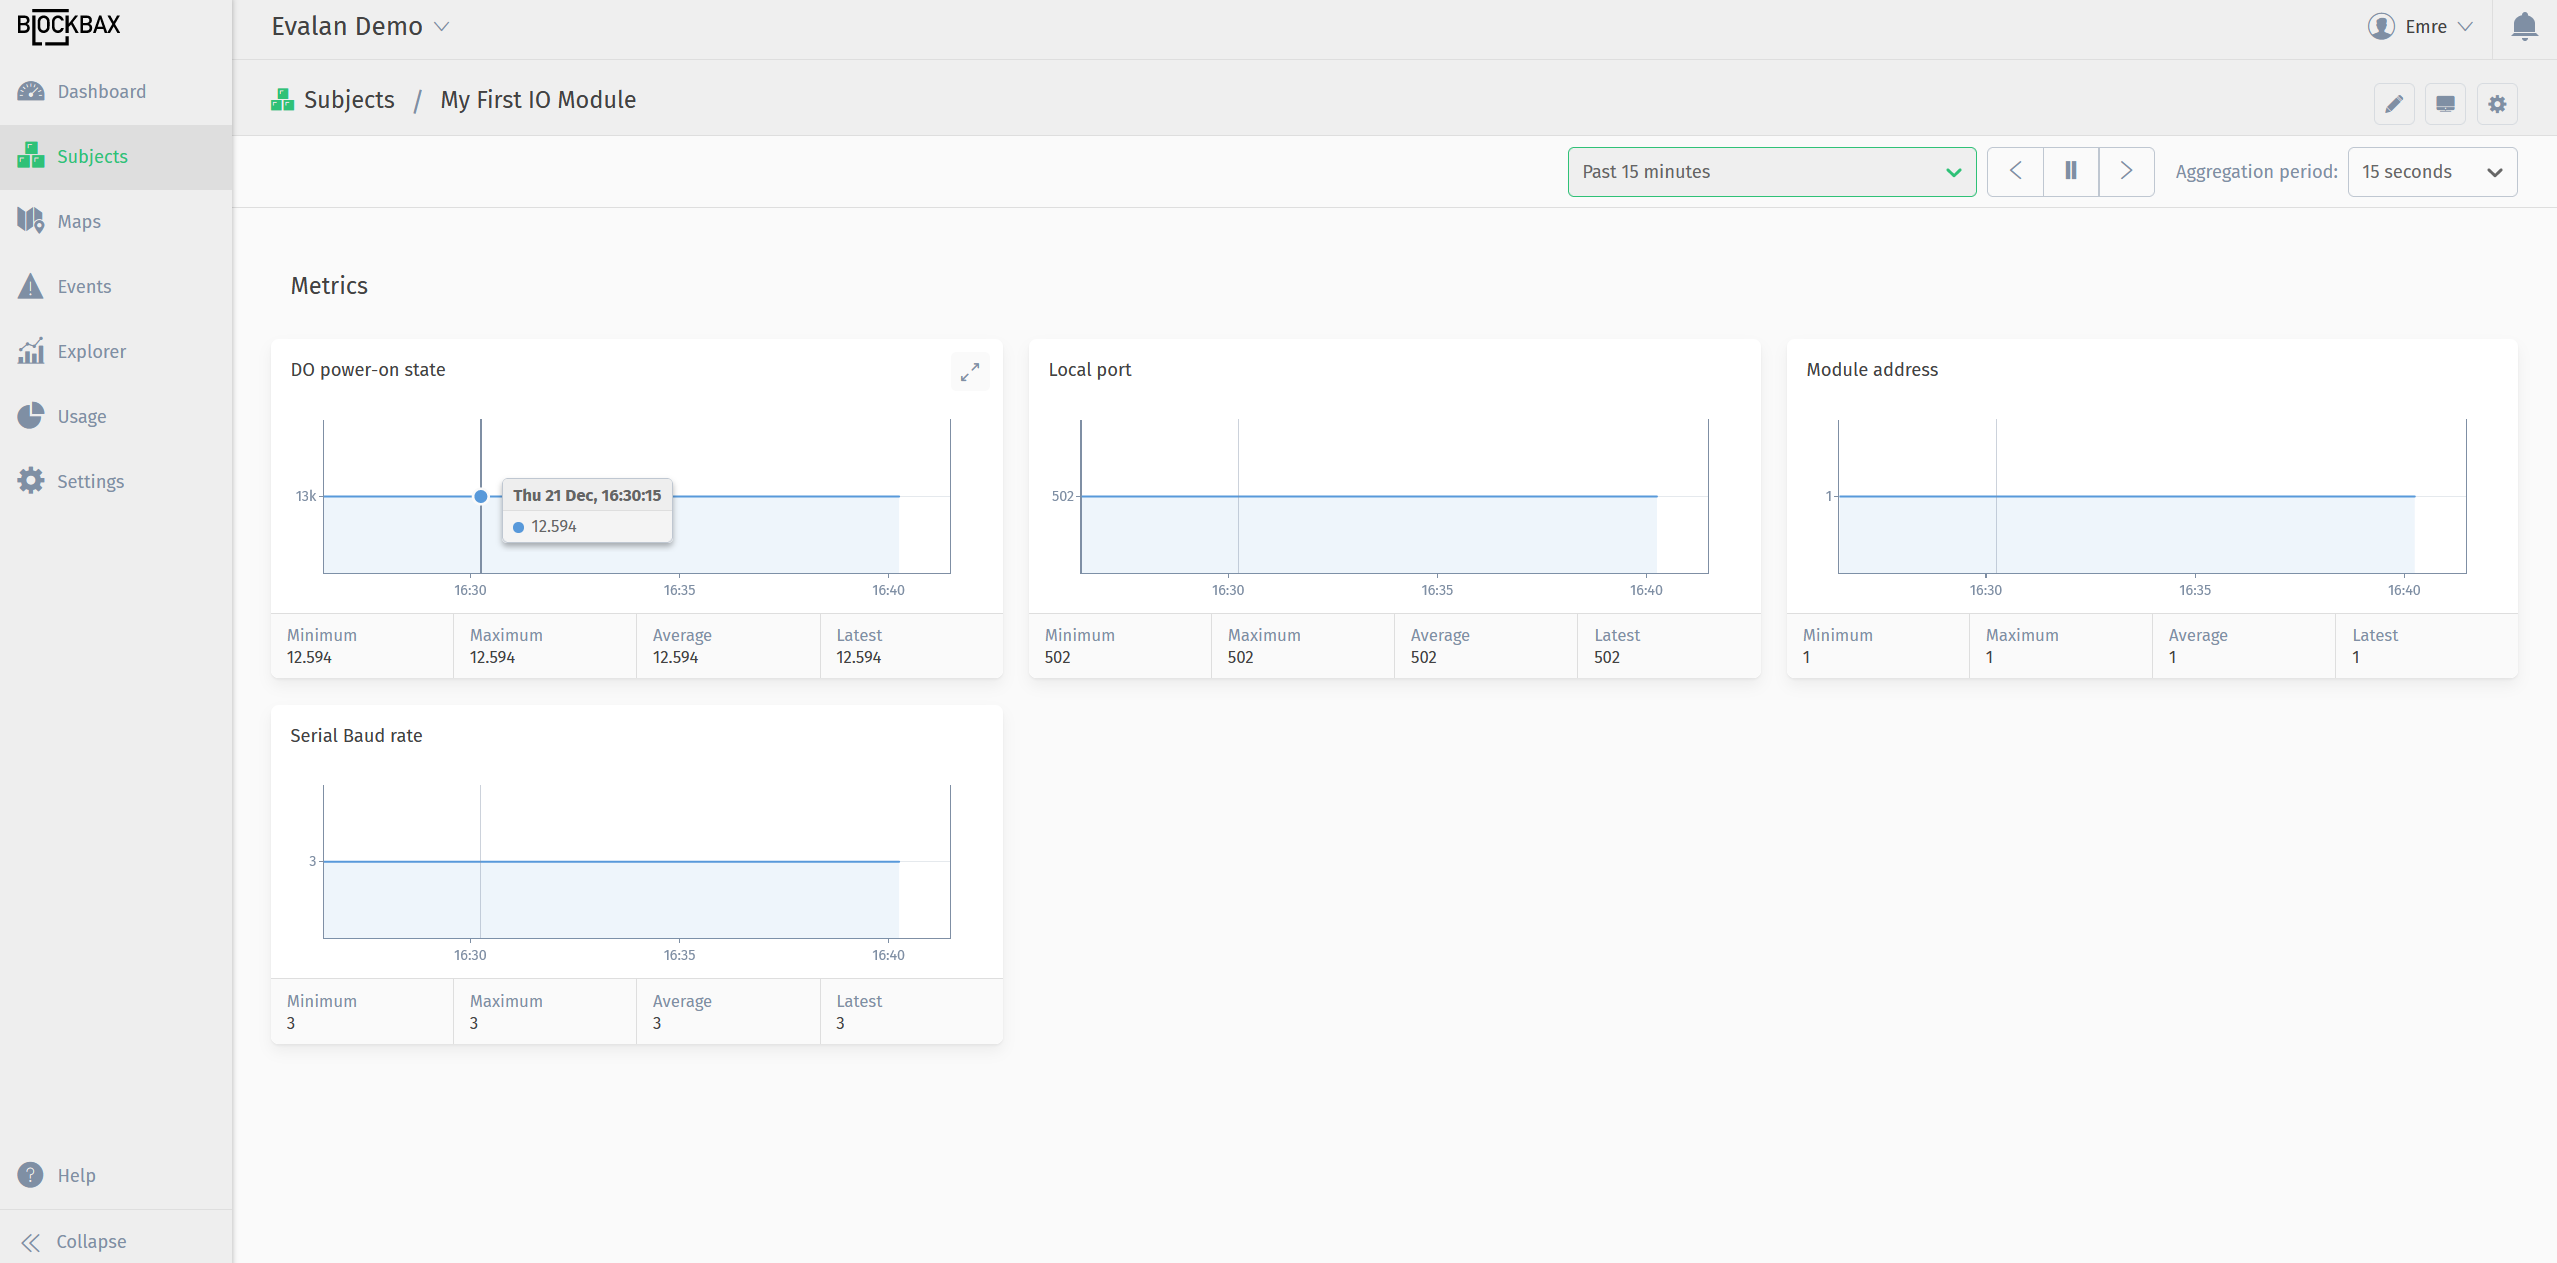
- You need to create Metrics for all data points pushed from BACE IoT Platform. For finding out which datatypes are pushed from BACE, in BACE Panel Go to Modbus Devices -> Click one of the Gateways -> Device Info. As you can see from the example below: Local port, Serial Baud rate, Module Adress and DO Power on-state are being read by BACE.
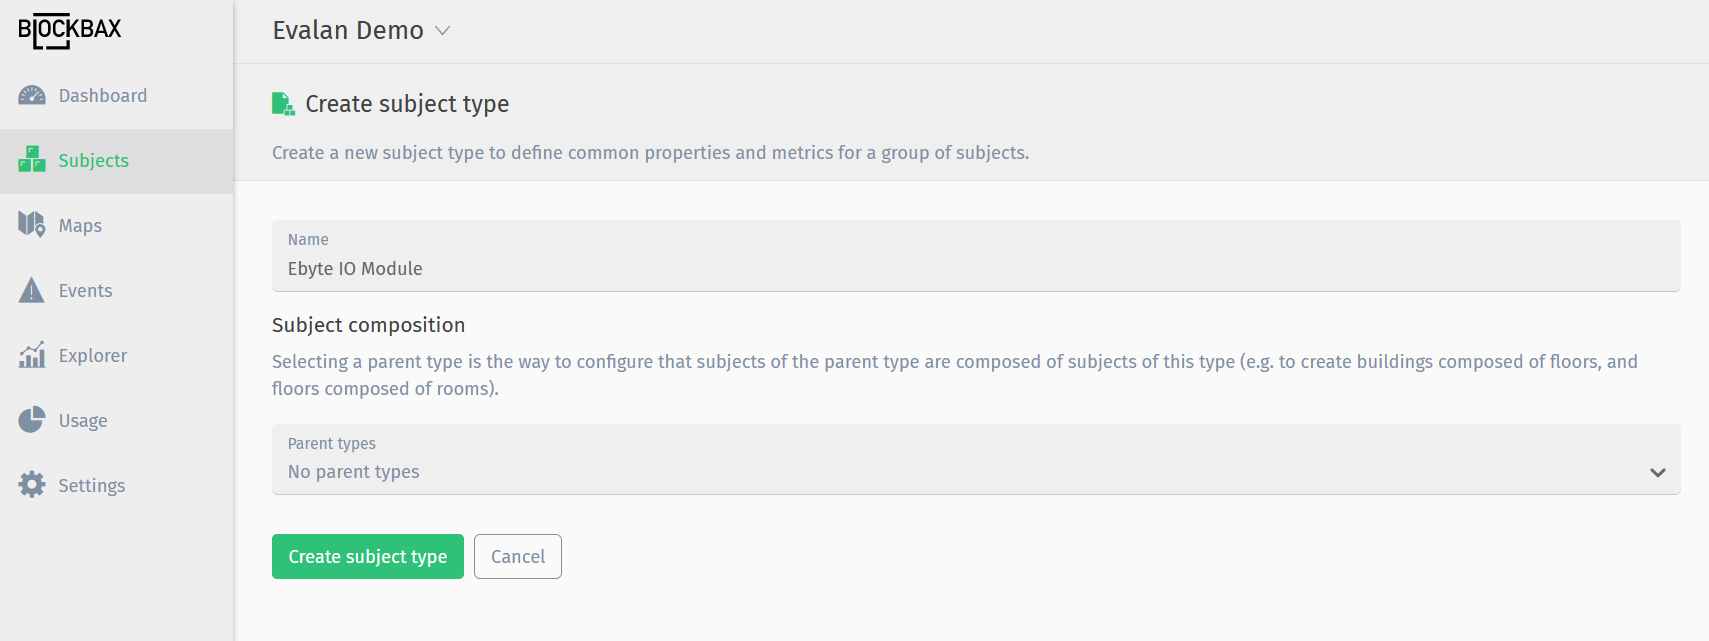
- Create a new subject type by clicking Subjects -> Types -> (+) Create a new subject type.
- Provide a name that you can remember. In this example, we are integrating an Ebyte Modbus IO module so we named it with Ebyte IO Module.
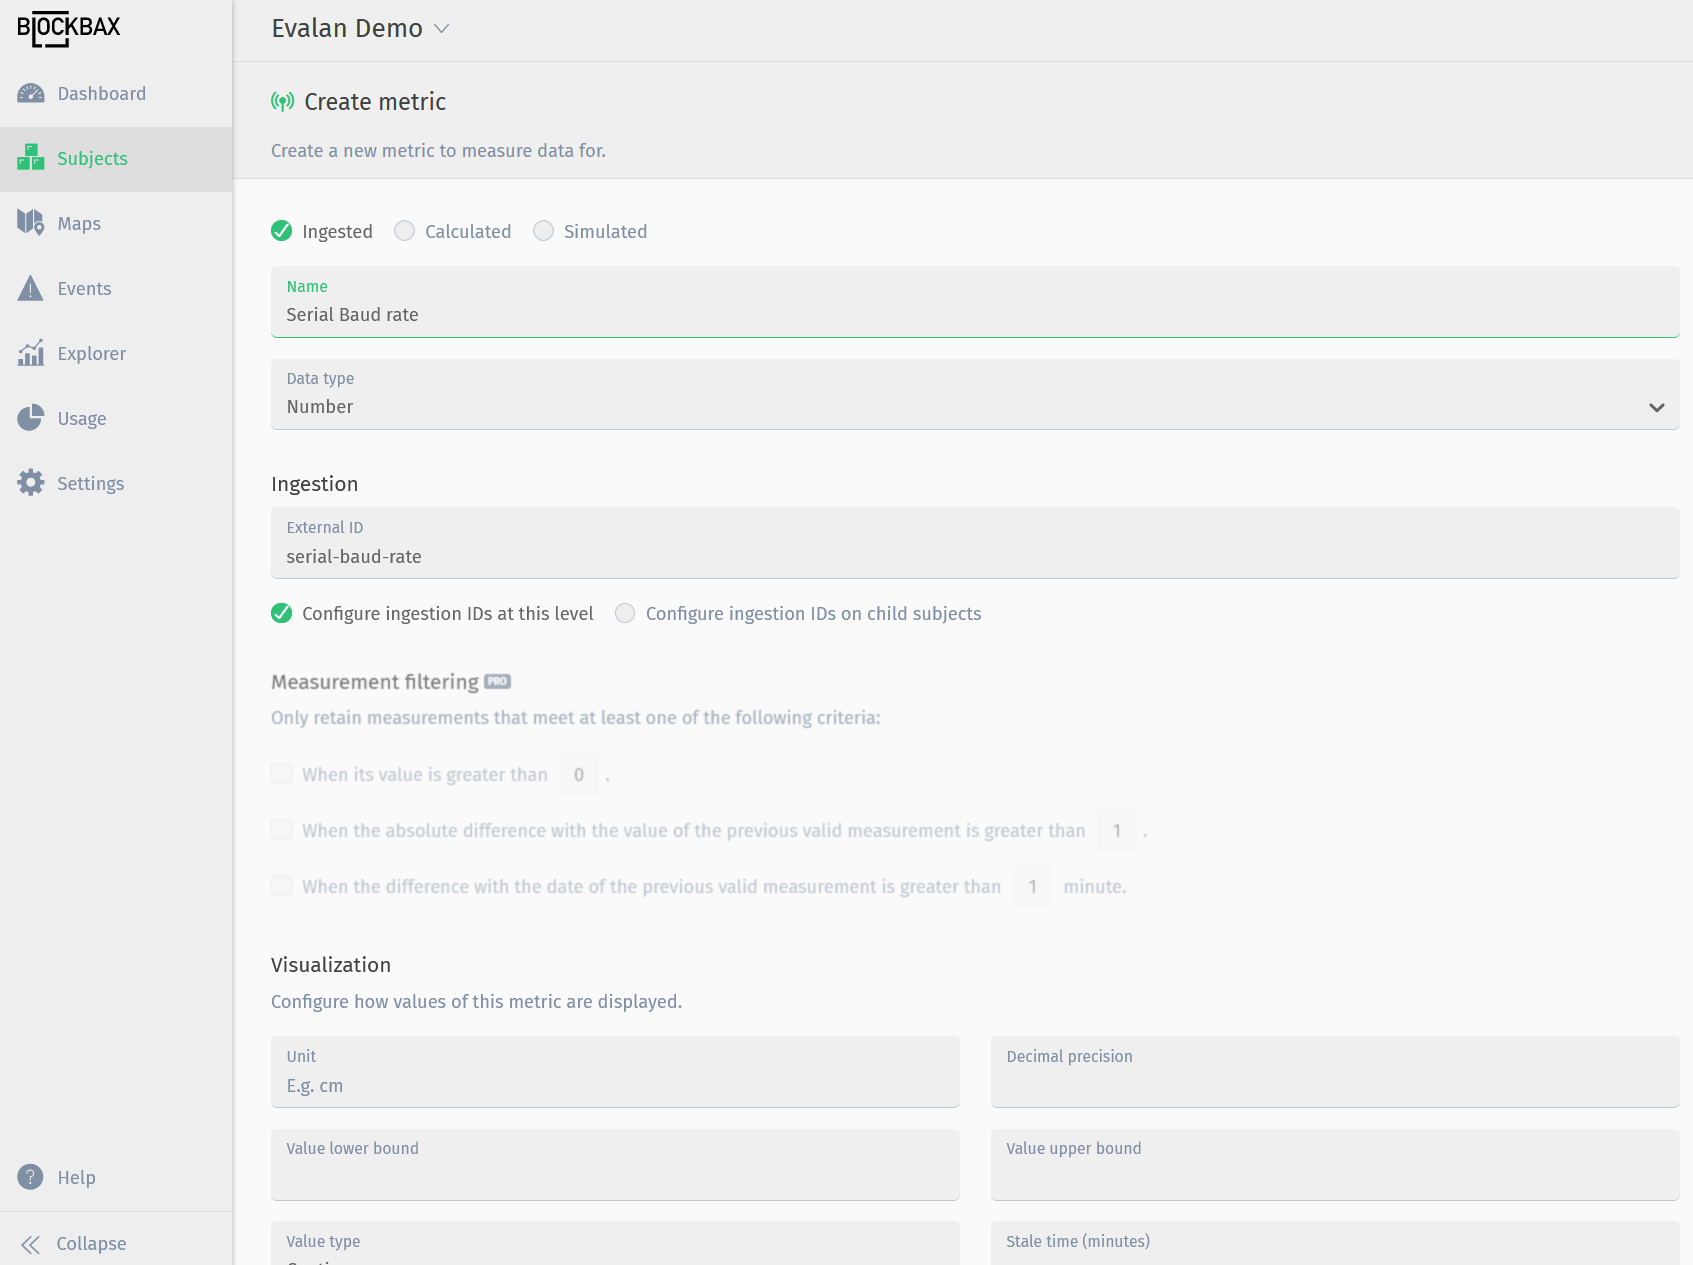
- In next screen click Create Metric to add all metrics into the subject type.
- Select ingested, relevant data type and click Create Metric. In this step you can also define additional attributes like unit, upper bound, etc. Refer to Blockbax documentation for each option.
- Add all metrics you want to see in Blockbax dashboard.
Create a Subject in Blockbax
In next step you need to create a new subject using the subject type that was created in the previous step.
- Go to Subjects -> Overview -> (+) Create a new subject.
- Select the subject type you have created in previous screen, and provide a name. External ID should match the `source_device`` attribute in the BACE Webhook response. This UUID is also available in the BACE Panel URL.
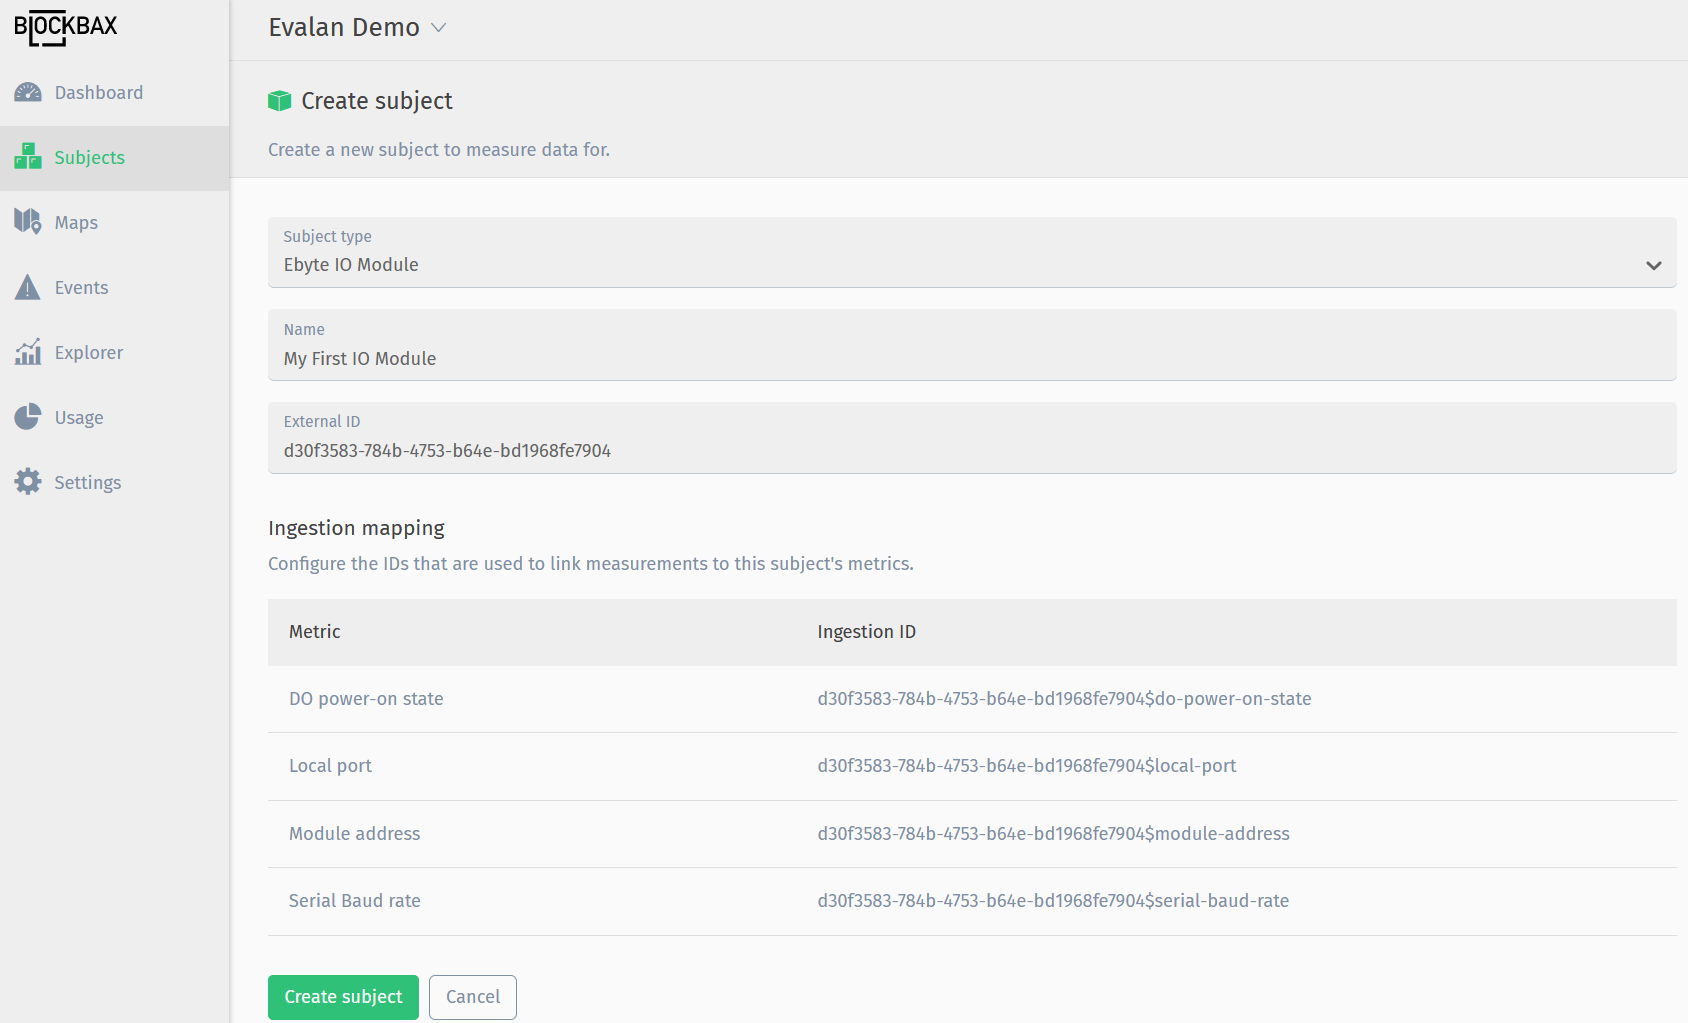
- Click Create Subject to finalize. Data will start to flow in and graphs will start to fill.
You have successfully integrated data from BACE Platform into Blockbax now! You can continue with creating custom dashboards following steps in Blockbax documentation.