Docs
ABB Smart Communication Card (SCC)
The ABB Smart Communication Card (SCC) is an IT-OT gateway that connects field devices (Modbus RTU/TCP, OPC UA) to cloud-based systems and lets you run control logic via Node-RED. This guide shows how to:
- Get on-network access to the SCC WebUI
- Configure static or DHCP addressing
- Enable Node-RED and OPC UA
- Configure Modbus RTU
- Test connectivity
- Set up data flows and send data to Blockbax
Prerequisites
- ABB Smart Communication Card with default firmware
- PC with Ethernet port
- Network switch or router
- OPC UA client (e.g. UAExpert. Optional step that helps with debugging)
- Node-RED basic knowledge
- Modbus RTU device (e.g. TCN) and wiring accessories (if not shipped assembled)
1. Access the SCC WebUI
- Connect your PC to the SCC LAN port.
- SCC defaults to DHCP server on 192.168.2.0/24 and WebUI at 192.168.2.1.
- If that conflicts with another gateway, disconnect the conflicting device, then browse to http://192.168.2.1.
2. Configure LAN interface
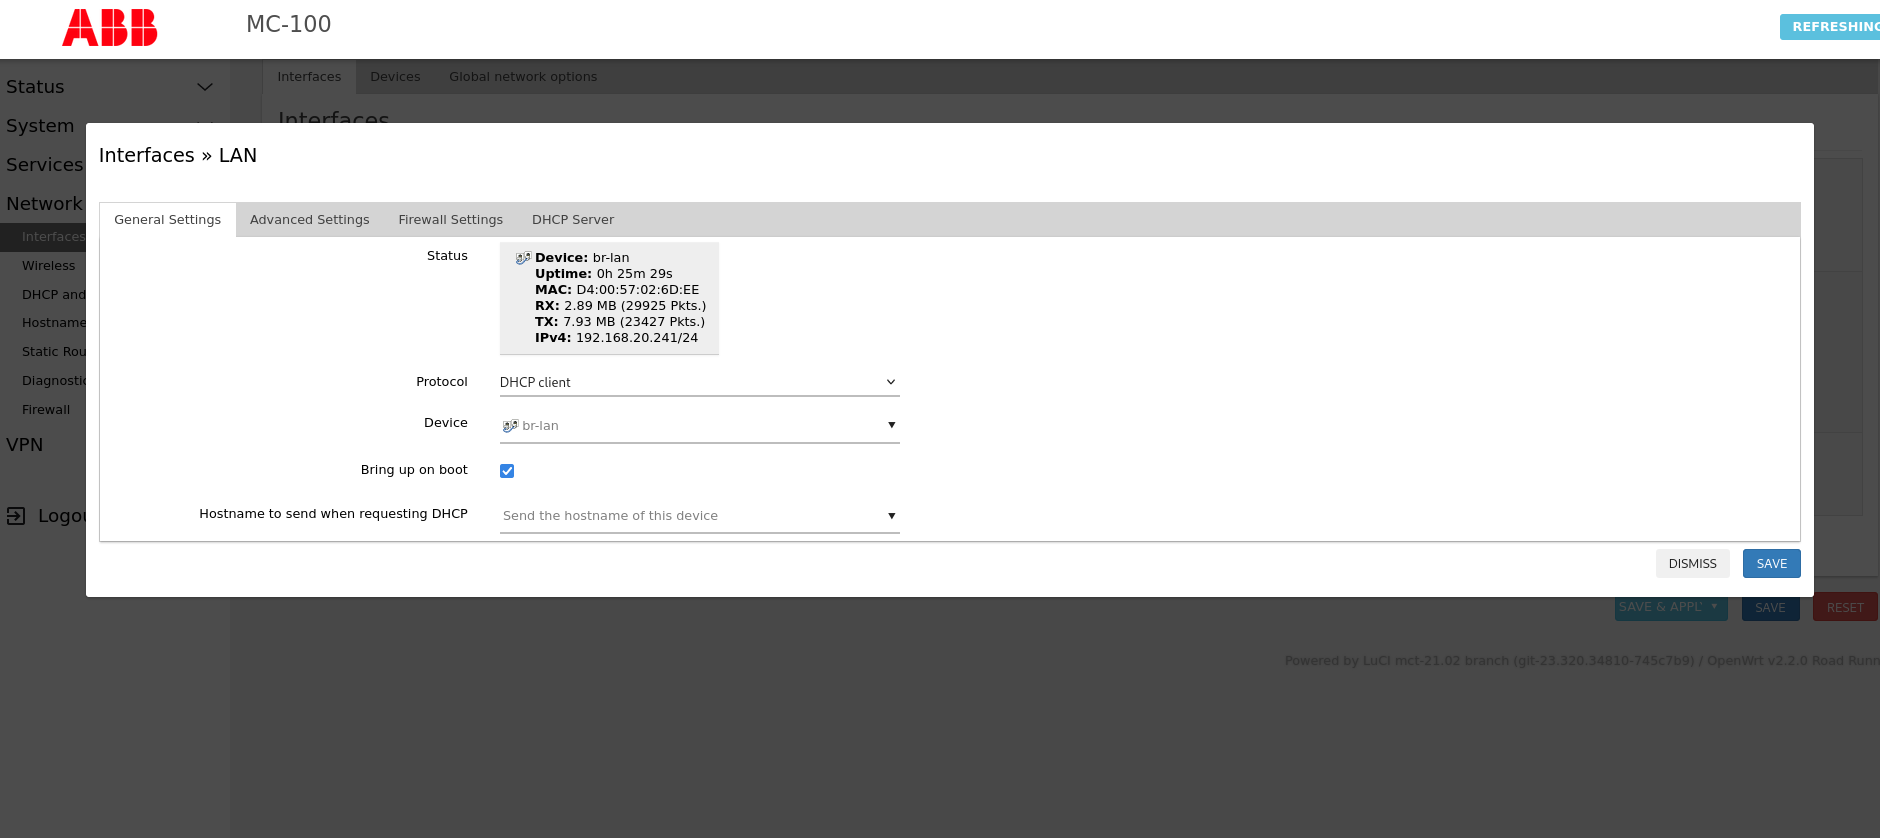
A. DHCP client (preferred)
- In WebUI → Network → Interface → EDIT → DHCP client: Enable DHCP.
- Connect the LAN port to your DHCP-serving router or switch.
- Apply and reboot.
- Scan your network to find the SCC’s assigned IP.
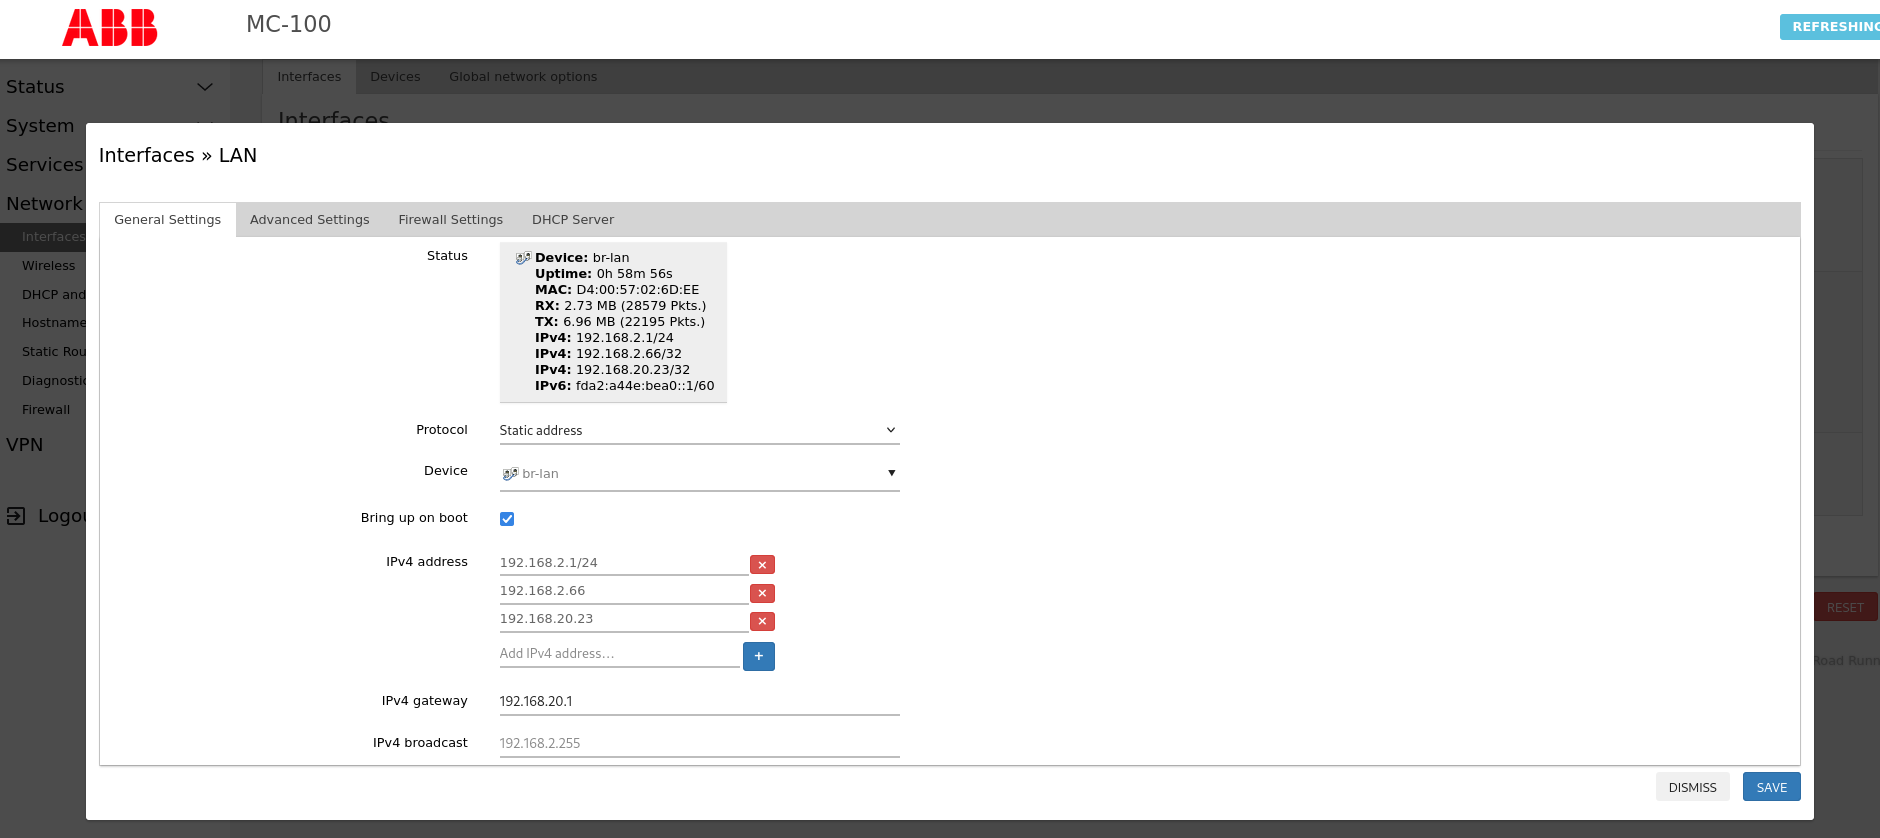
B. Static IP (Manual)
- In WebUI → Network → Interface → EDIT:
- Set the protocol to
Static addressand confirm theSWITCH PROTOCOL. - Keep the default 192.168.2.1/24 address.
- Add a secondary address: e.g. 192.168.20.23/24.
- Set IPv4 gateway to your router’s IP (e.g. 192.168.20.1).
- Set the protocol to
- Save & Apply.
Important note about setting static IP
Do not remove 192.168.2.1/24 or you’ll lose default access via LAN and need a factory reset.
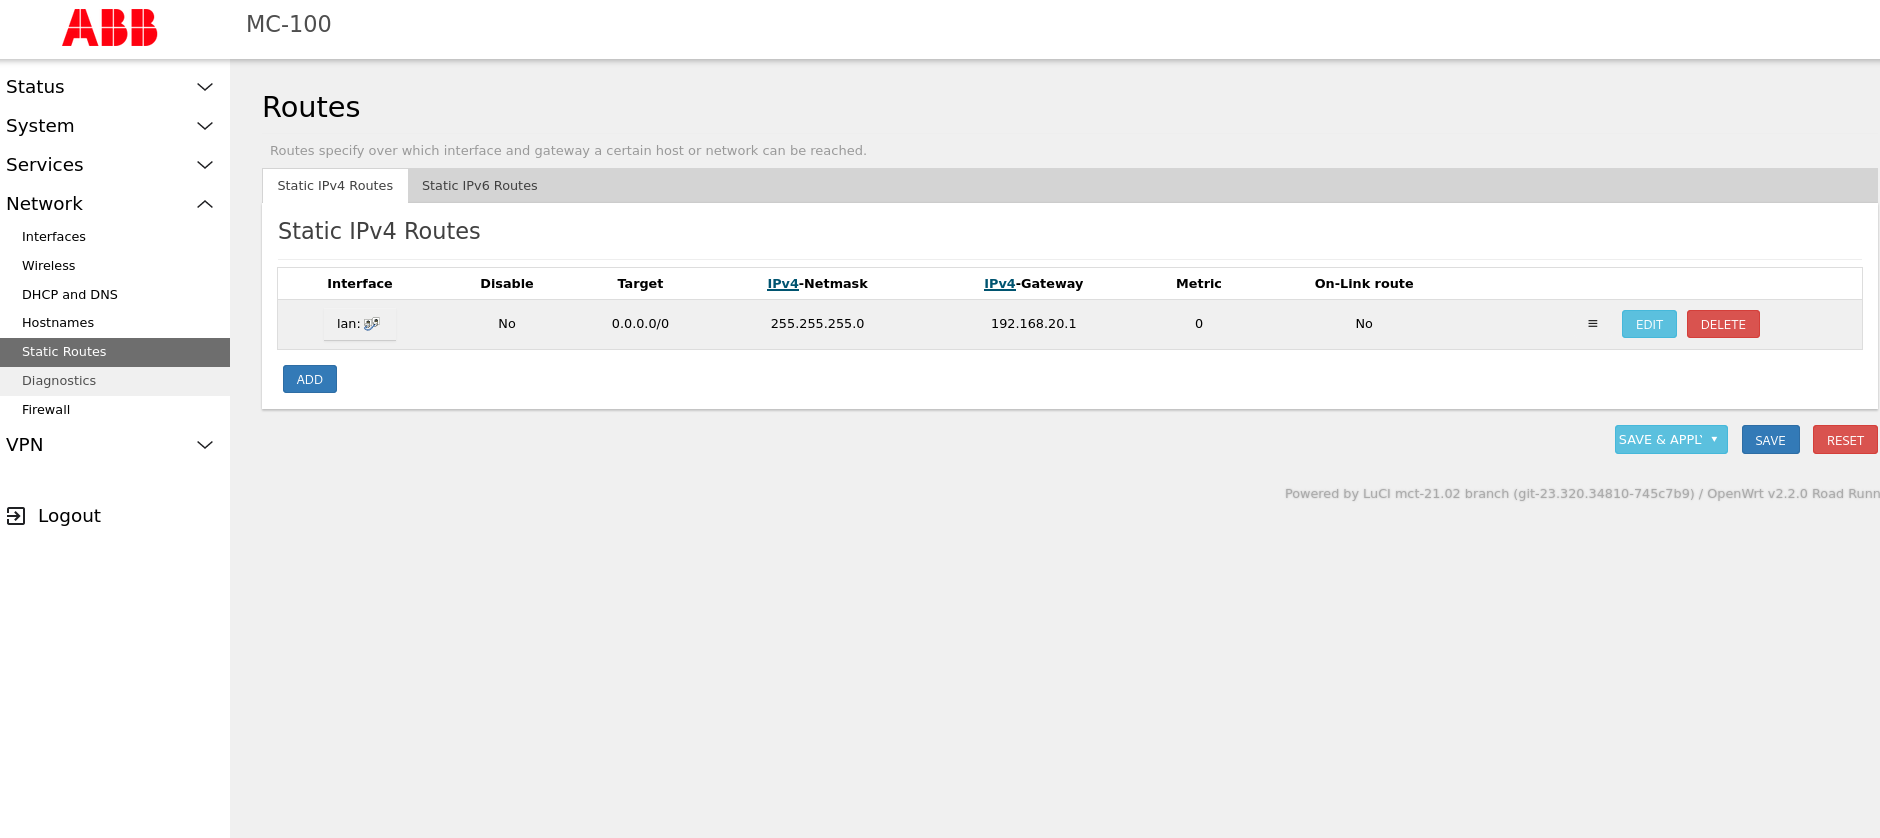
You can configure all the targets on the LAN interface to route to the gateway to which the SCC is connected.
3.1. In WebUI → Network → Static Routes → ADD → Static IPv4 Routes:
• Destination: 0.0.0.0/0
• Gateway: your router’s IP (e.g. 192.168.20.1)Save & Apply.
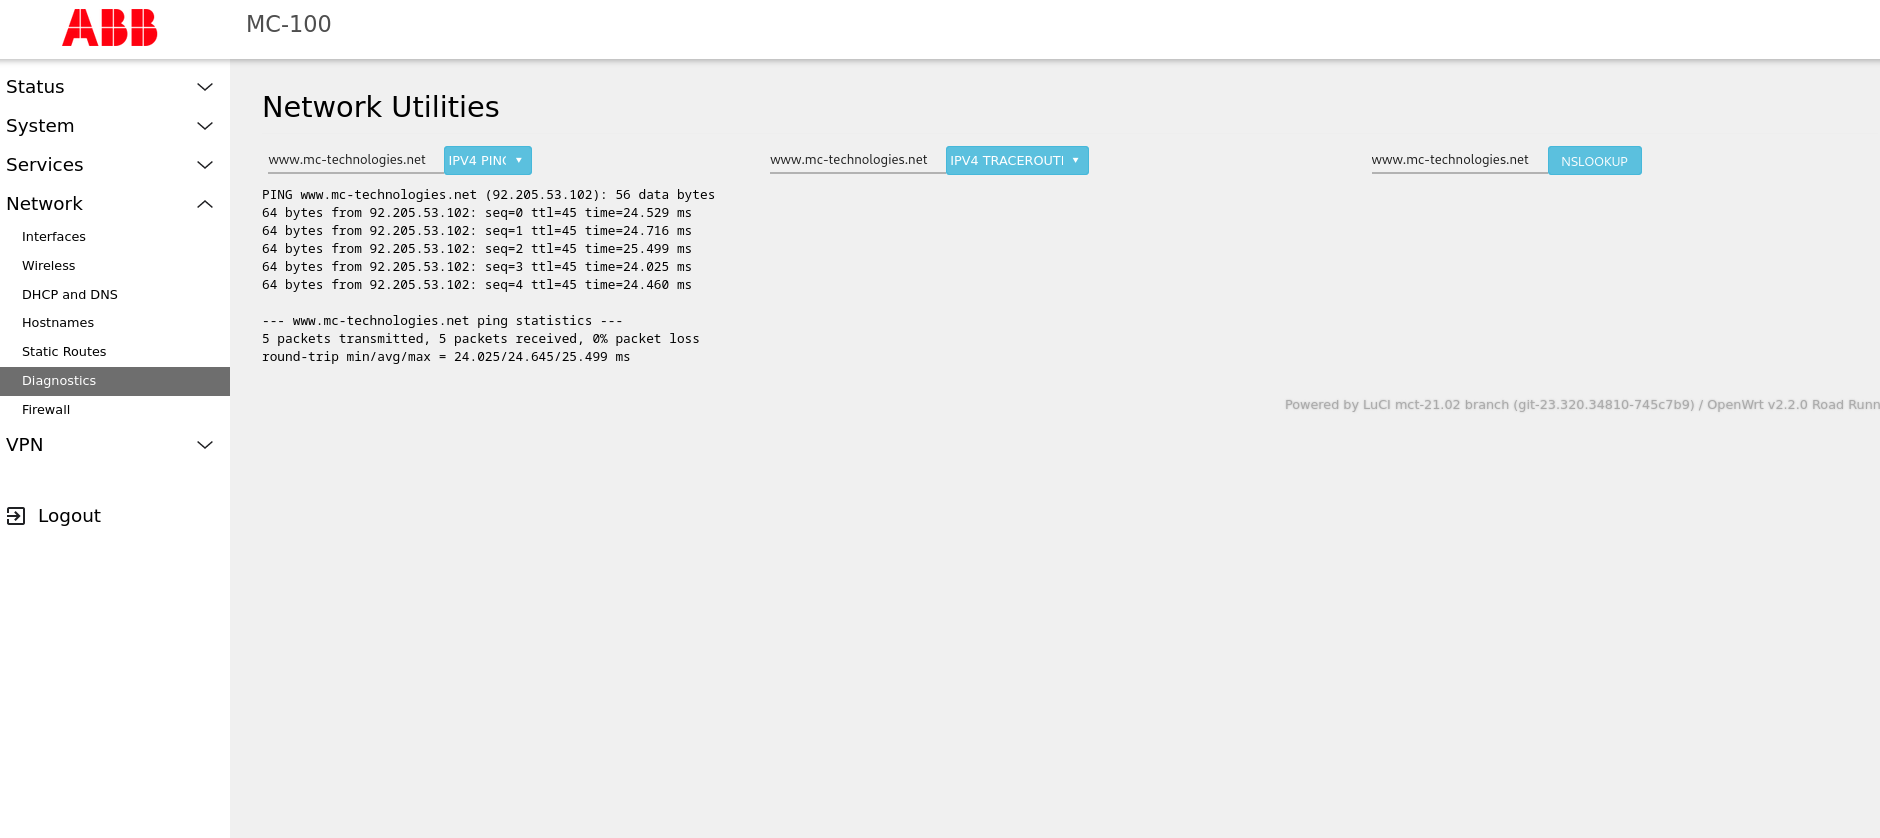
4. Verify network connectivity
- In WebUI → Diagnostics → Use the default URL or enter a public IP (e.g. 8.8.8.8).
- Click ping to confirm WAN reachability.
5. Enable Node-RED
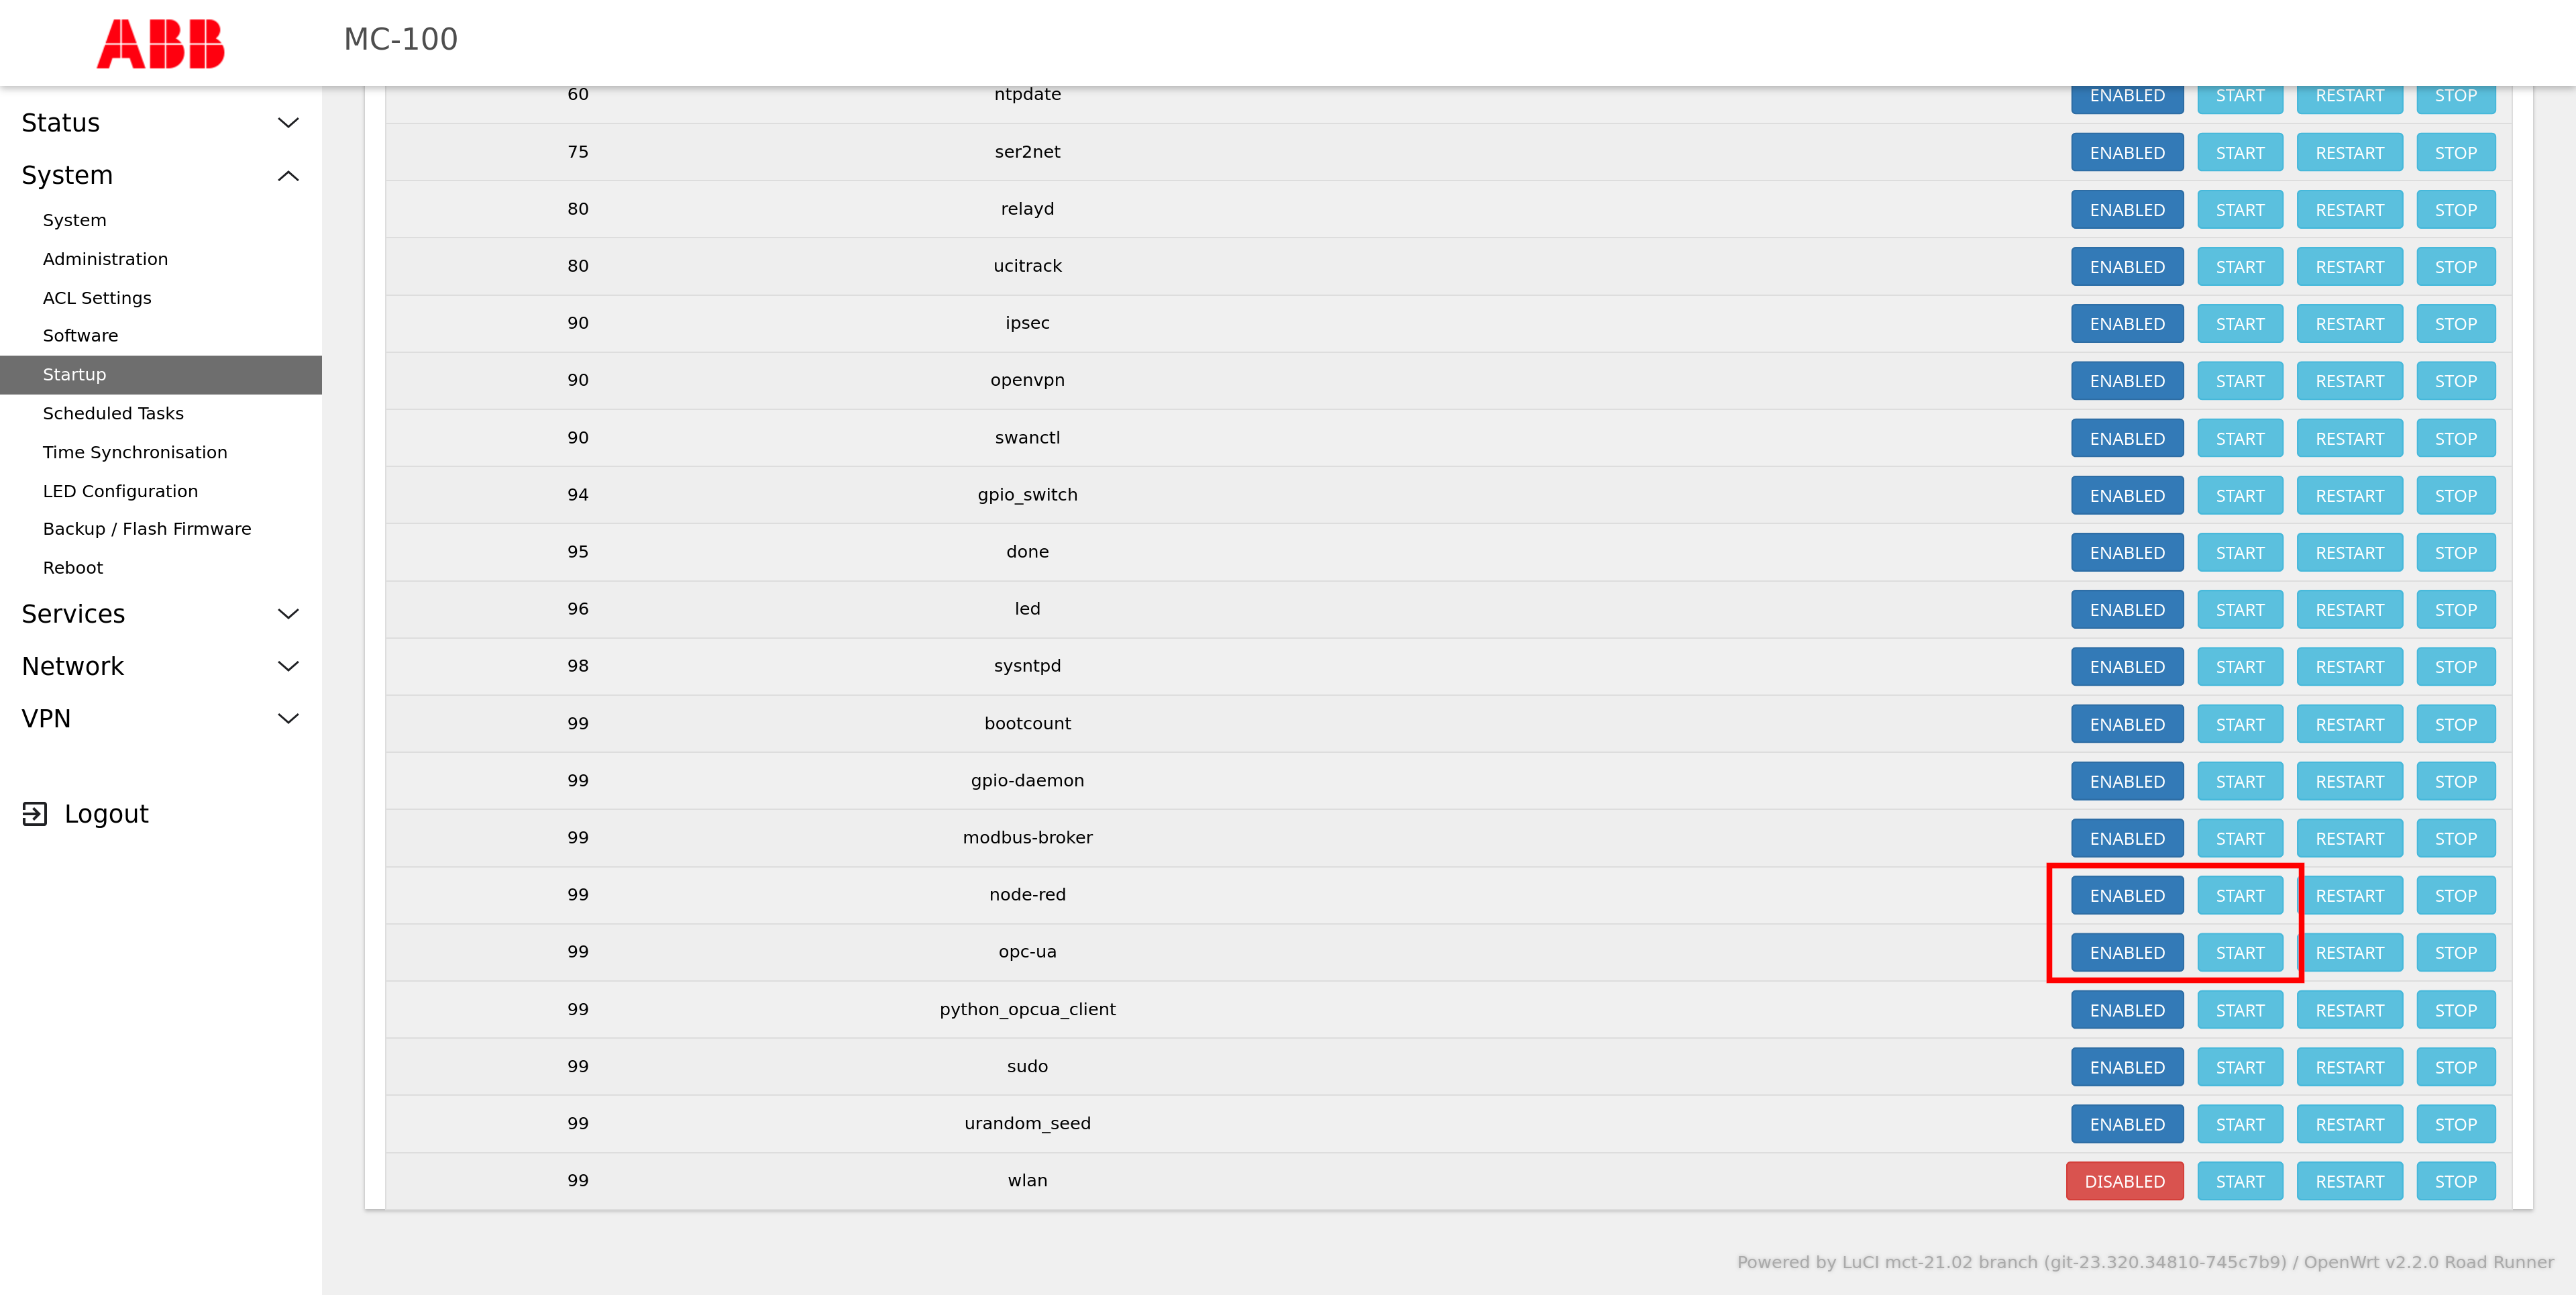
- In WebUI → System → Startup → node-red : Toggle Enable.
- Apply and wait for service start.
- Open http://<SCC_IP>:1880 in your browser.
6. Enable OPC UA server (if not enabled)
- In WebUI → System → Startup → opc-ua : Toggle Enable.
- You can now confirm connection with any client. See the next step.
- Default credentials: user “abb”, password “abb”.
7. Verify with an OPC UA client (optional)
To confirm that the OPC UA server is reachable, you can use any client to test the connection. One industry standard tool for this is UAExpert. In order to use UAExpert follow these steps:
- Create a new server connection pointing to the SCC endpoint.
- Authenticate with the username “abb” and the password “abb”.
- Browse the address space and confirm that the device tags appear.
8. Configure Modbus RTU
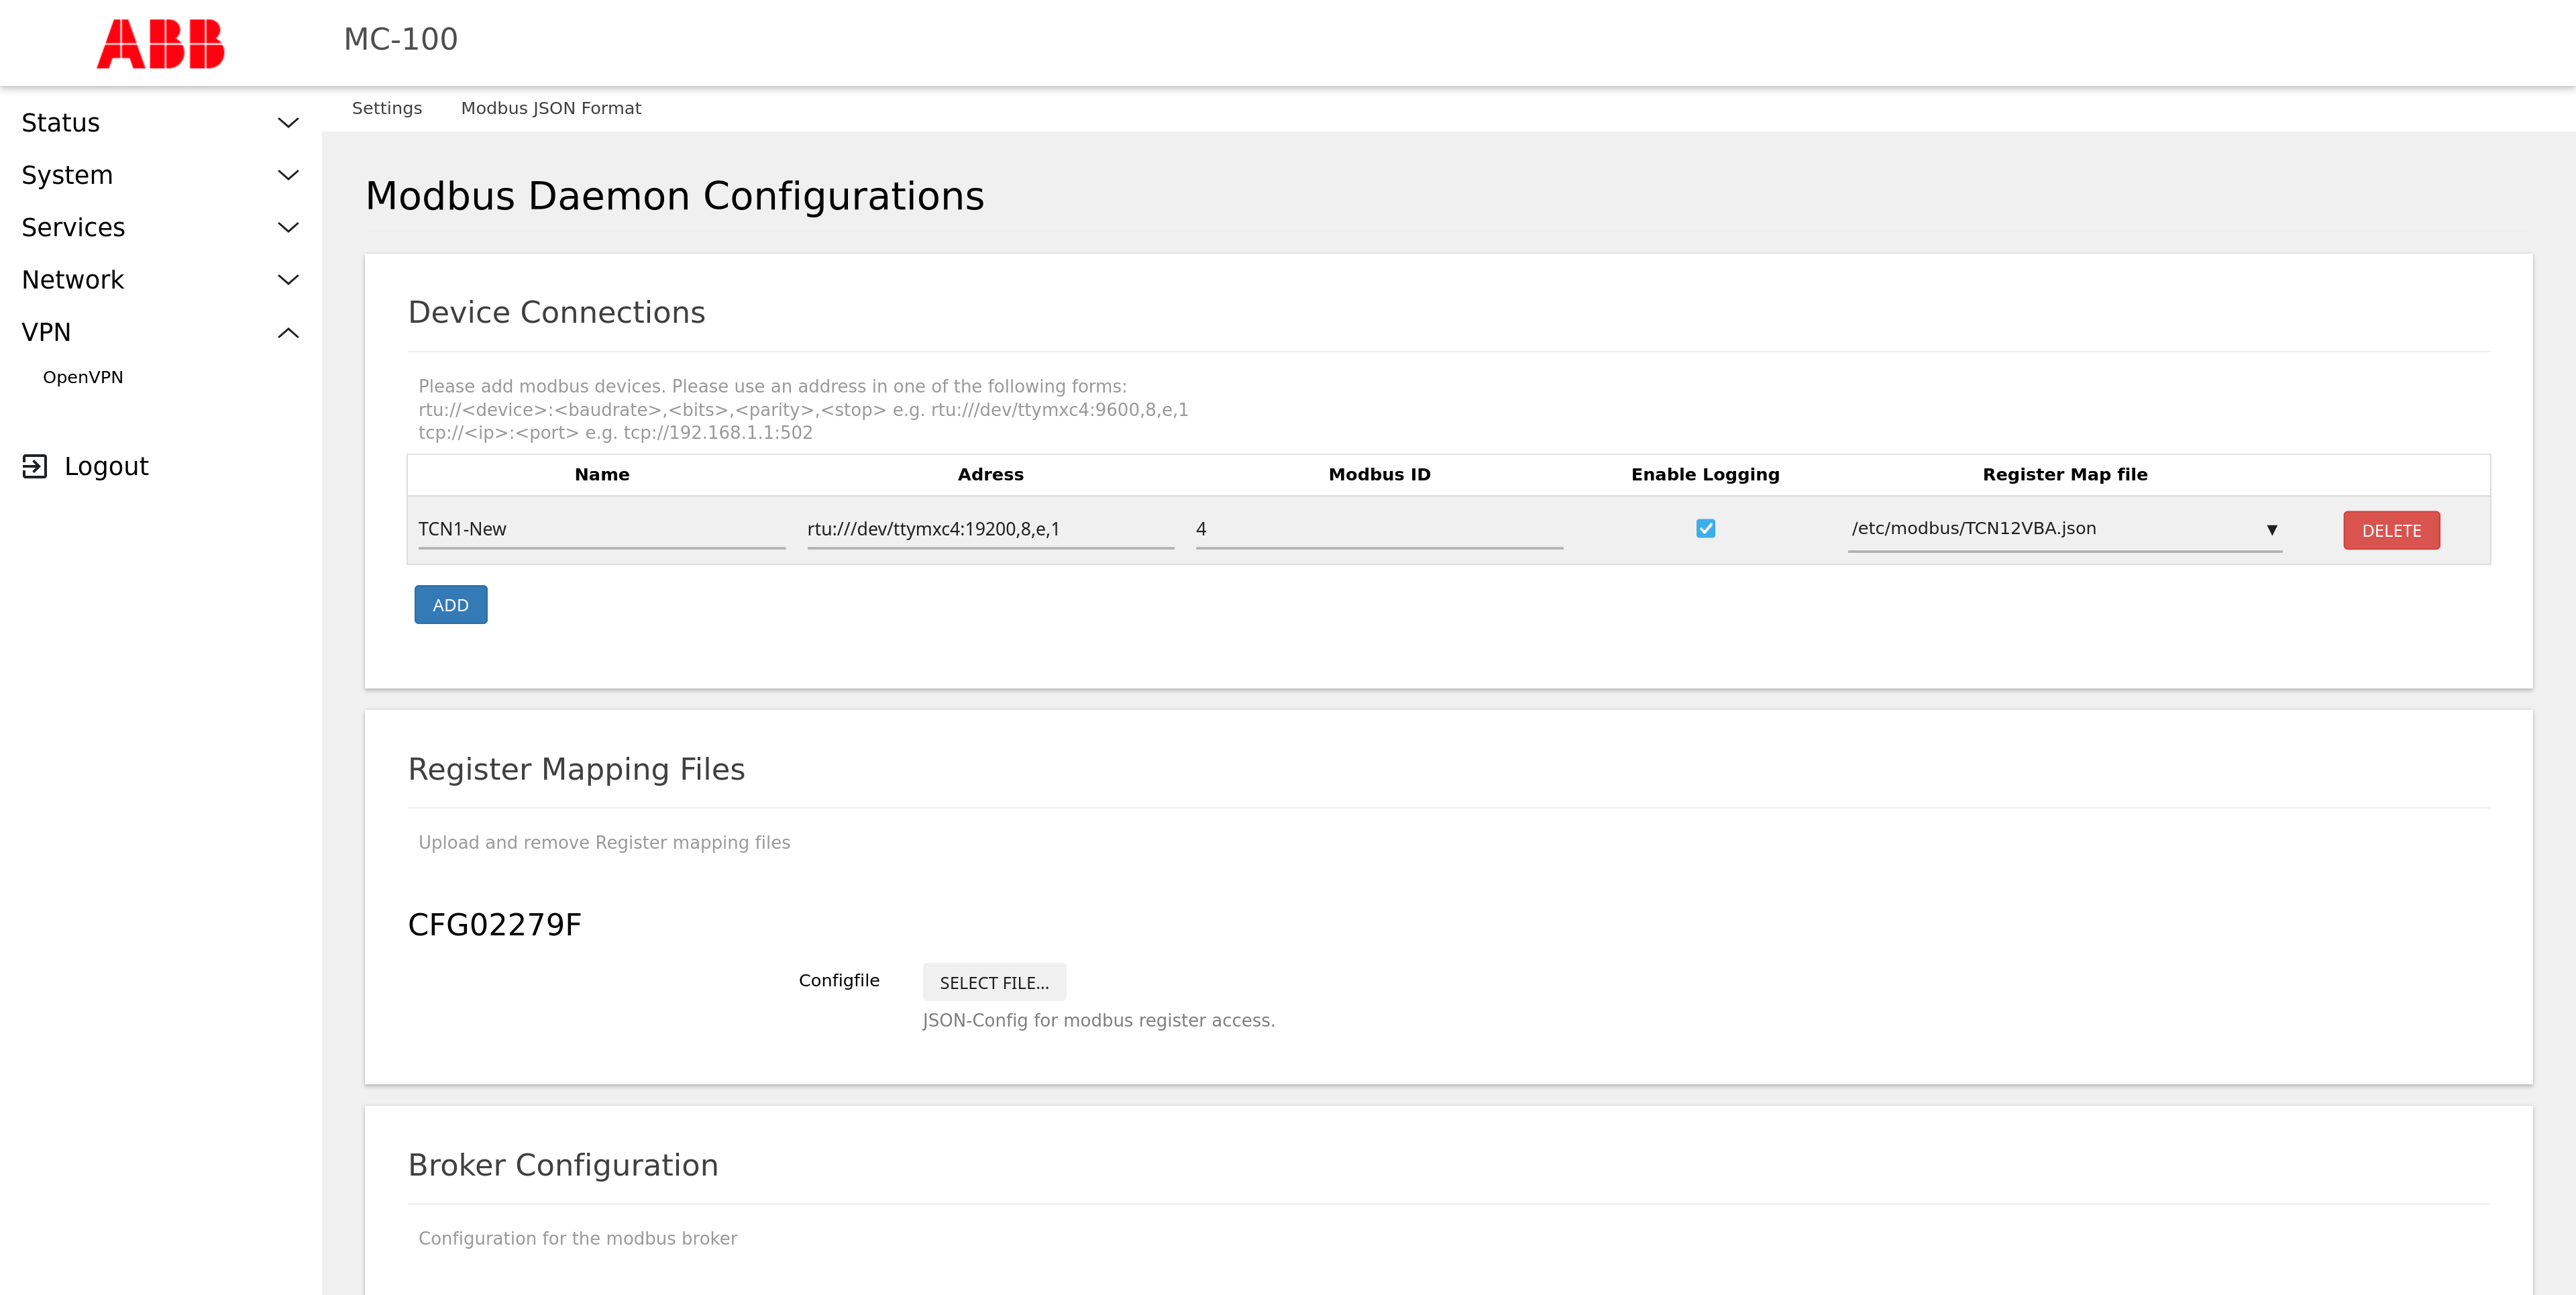
- In WebUI → Services → Modbus:
• Add a new instance or modify the existing.
• Set baud rate, parity, and data bits according to your device specifications.
• Override the default Device ID from 1 to your device’s ID (e.g., 4). If you don’t know the Modbus ID, you can check the manufacturer’s website for product specifications or support documentation related to the Modbus device. - Save & Apply.
9. Go to the Node-RED instance
To access the Node-RED instance, navigate to http://<SCC_IP>:1880.
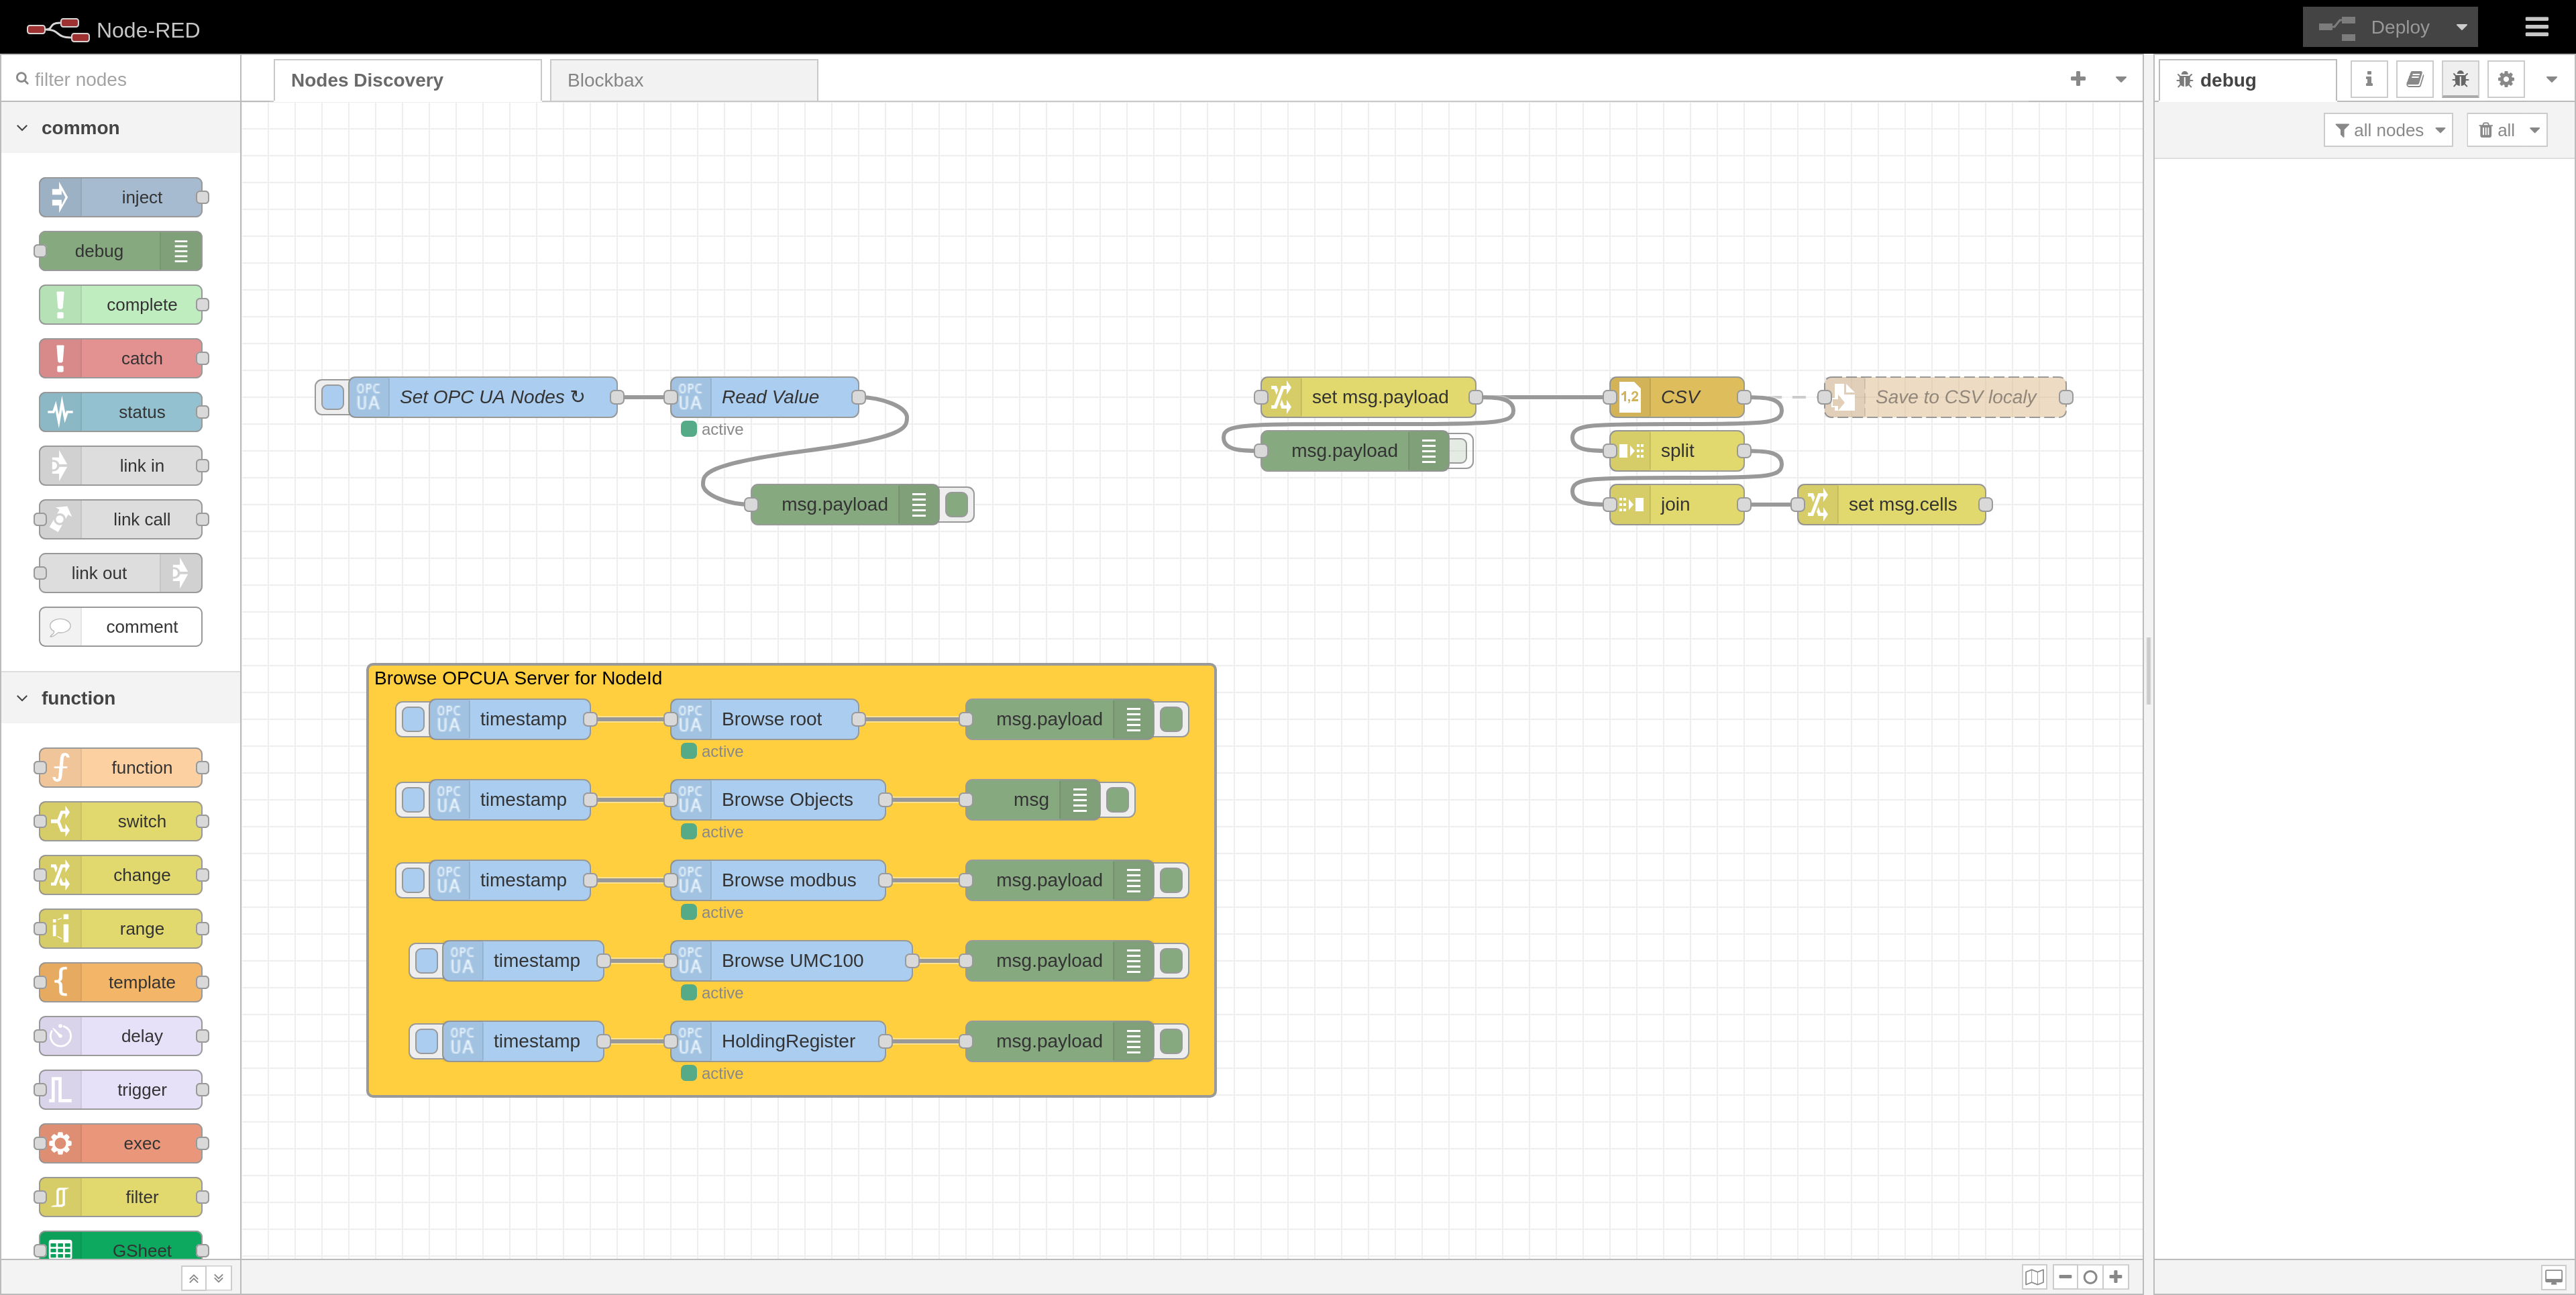
9.1 Node discovery
This is the default view. You can use the utility nodes available to browse the nodes in Modbus and find the nodes you want to read data from. Alternatively, you can use other Modbus clients, such as UAExpert, to discover the nodes. See step 7 for more details.
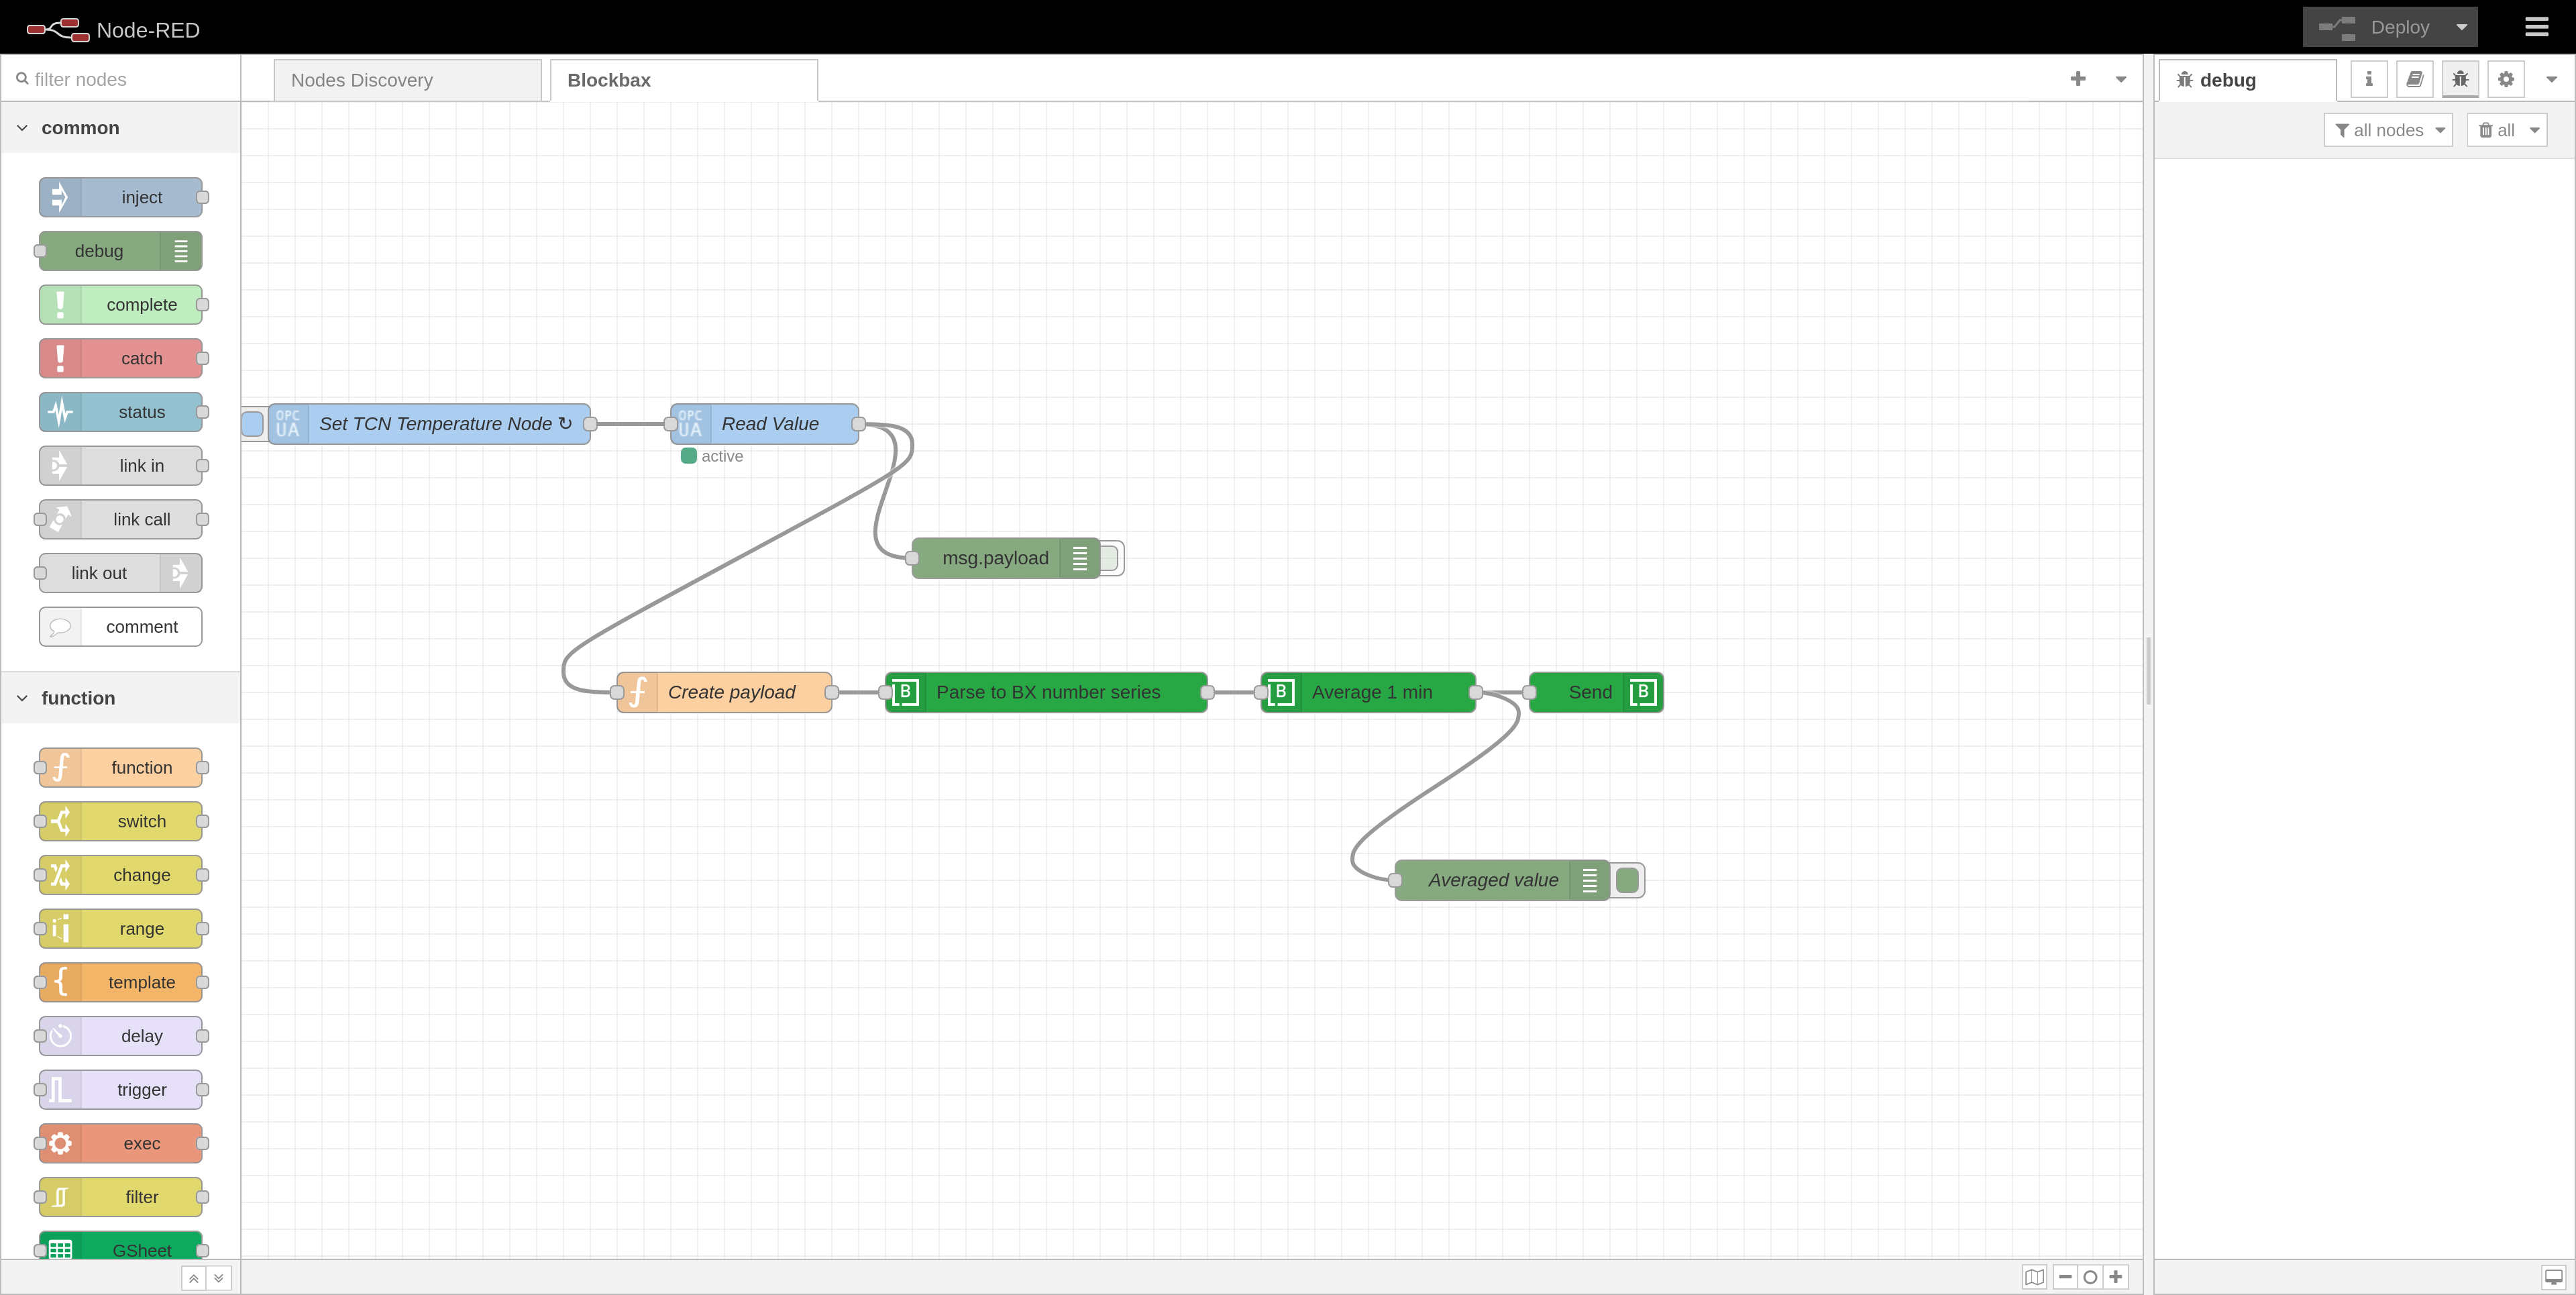
9.2 process the data and send it to Blockbax
After identifying the nodes of interest, you can start reading them using the OPC UA - IIOT - Inject node. Then, process and send the data using the Blockbax Node-RED module. You can install the Blockbax module via the Manage Palette in Node-RED. Refer to the Blockbax Node-RED documentation for more details.
Congratulations! Your ABB SCC is now network-connected, runs Node-RED flows, serves OPC UA, and talks Modbus RTU. You can build your edge logic and send data to Blockbax.
