Docs
Environments
With the Environments feature, you can create and manage multiple DTAP (Development, Testing, Acceptance, Production) environments to support structured workflows. Make and test changes in one environment (e.g., Acceptance), then promote those changes to the next stage (e.g., Production).
Creating environments
In order to create an environment you need to be an administrator of the production environment, as well as the organizational admin. With these rights, you will be able to navigate to project settings, and click to create an environment.

As shown in the screenshot above, you are able to create an environment one level lower than the current environment. Meaning from Production you can create an Acceptance environment, from an Acceptance environment you can create a Test environment and lastly, from the Test environment you can create a Development environment. After having created the environment, you will see a notification in the new environment that guides you through the process of fetching changes.
Switching environments
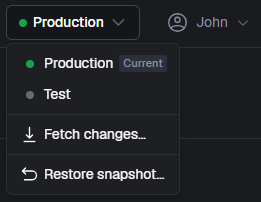
Once you’ve created an environment you will see a new environment switcher in the top of your page. Users that have access to multiple environments will see this switcher and by clicking on the dropdown you will be able to select which environment you would like to navigate to.
Please note that you will only see the production environment in the Blockbax mobile application.
Fetching changes
An important feature of Environments is the ability to synchronize environments. To do so, you are able to fetch changes per environment. In most cases, you will be synchronizing from a test environment to an acceptance environment, or from an acceptance environment to a production environment. This way you can prepare your changes in development, test, or acceptance environment and allow your target environment to fetch the changes that have been made. This is considered the normal flow of changes to synchronize across environments. However, when provisioning a new environment, for example an acceptance environment, you will notice that you start with a blank environment, in this case you will need to fetch the changes from production to populate your acceptance environment.
To fetch changes, click on the environments selector and click the button to fetch changes. You will see a screen with the changes that can be fetched from the desired environment. Any changes that have been made in said environment should be visible in this popup. By opening the group boxes you can see if items were added, deleted or modified and you are able to select on a granular level which changes you would like to fetch into your environment:
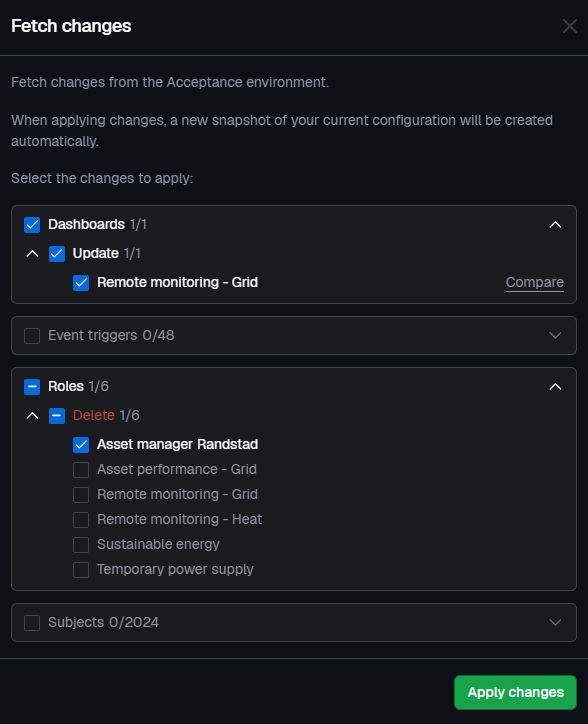
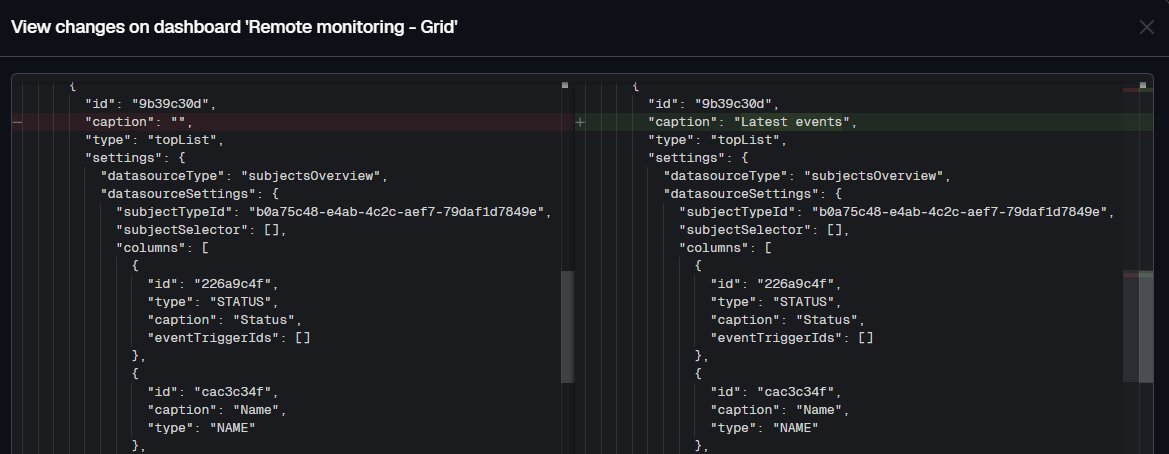
You can see the details of the change by using the ‘Compare’ button:
The following resources are synchronized between environments: property types, subject types, metrics, actions, subjects, event triggers, inbound connectors, dashboards, and roles. Other resources, such as members or webhooks are not synchronized. Timeseries data such as measurements, events and alarms is also not synchronized.
Cascading changes are always synchronized. For example, when a property type is deleted, the type and its values are also removed from subject types and subjects. When the deletion of the property type is selected to be synchronized, but an affected subject type or subject is not, the property type and its values will still be removed from that subject type or subject.
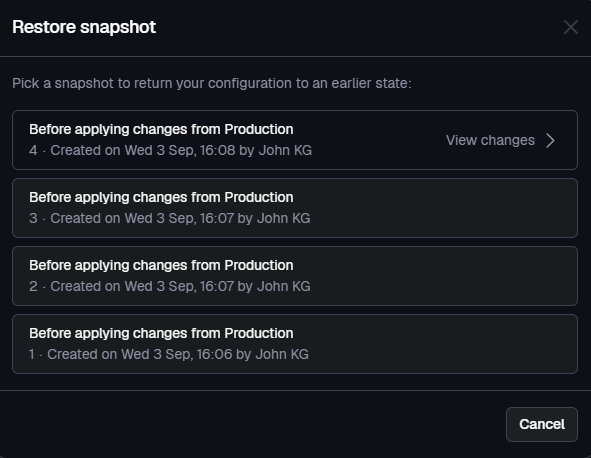
Restoring snapshots
Whenever fetching changes into an environment, a snapshot of the environment before the fetch will be created. This snapshot is meant to allow users to restore changes that have been applied and reverting to a previous snapshot. When selecting the option to restore a snapshot, you will first see a list of snapshots to select from, and when clicking through on the desired snapshot you can also select what changes you would like to restore.