Docs
Alarms
An alarm serves as a task for a user to follow up on problematic events. Alarms are created automatically from an event, if this is configured for the event trigger. Users can take actions in the real world to resolve the cause of the alarm. Once the alarm is no longer active, i.e. the latest event has been suppressed or is not problem or warning anymore, it can be closed marking its resolution.
Managing alarms
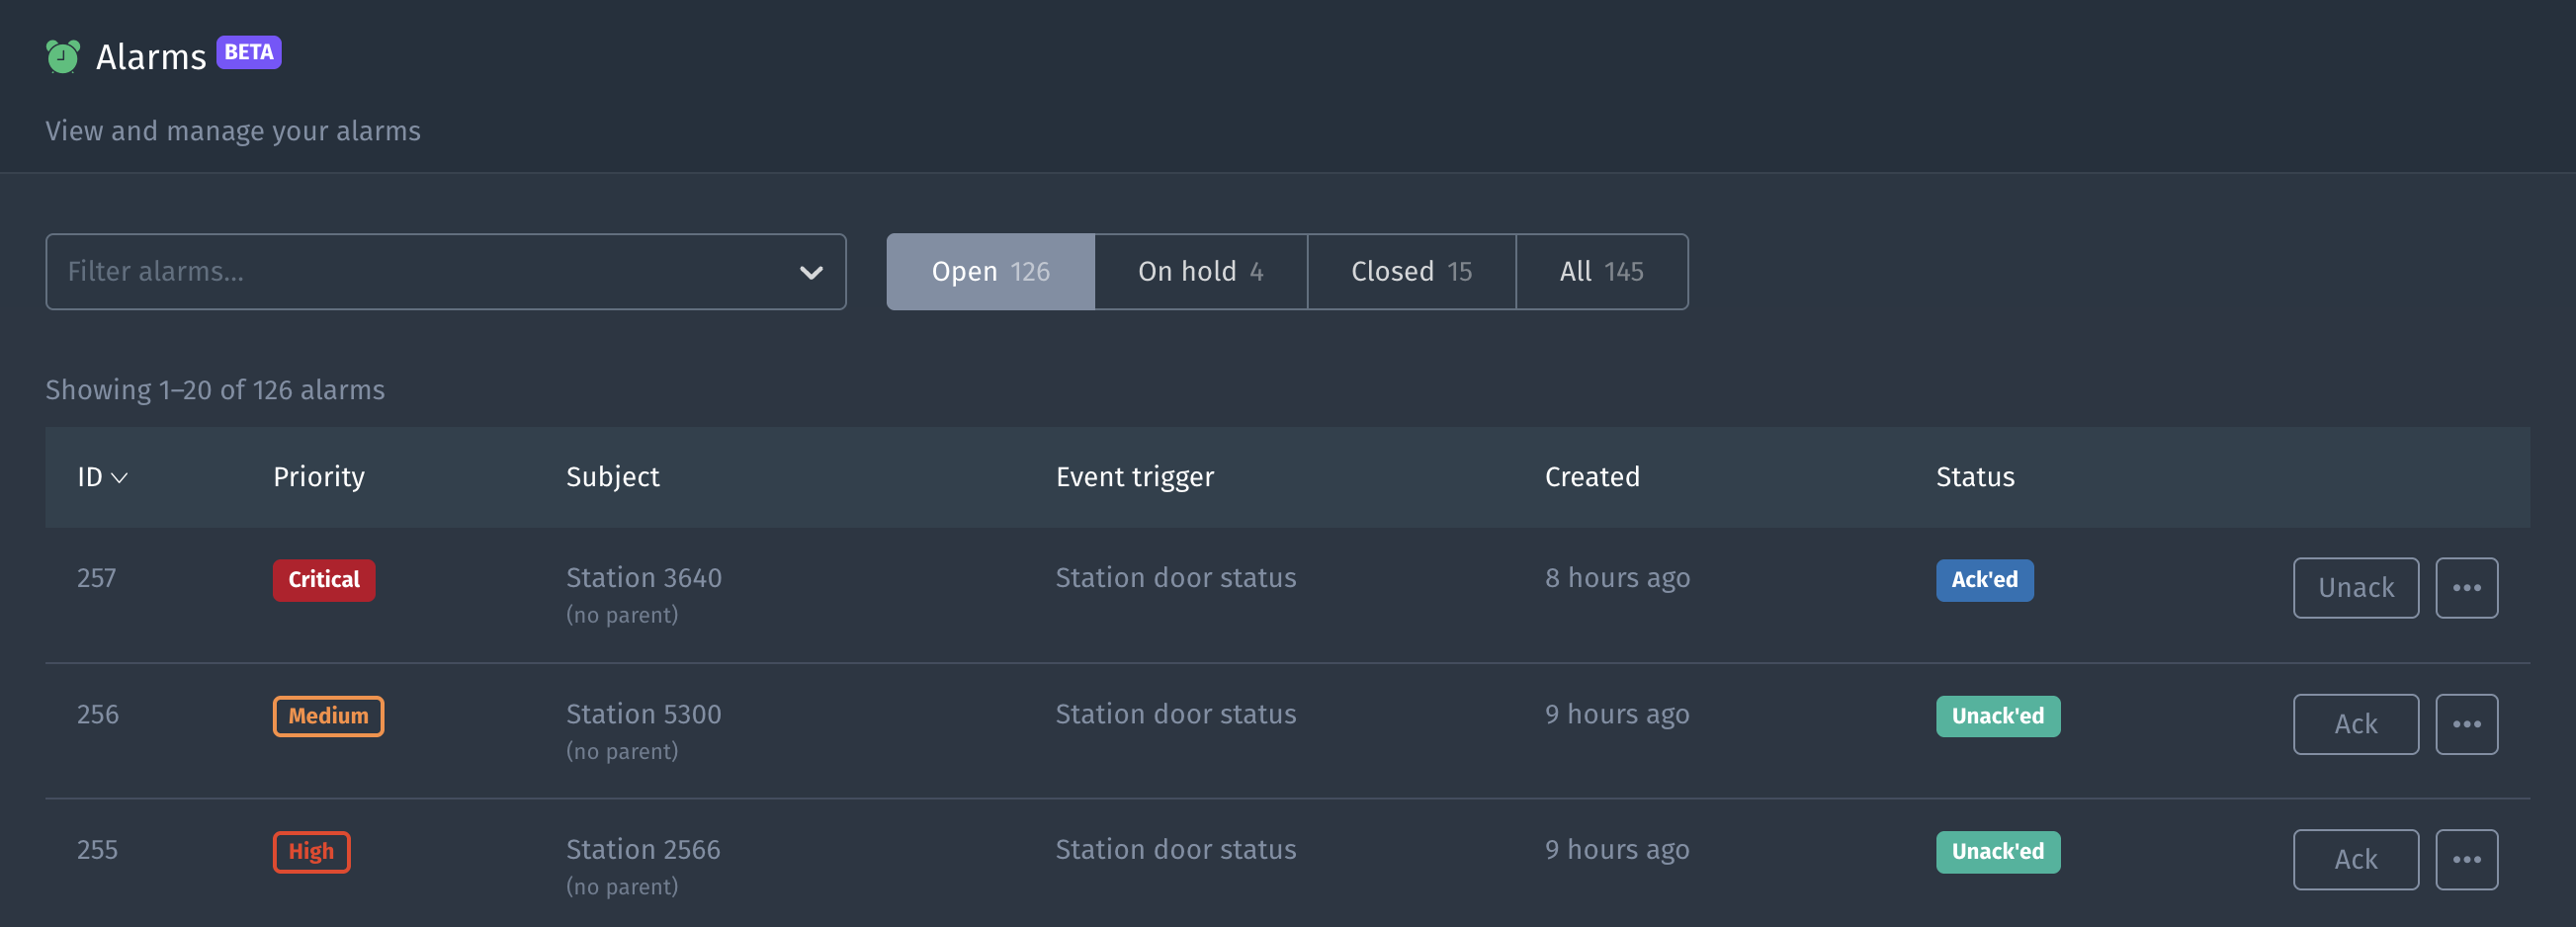
Alarms are shown in an overview page. From there, you can zoom into individual alarms and manipulate them.
Alarm overview
The alarm overview shows all alarms with some of their details. Alarms can be filtered based on subjects and event triggers.
The status of an alarm describes what stage of its workflow it is in:
| Status | Description |
|---|---|
 | Short for unacknowledged. The alarm is new and has not been acknowledged by anyone. On hold alarms can be automatically unacked to bring to attention again, indicated with an arrow in the label |
 | Short for acknowledged. Someone has acknowledged the alarm and is working on resolving it. There is a convenience option to automatically close an alarm once it becomes inactive, indicated by the label turning grey  .
. |
 | The alarm has been picked up, but its handling is held up by some external condition. There is a convenience option to automatically unack after a specified period to bring these alarms to attention again. This is indicated by a clock icon added to the label  or
or |
 | The handling of the alarm is complete. An alarm that is closed cannot go back to another status anymore. |
Until an alarm is closed, new events for the same subject/trigger combination will not cause alarms to be created. Those events will simply belong to the existing alarm.
An alarm can only be closed if the latest event is suppressed or no longer a problem or a warning. You can tell that this is the case when the priority is shown as an outline, rather than a filled badge. Once the alarm is closed, new problem/warning events will cause a new alarm to be created. Alarms can be set to automatically close if they do not meet the requirements to be closed right away. The status will be displayed in grey and our system will automatically close the alarm as soon as possible.
Next to putting alarms on hold indefinitely, they can be put on hold for a limited time as well, which is indicated by a clock icon on the status badge. When the deadline is met, the alarm will automatically move to the unacked state with an arrow icon to mark that it was previously on hold. This functionality is particularly useful in combination with the automatic closing feature described above, in cases where you expect the problem to get resolved within a certain timeframe. If it does the alarm will get closed by our system, or it simply pops up in your inbox again if the deadline is reached instead.
Based on their status, alarms are grouped into four different buckets:
| Bucket | Description |
|---|---|
| Open | Shows alarms that are unacknowledged or acknowledged |
| On hold | Shows alarms that are on hold |
| Closed | Shows alarms that are closed |
| All | Shows all alarms regardless of their status |
For convenience, all actions including status transitions can be initiated by using the button or context menu in the overview itself.
Alarm details
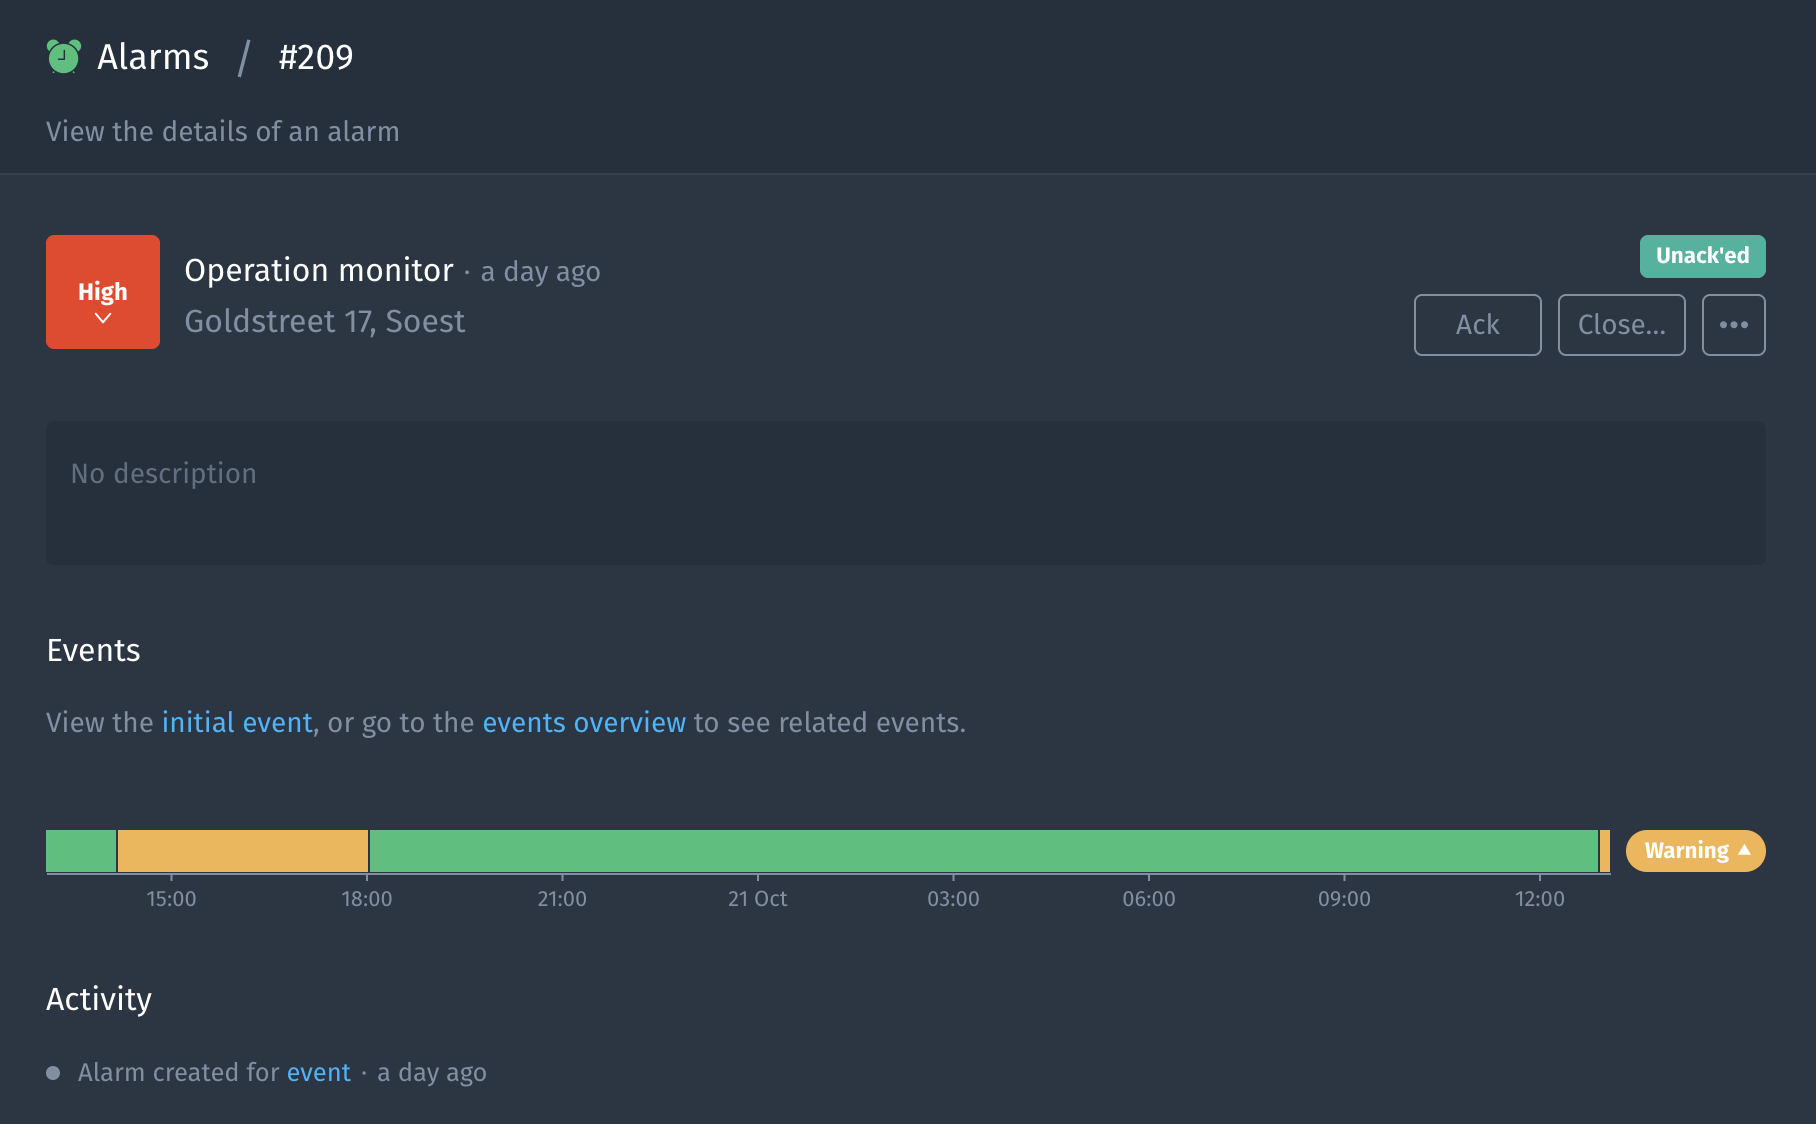
From the overview page, you can navigate to the details page by clicking on one of the alarms.
Alarms have the following attributes:
| Attribute | Description |
|---|---|
| ID | A number that makes it easy to refer to the alarm. |
| Created date | The time that the alarm was created. |
| Subject | The subject that the alarm applies to. |
| Trigger | The event trigger that caused the alarm to be created. |
| Priority | The priority of the alarm: Critical, High, Medium, Low or no priority. |
| Status | The stage of the workflow that the alarm is in. |
| Description | A user editable description of the alarm. |
The initial priority is determined by the event trigger definition, but it can be changed later on using the priority dropdown. The status can be changed by using one of the buttons or from the context menu. A shortcut is available to create a suppression for the alarm from this same menu.
The events section shows a summary of the events that occurred during the lifetime of the alarm. You can navigate to the initial event, or the events overview to see all the individual events.
At the bottom of the details page, you can find an activity log. Here you see all the changes (change status, update description, etcetera) that were made to the alarm including the person who made the change.
Suppressing alarms
If you do not want alarms to be created for a certain period or for specific subjects and/or event triggers, you can create a suppression. A suppression stops all follow-up actions of an event, including alarm creation. See suppressing events for more information.

